投稿者: admin

  • “Two Towers in One Day” Challenge – Useful Info and Experience Sharing (1)

    “Two Towers in One Day” Challenge – Useful Info and Experience Sharing (1)

    このブログ記事の翻訳を進行中です。もうすぐ完成しますので、後ほど再度ご確認ください。ご不便をおかけして申し訳ありません。現在は、こちらで提供されているGPXルートや地図などの情報を自由にご利用ください。

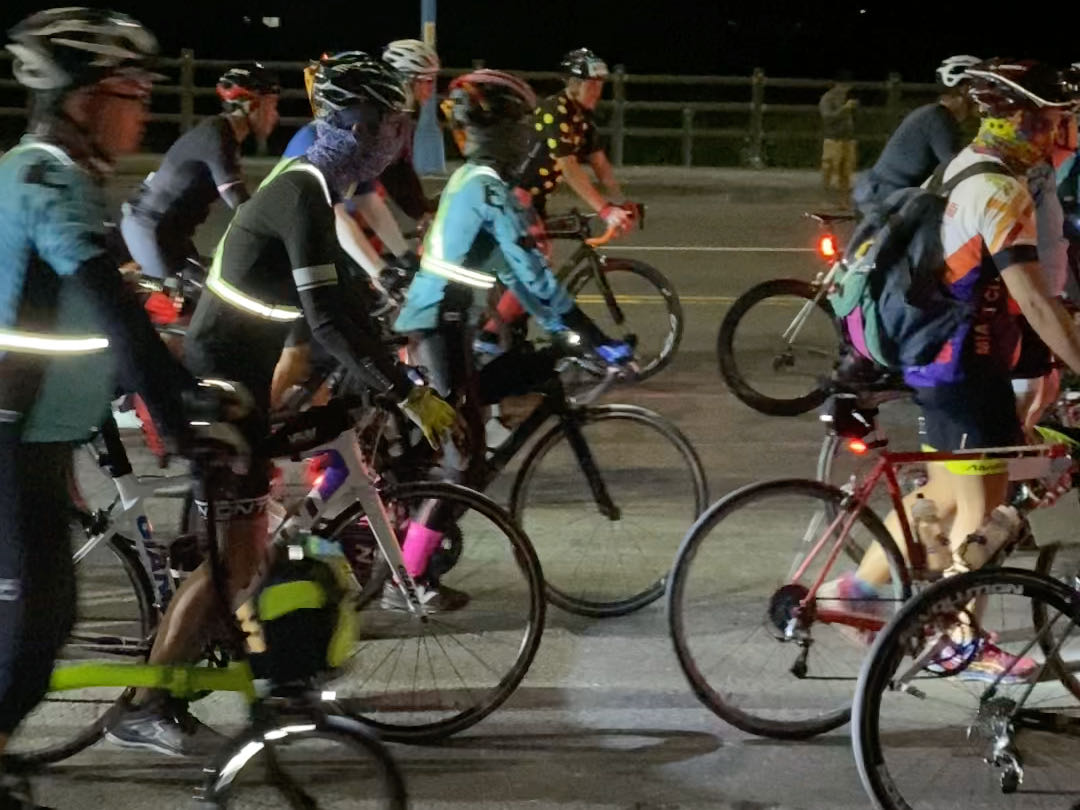
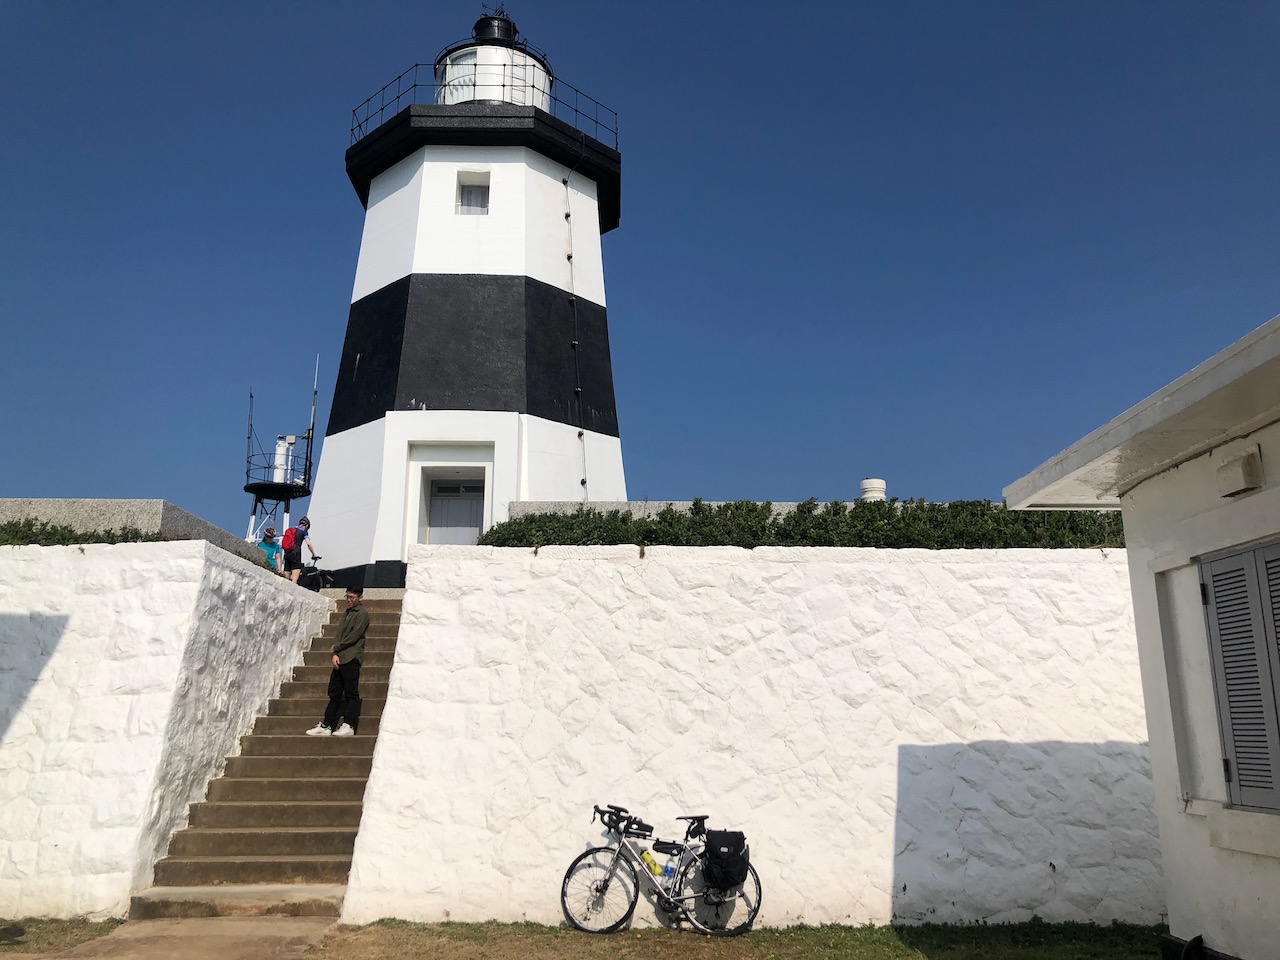
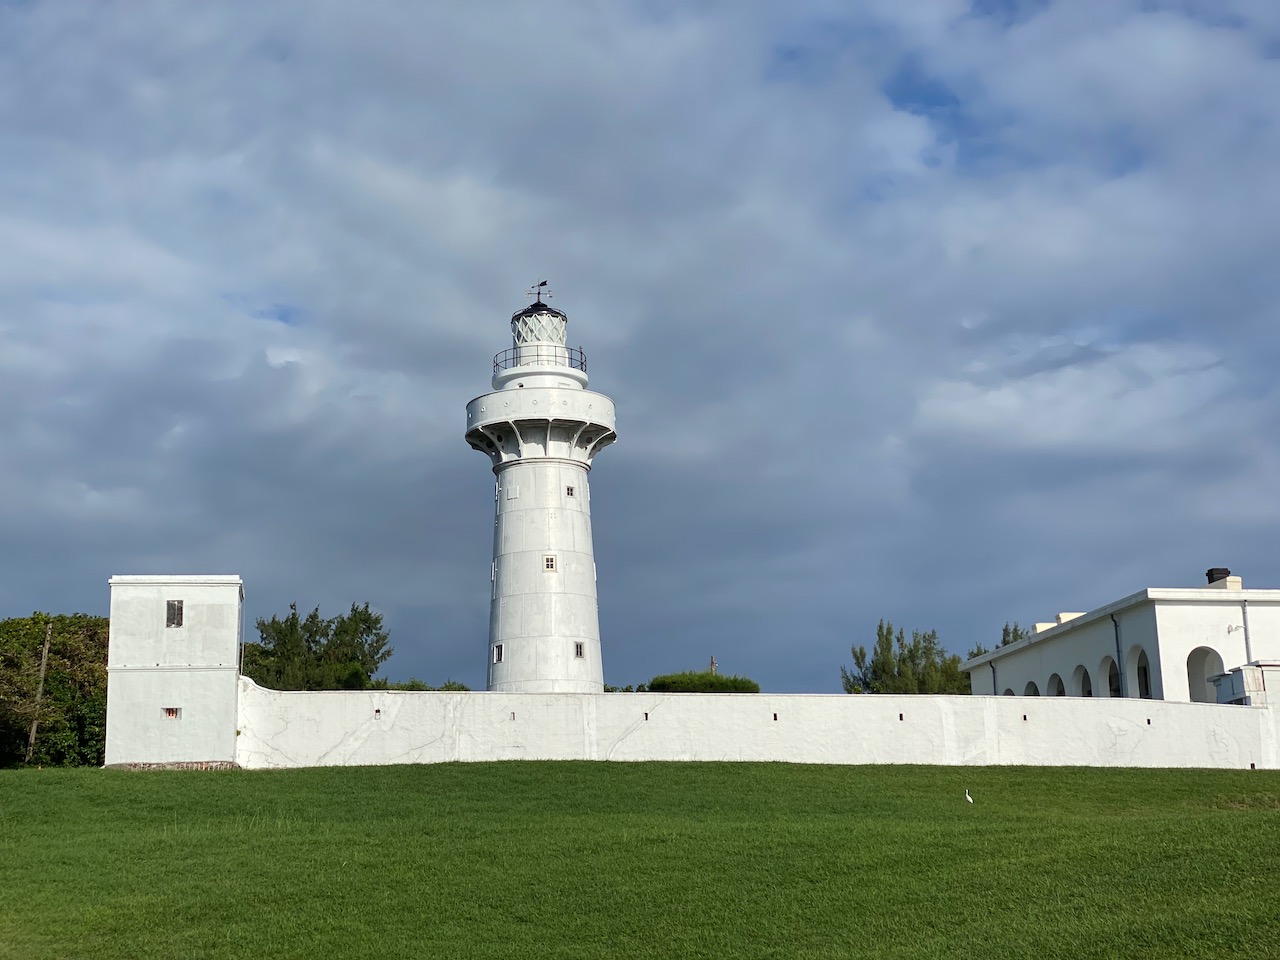
    The “Two Towers in One Day” Challenge 一日雙塔 is another popular cycling event in Taiwan held early November each year. In this event, participants need to start cycling from the northern tip of the island of Taiwan to its southern tip to cover a total of 520km within 28 hours. Two lighthouses, Fuguijiao Lighthouse and Eluanbi Lighthouse, mark the starting point and finishing point respectively, hence the name “Two Towers in One Day”.

    Those who would like to try a less challenging one can instead sign up for the “Taipei to Kaohsiung in One Day” Challenge 一日北高, which will be held on the same day and cover 360km in 20 hours.

    After completing the “Taipei to Kaohsiung in One Day” Challenge in 2020, I decided to take up the “Two Towers in One Day” Challenge in 2021. Unfortunately I could not make it to the finish line this time. In this post is some experience I would like to share. Please refer to this post for more information about Support, Rules and Administration.

    My Plan and Strategy

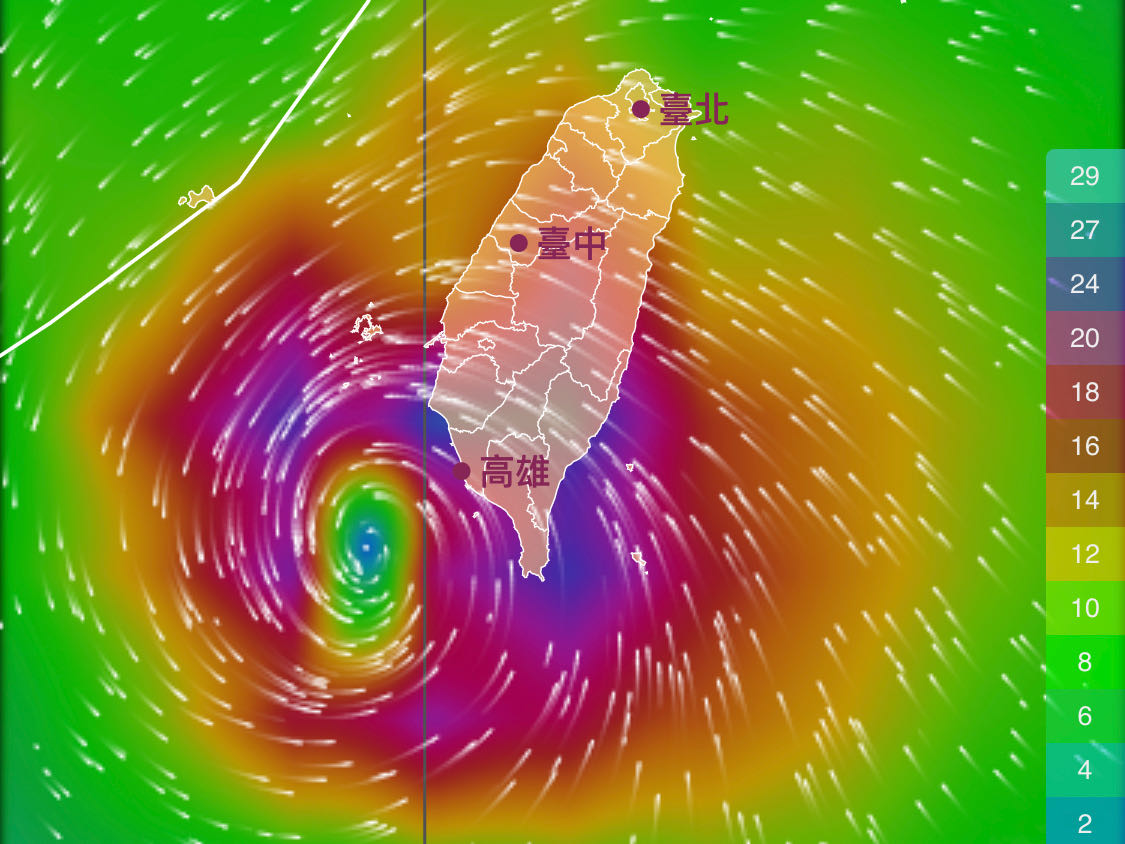
    28 hours is a very long stretch of time and I doubt I would be able to stay awake and keep cycling. So I had aimed to finish it in 24 hours. I believed I would be able to stay sharp and focused for that long if I had enough sleep beforehand. With this target in mind, I would need to achieve an overall average speed of 21.66km/h. To allow 4 hours for breaks, my average moving speed would need to be around 26km/h. This looked reasonable, given that there should be prevailing wind coming from the north east in the winter that would give us a push.

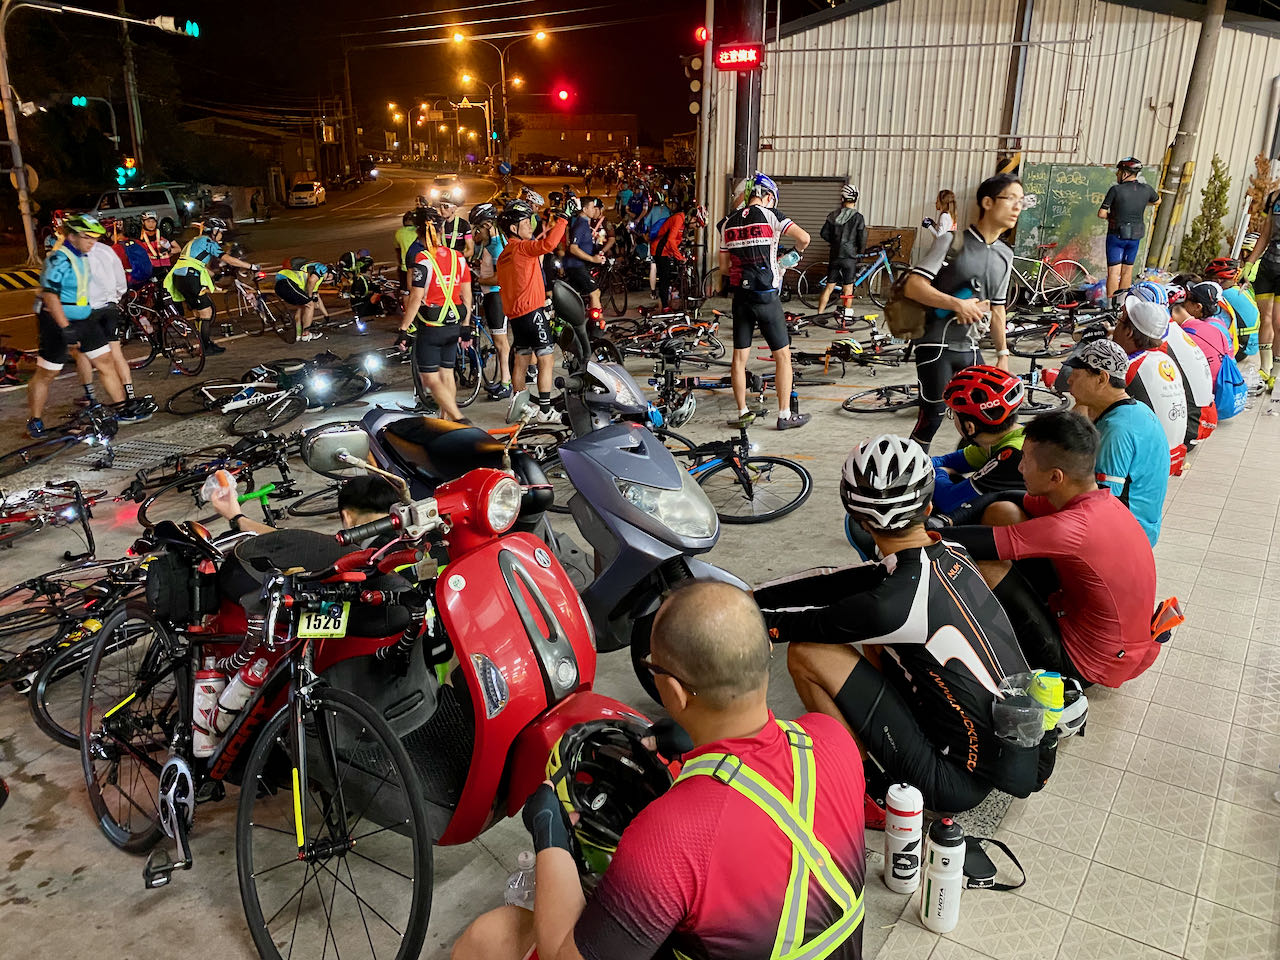
    I used to mistake the impact of lack of fuel as tiredness when my legs went soft after cycling for around 2 hours. Then I learned from my experience last year during the “Taipei to Kaohsiung” Challenge that our legs never get tired and all I need is fuel. As long as we keep fueling our muscles by taking in carbohydrates, our legs will keep pedalling. Along the route of the “Two Towers” Challenge, there are numerous convenience stores where we can find all kinds of carbohydrates, including my favourite energy gels. Their locations are marked on the GoogleMaps in the next section of this post. Since supplies are very easy to get, I decided not to join any teams nor hire any supporting vehicles.

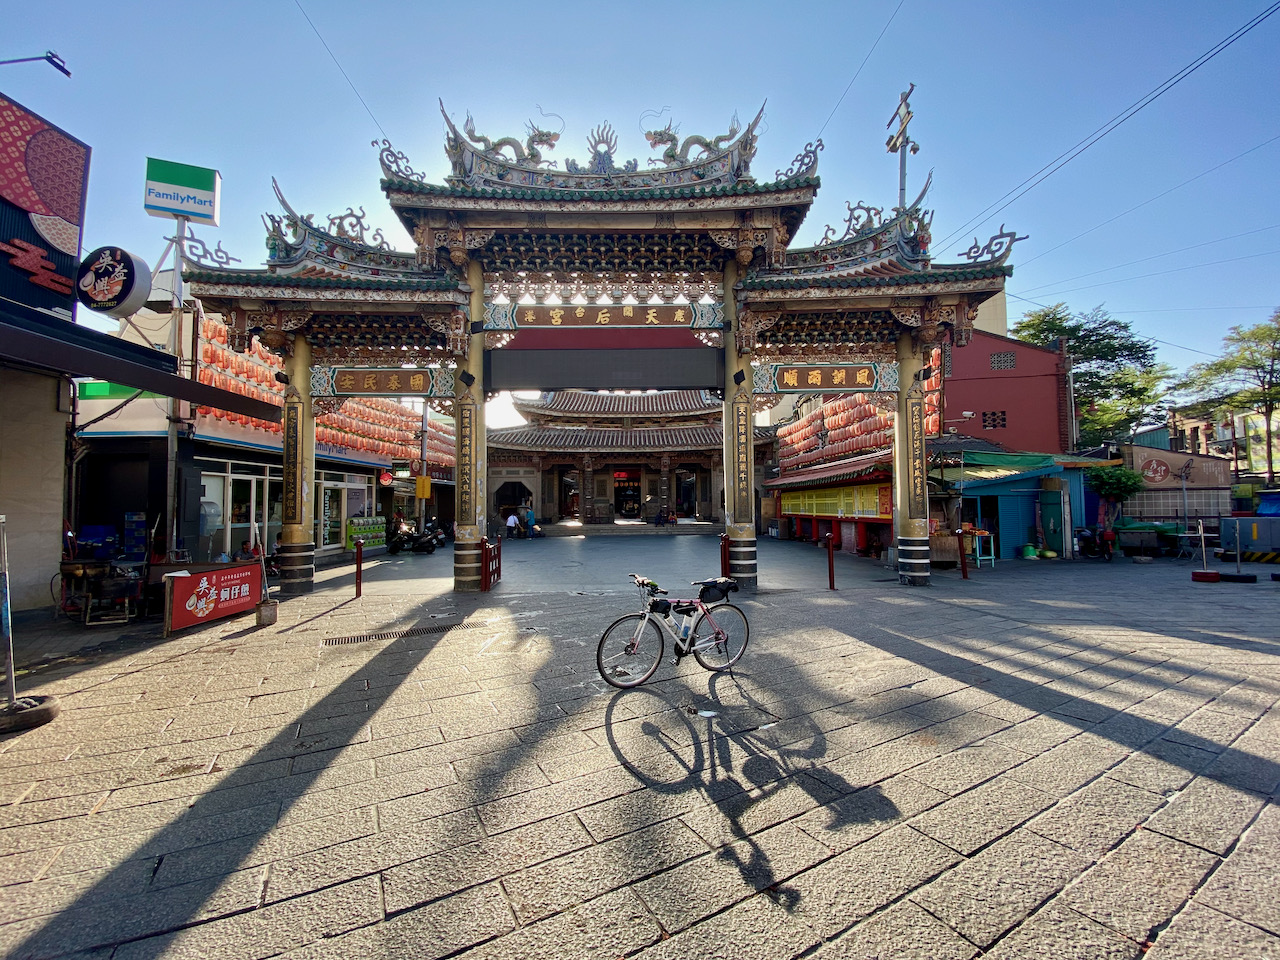
    The Challenge starts at 00:00 Saturday (midnight). I took a day-off on Friday, booked a hotel around 2km away from the starting point with the hope to get as much sleep as possible right before the event. Participants could drop their night pack with the organizer at the starting point and it would be sent to the finishing line for collection when the participants arrive. The organizer could also help book a hotel room right next to the finish line if needed. This is what I had opted for. I could take a good rest when I finished. For the return trip, there are coaches bound for Kaohsiung HSR station. I could bag my bike, hop on one of the coaches and then take the HSR back to Taipei.

    Contingency Plan: In case I needed to retire early from the Challenge, there are numerous train stations along the route. Some train stations would take my bike and send it back to Taipei for me to collect later. I could then travel like an ordinary passenger (though with filthy cycling outfits). There are also some coach stops. The tricky part is between Kaohsiung and Kenting. The population is sparser further down south and there won’t be much public transportation available in between. 
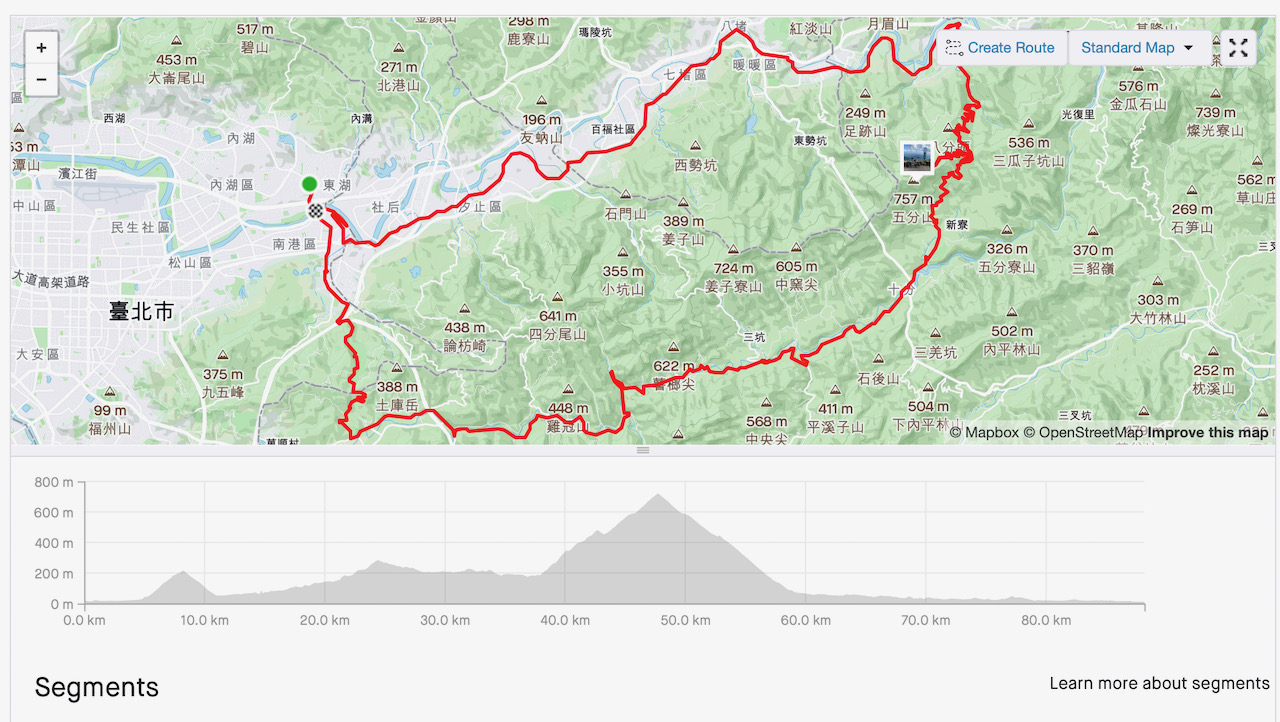
    The Route

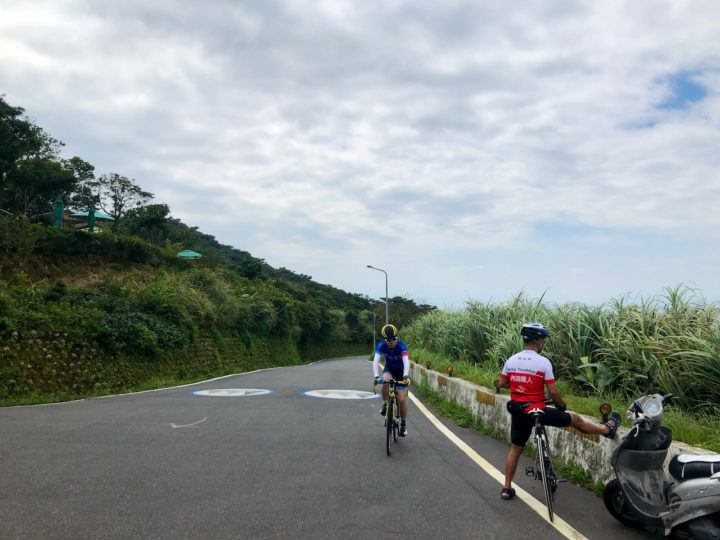
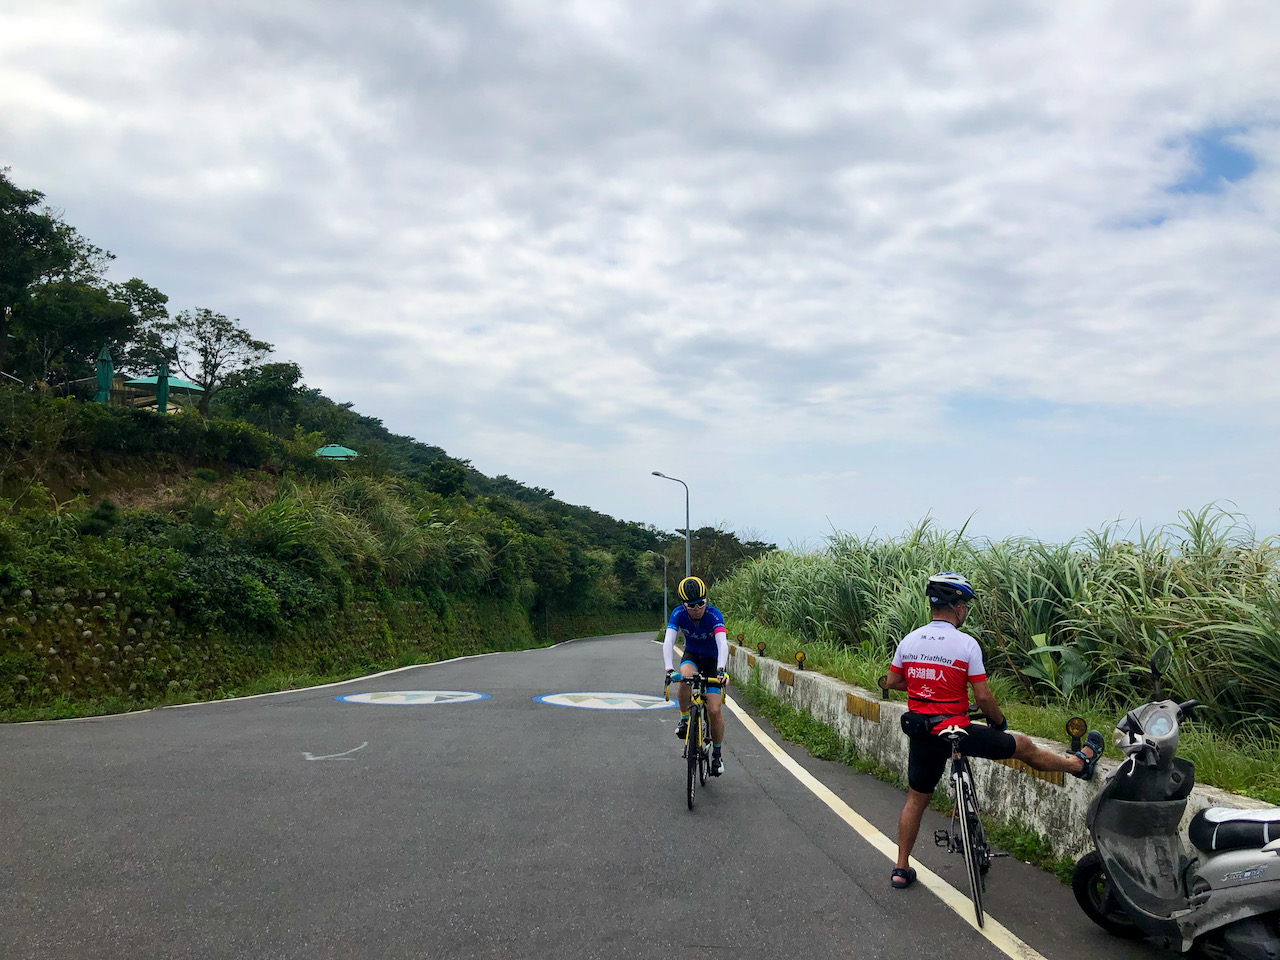
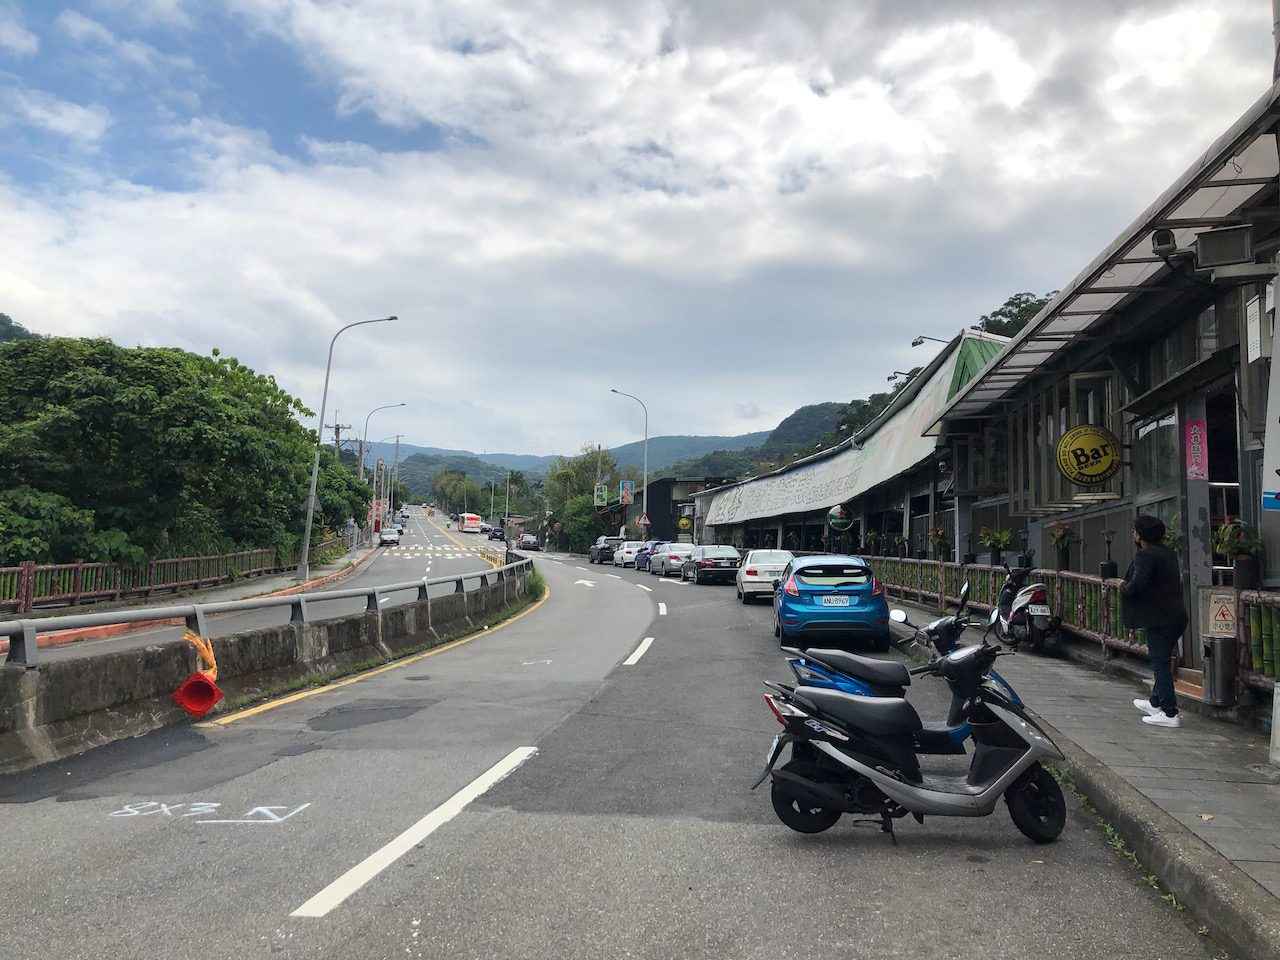
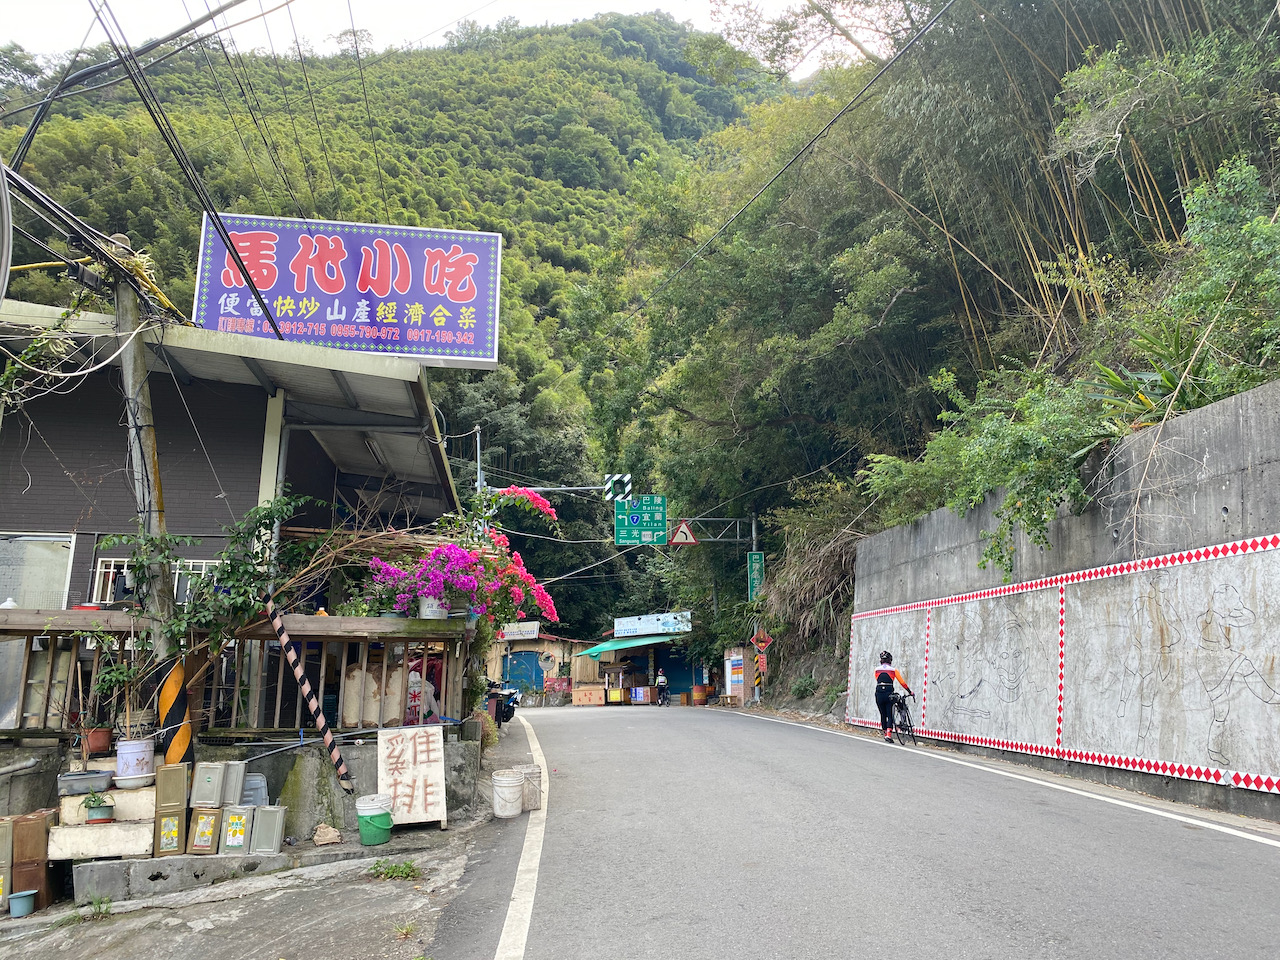
    The organizer suggests a route (shown in blue on Google Maps) but we are not obliged to use it. We just need to pass the four checkpoints and reach the destination within respective time limits. I had done some research and modified the route (shown in green on Google Maps) a little bit to avoid a climb (100 metres of elevation) at Houlong Township (後龍鎮) and the traffic lights in Budai Township (布袋鎮) and Kaohsiung. The segment in Taichung also has quite a few long traffic lights but I have yet to see any tips on how to bypass it.

    The checkpoints and those convenience stores close to the route are marked on this map for your easy reference.

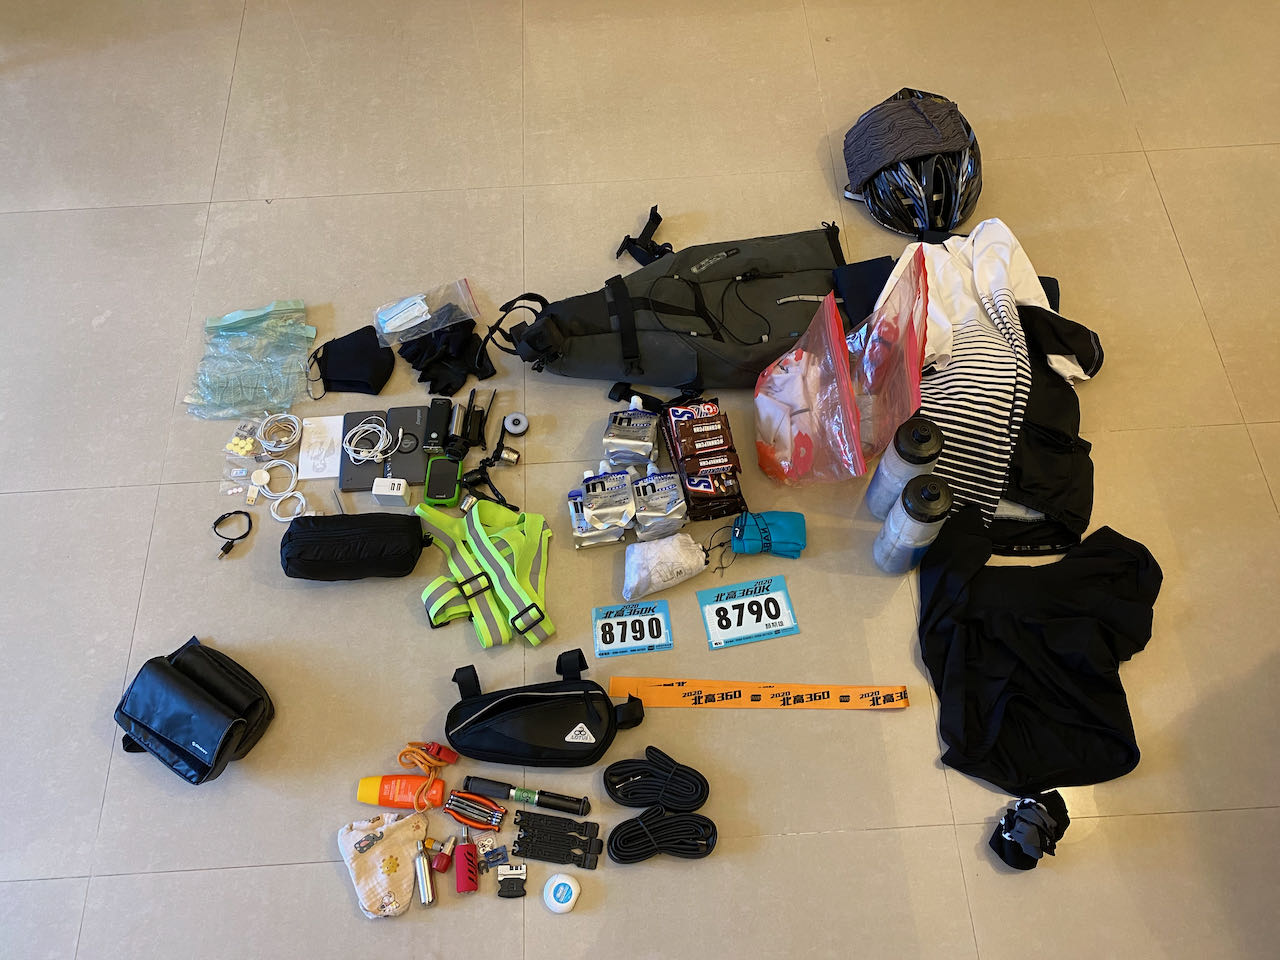
    Equipments and Accessories
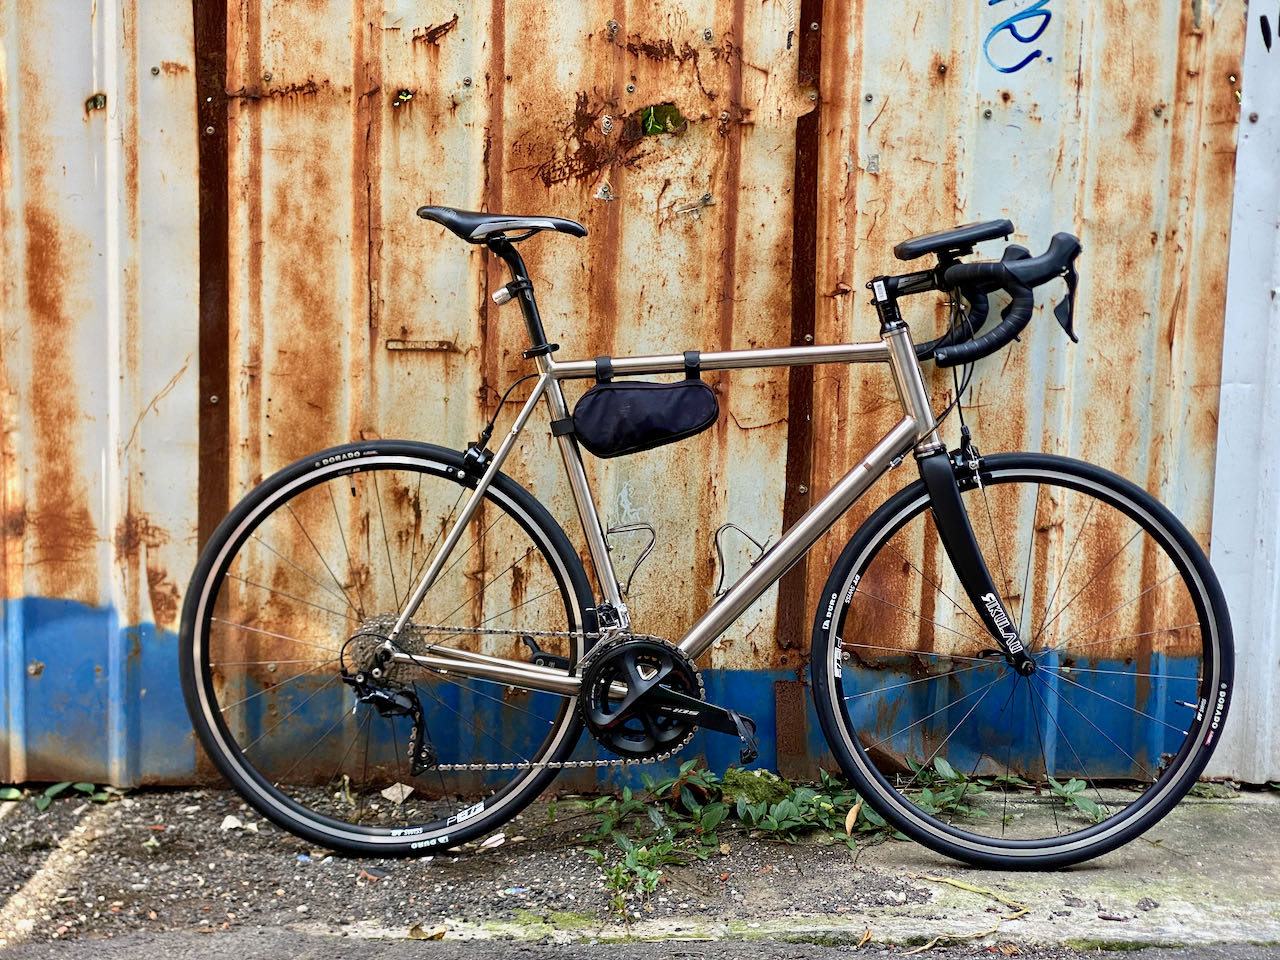
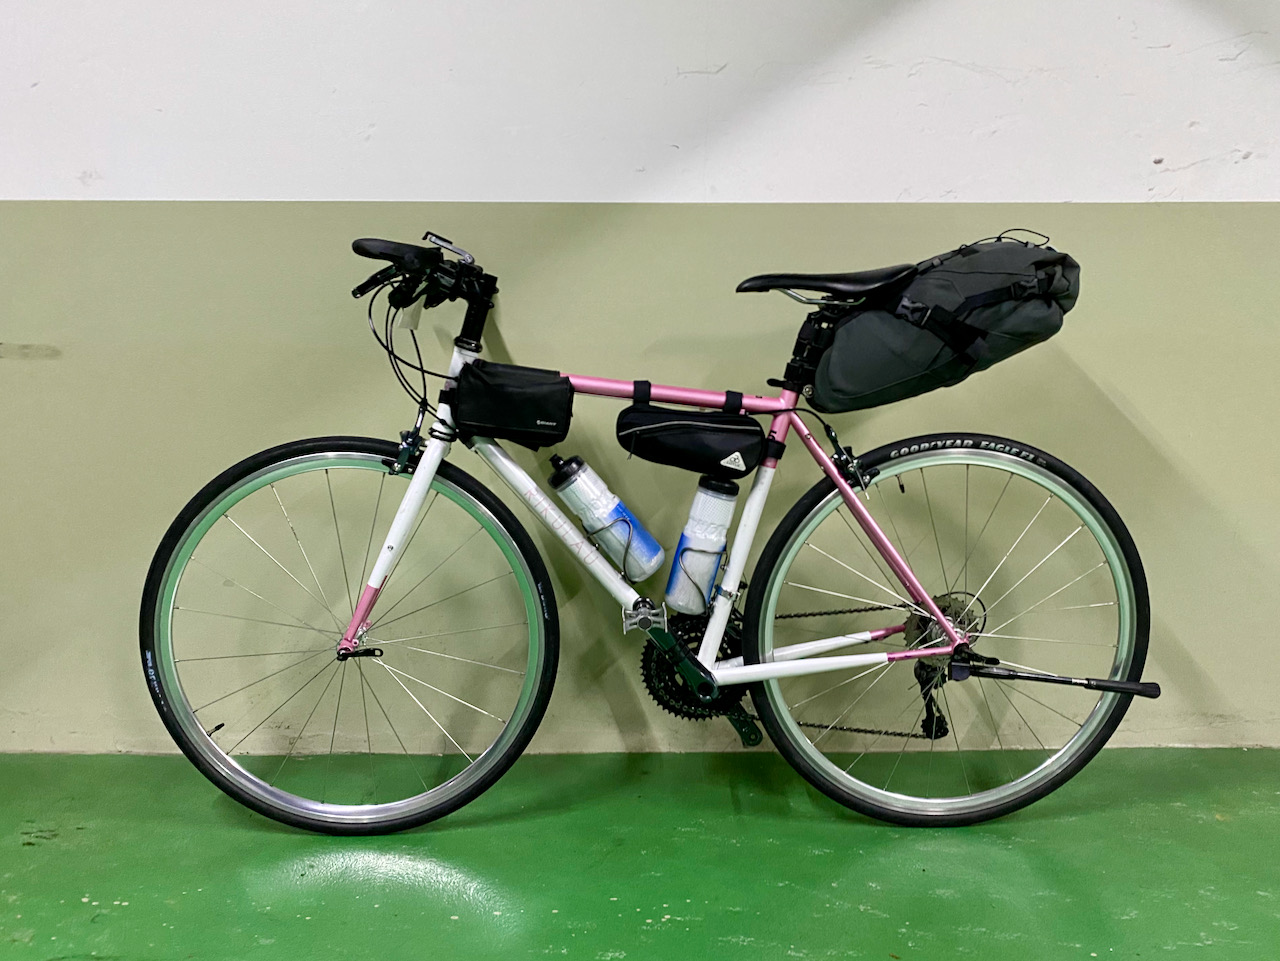
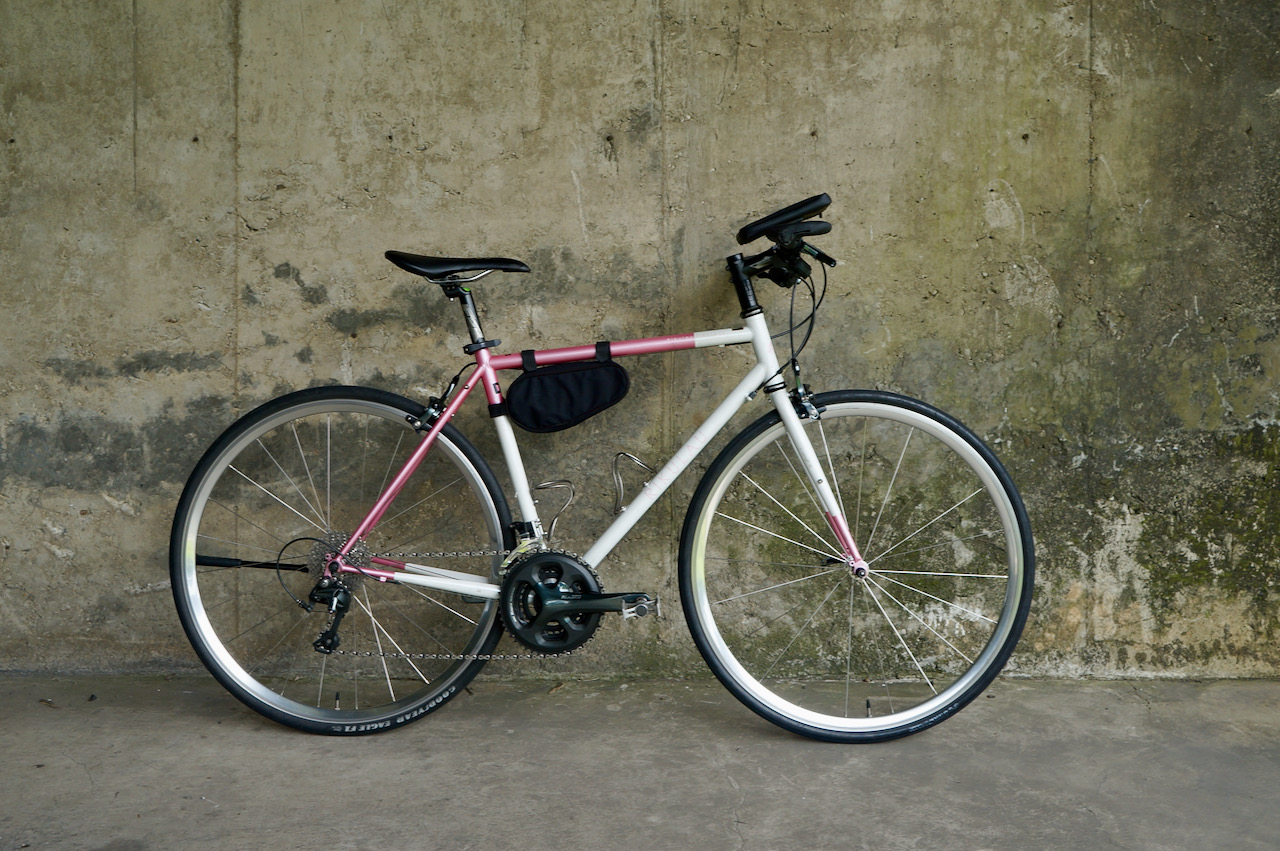
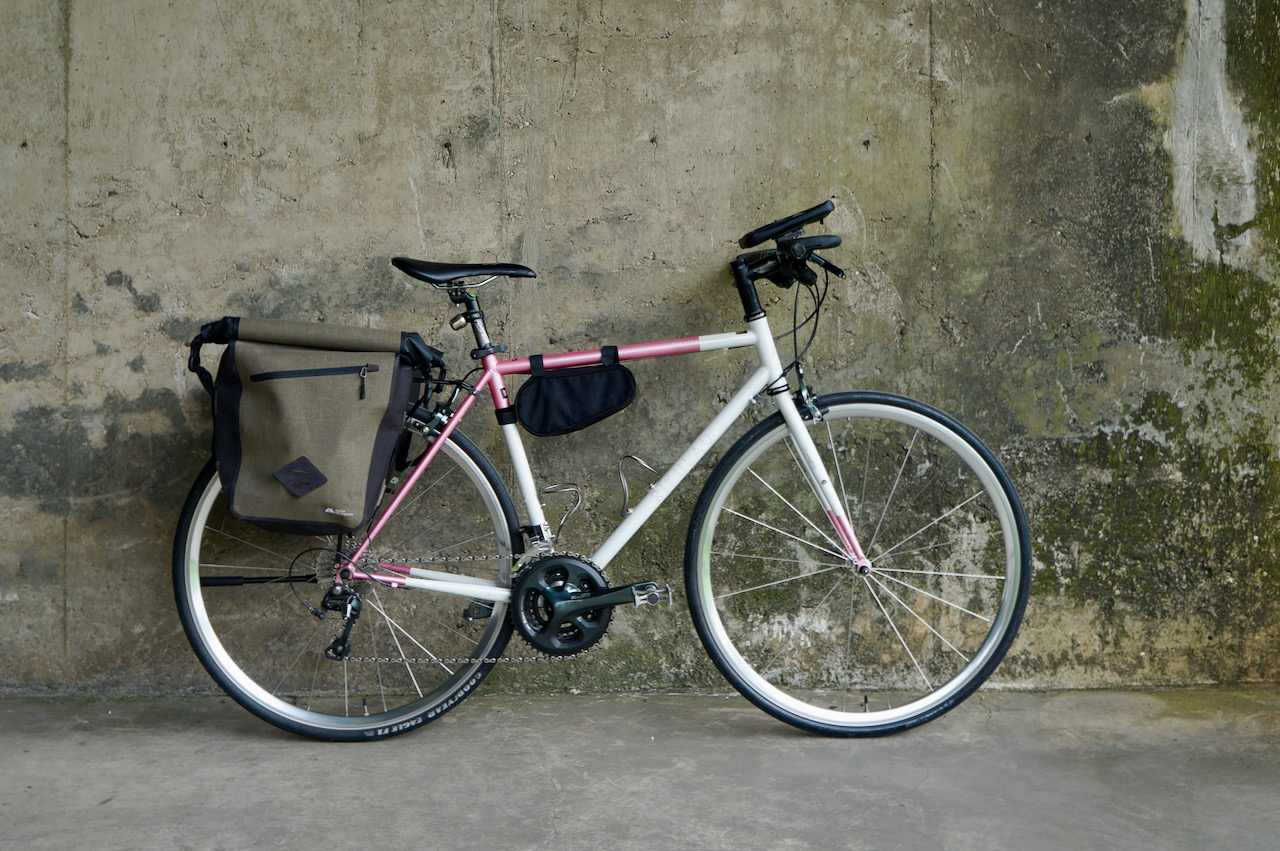
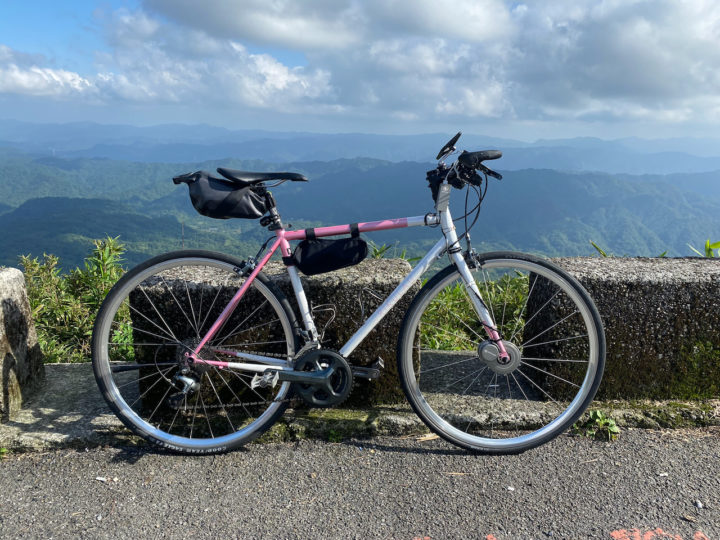
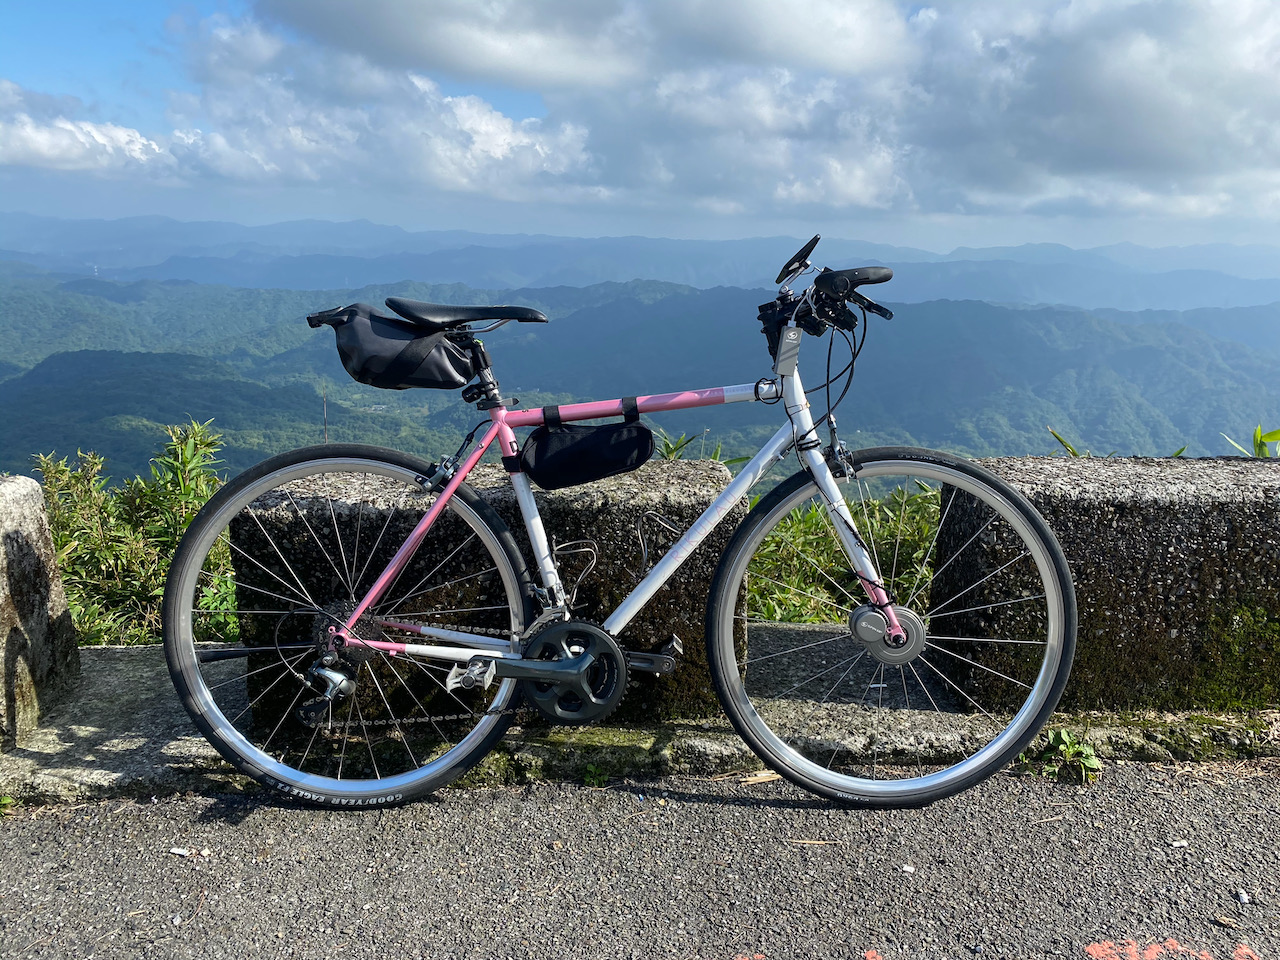
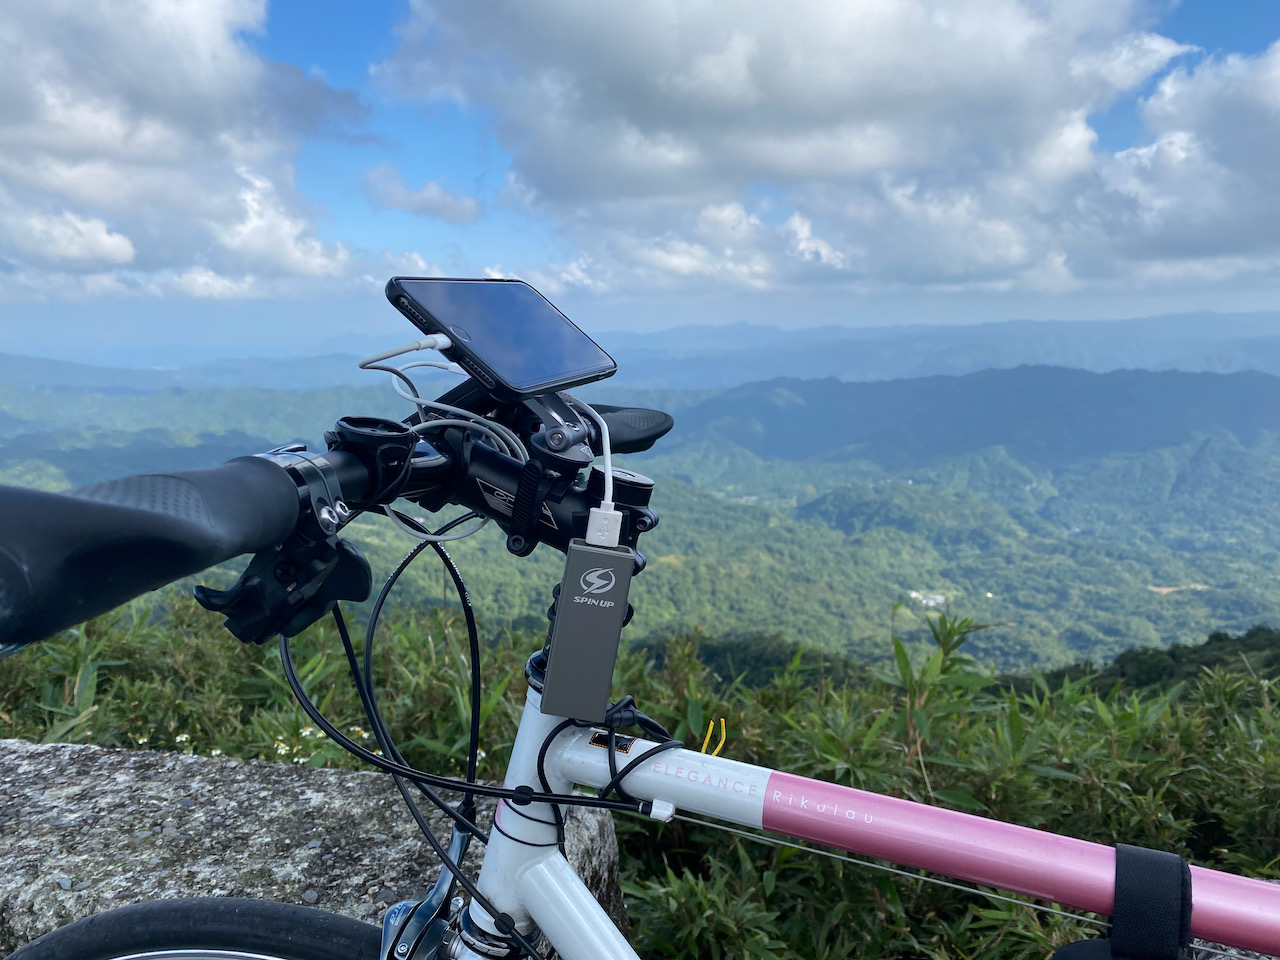
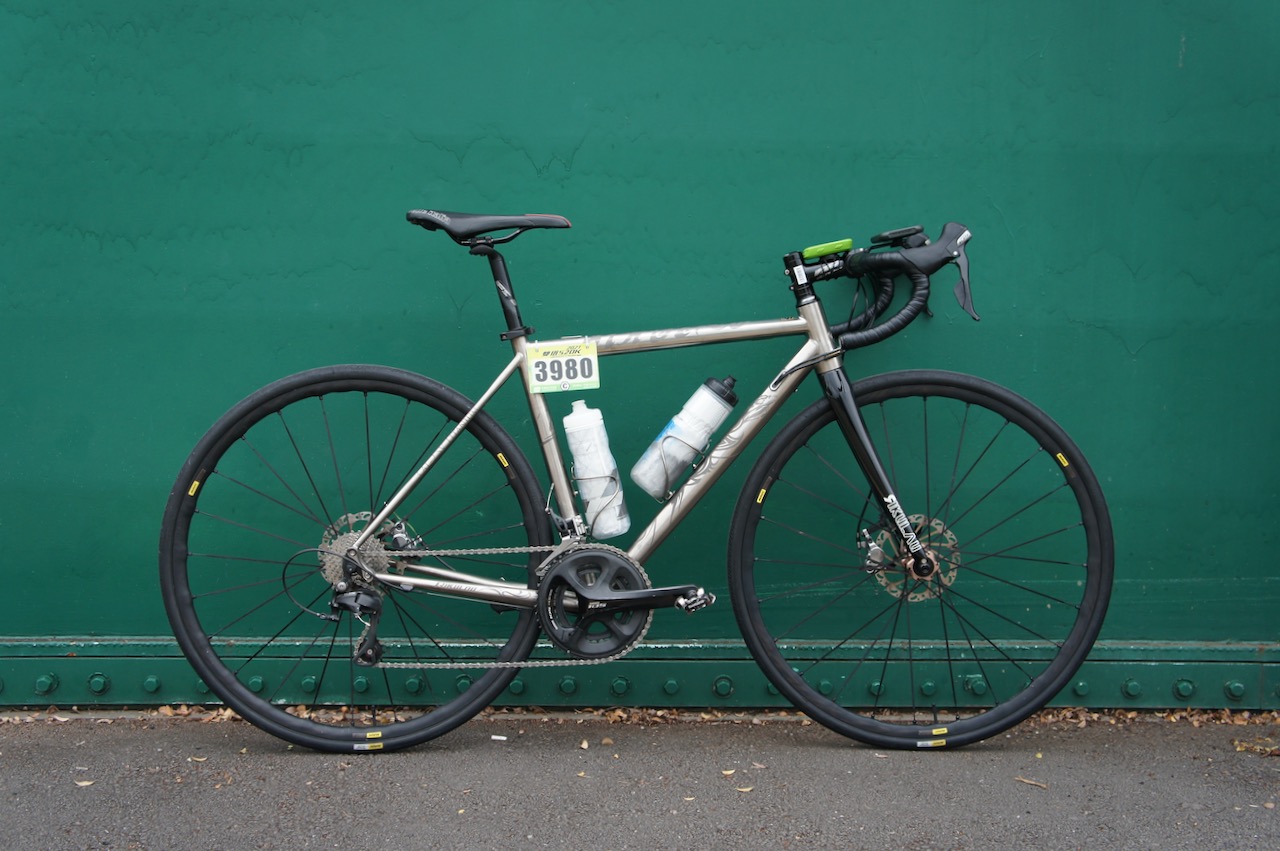
    Bike

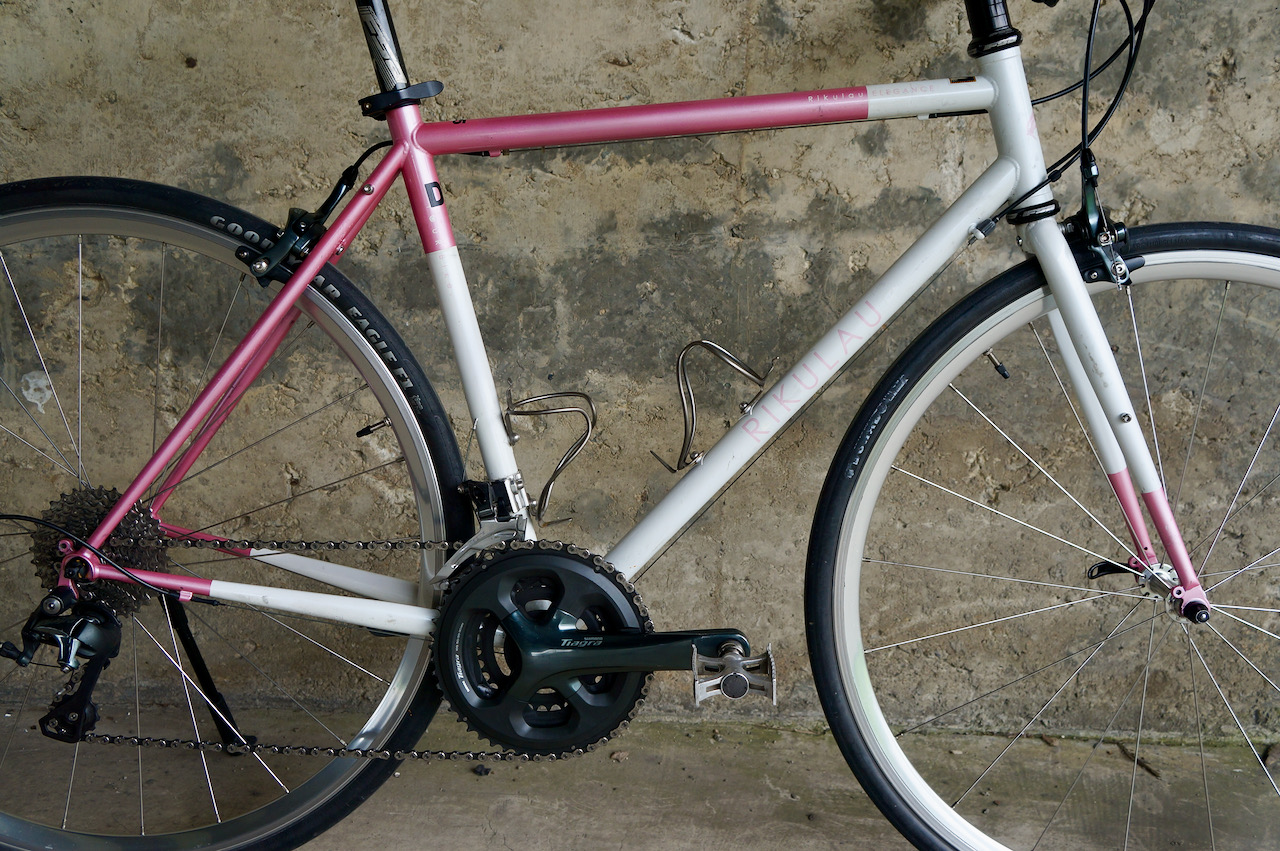
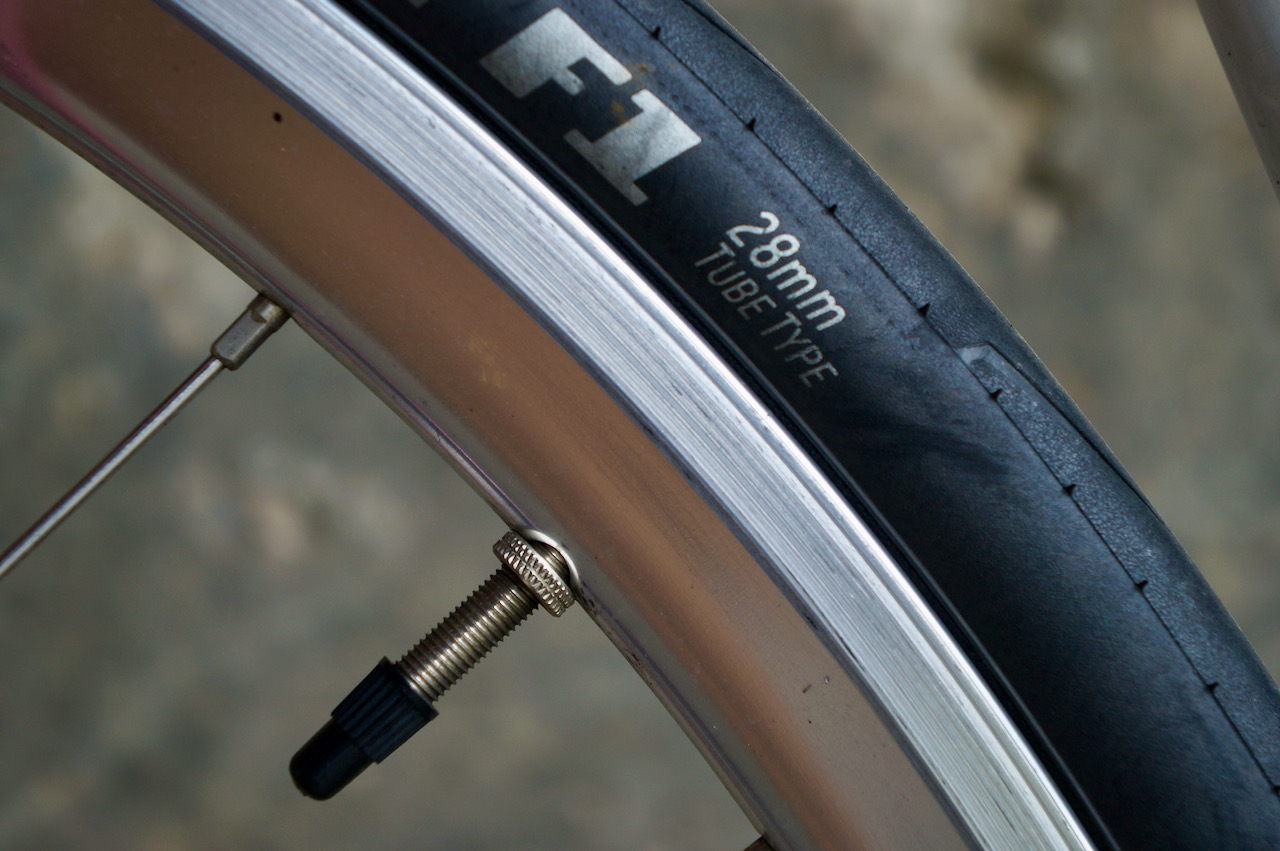
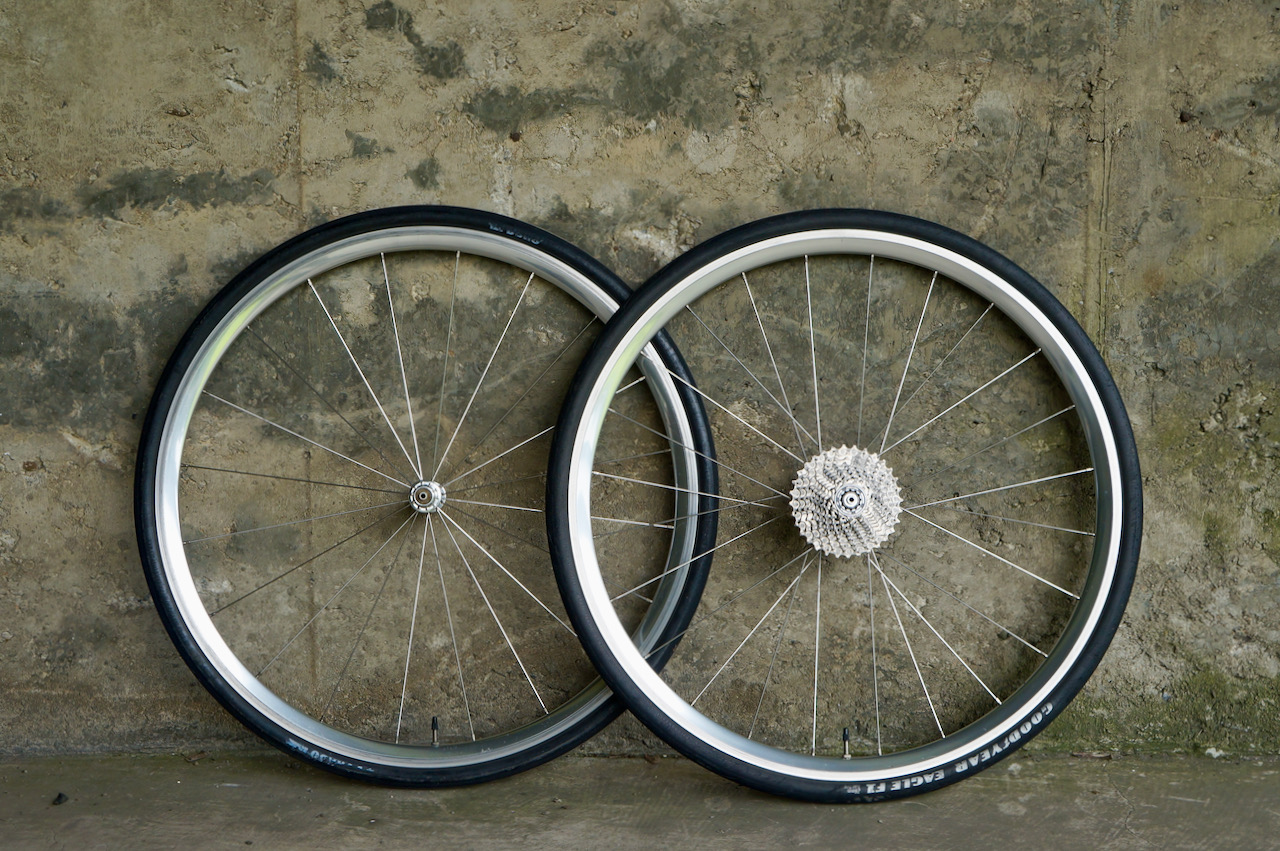
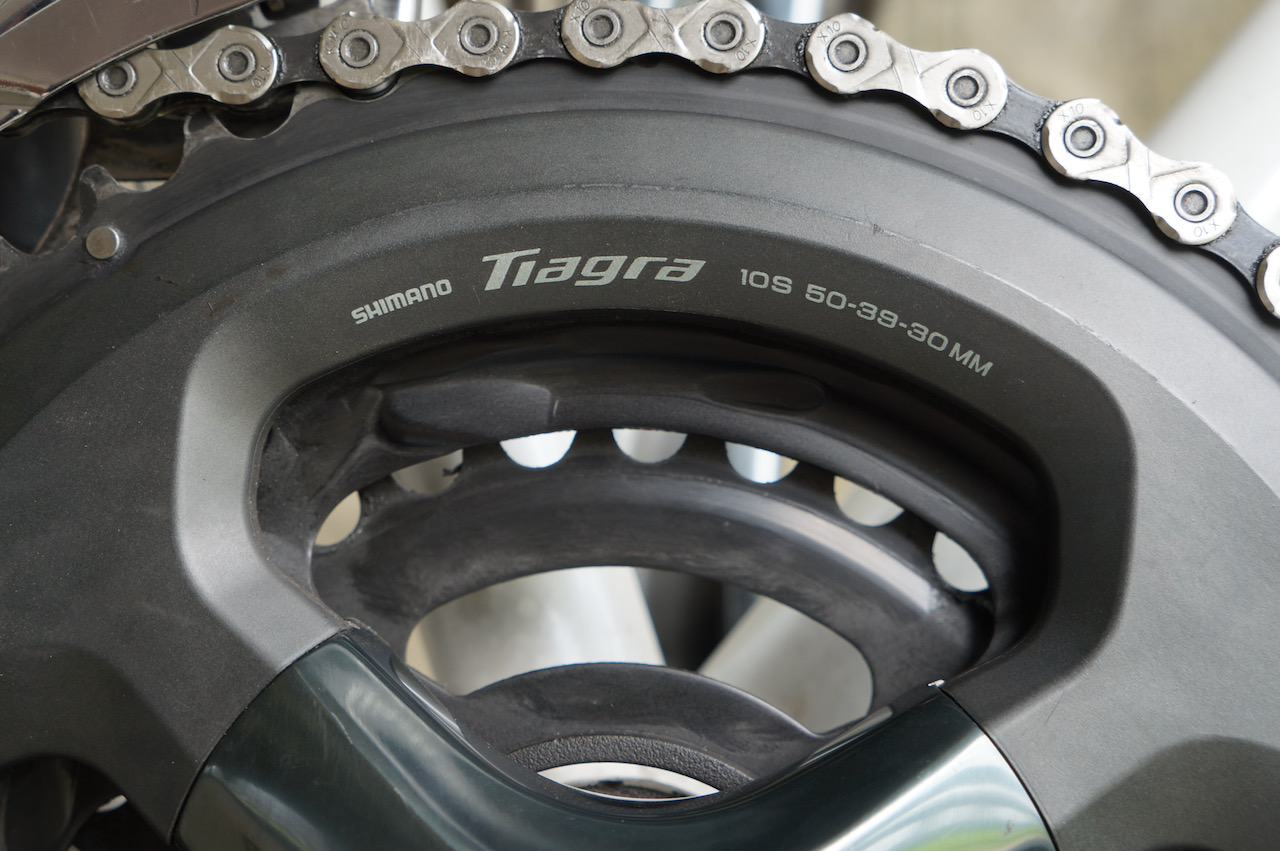
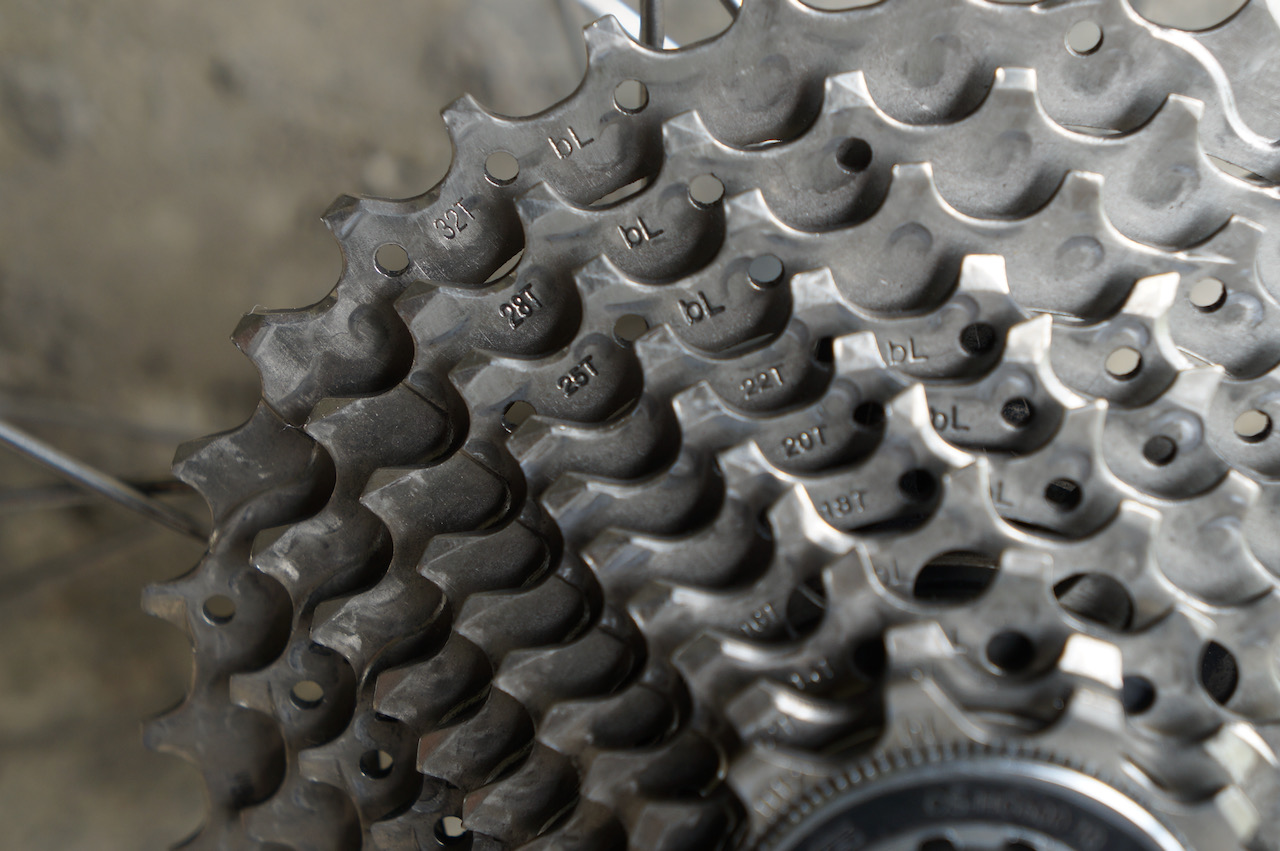
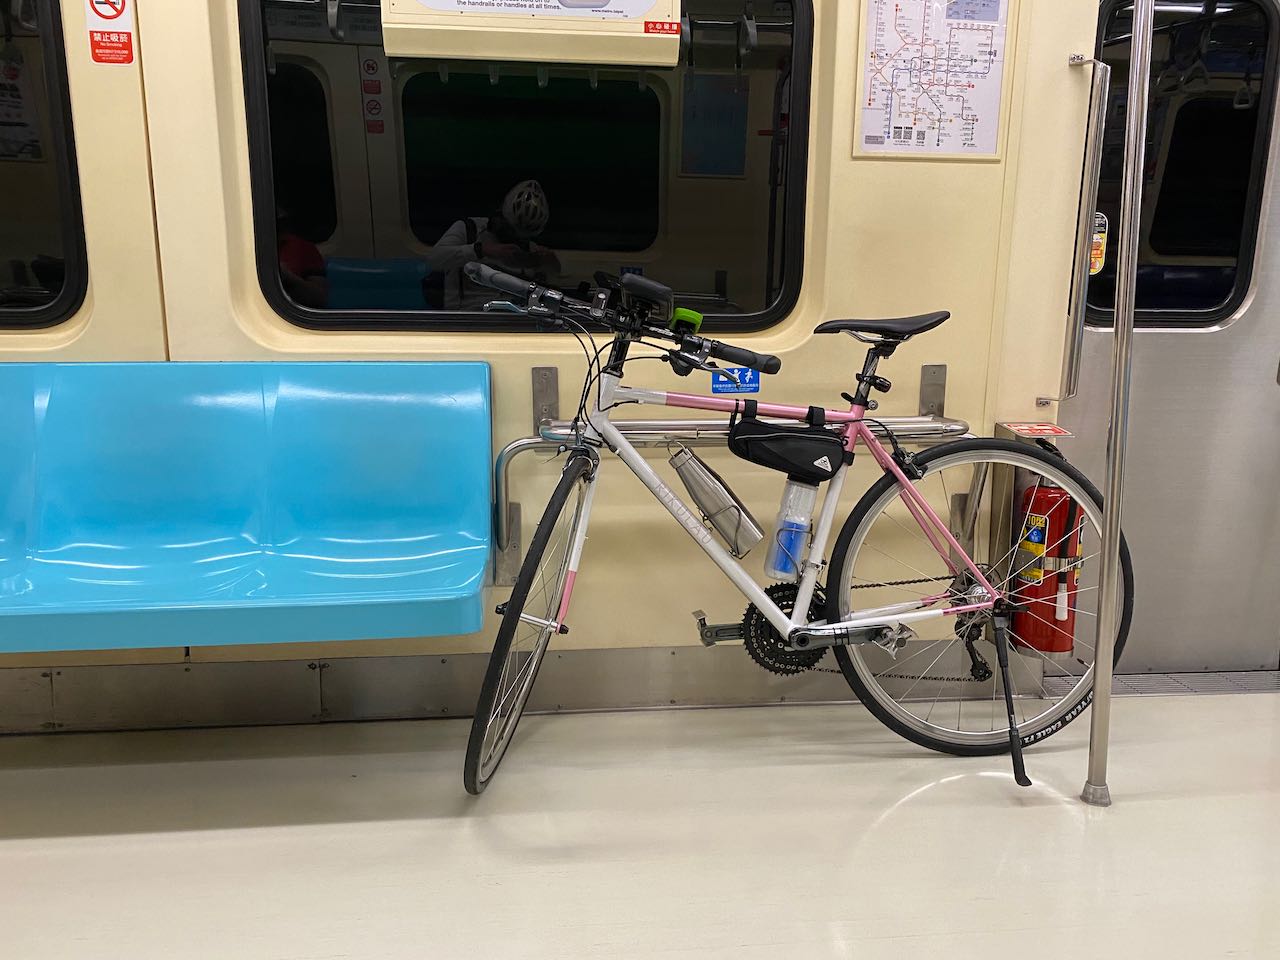
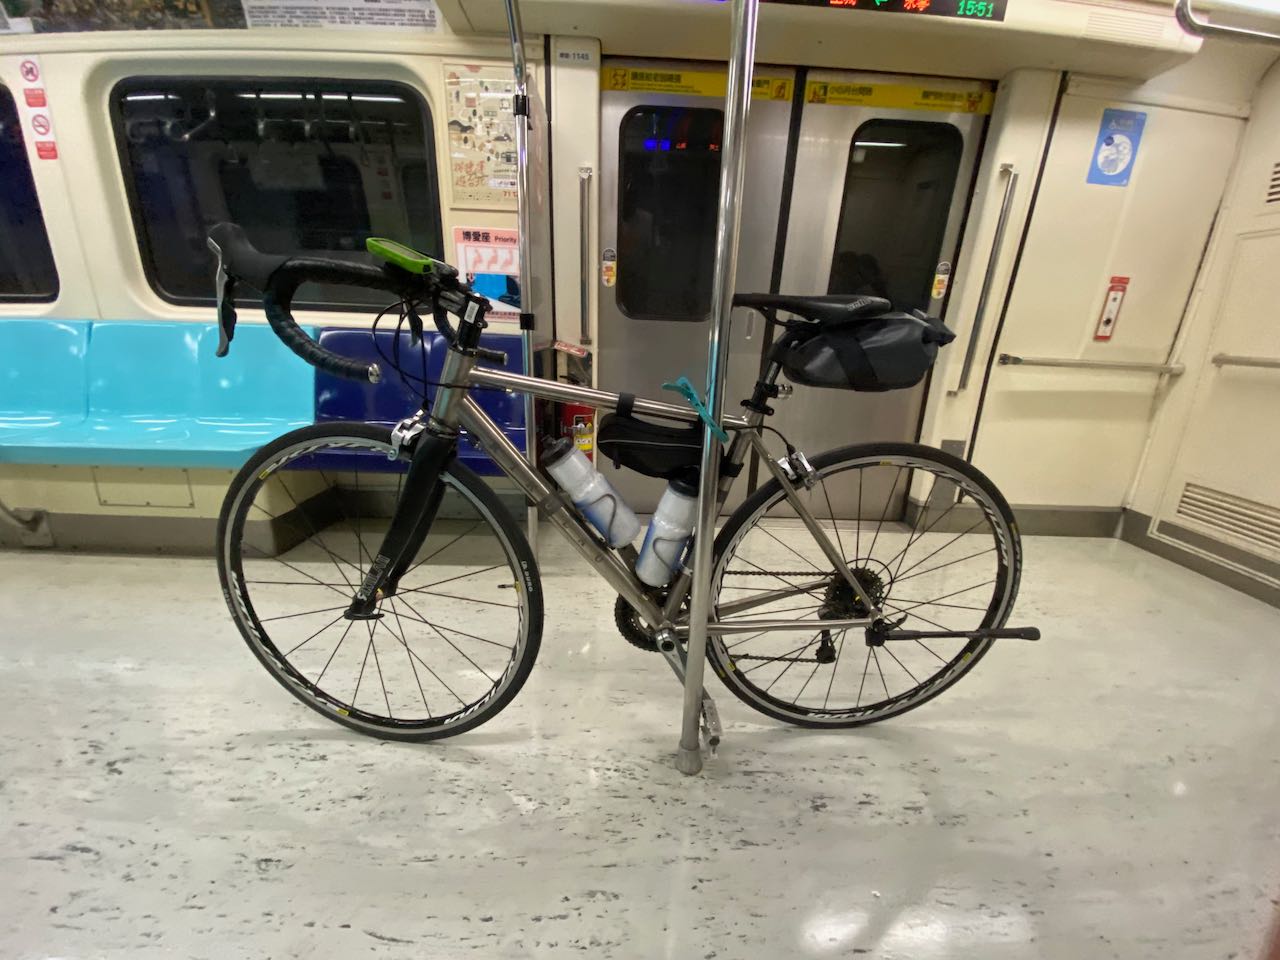
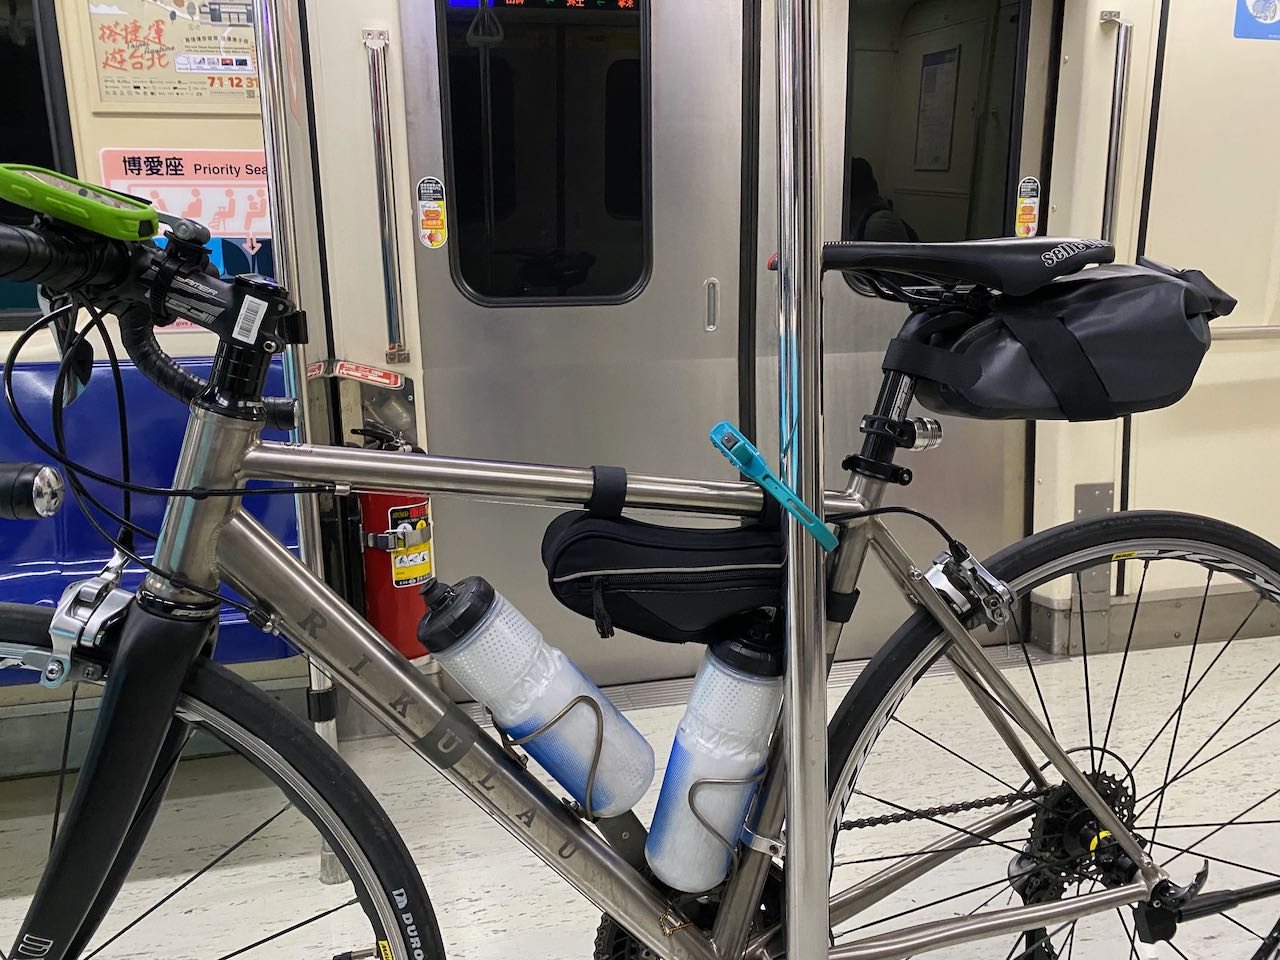
    I used a Rikulau Master 325Ti with a 11-28T, 11-speed cassette and a compact chainring (50/34T). With a narrower range of teeth numbers (instead of 11-32/34T), the 11 steps between the gears are smaller, which is easier to get an optimal gear ratio for my tired muscles to work with approaching the end of the Challenge. 

    The frame is made of Titanium alloy with 3% of Aluminum and 2.5% of Vanadium, hence the name 325Ti. Although 325Ti is considered to be less stiff than a 64Ti (6% Aluminum and 4% Vanadium), I was surprised to find it much stiffer than I had expected on my first ride. It is so light and stiff that the 28-tooth cog is enough to handle all of the climbing I usually do. I have no problem climbing with my friends who use big cogs with 32 or 34 teeth on their cassettes. This bike has boosted my confidence.

    A short chat with Chengnon Hsu, co-founder of Rikulau, gave me a better idea about how they achieved such an efficient bike. The titanium tubes were shaped by hydroforming to make them structurally stiff, strong and lightweight. Instead of being built with a simple round top tube and down tube, the Master 325Ti was built with round hexagonal tubes swaged to match the size and shape of the head tube and the bottom bracket shell for broader structural support. 
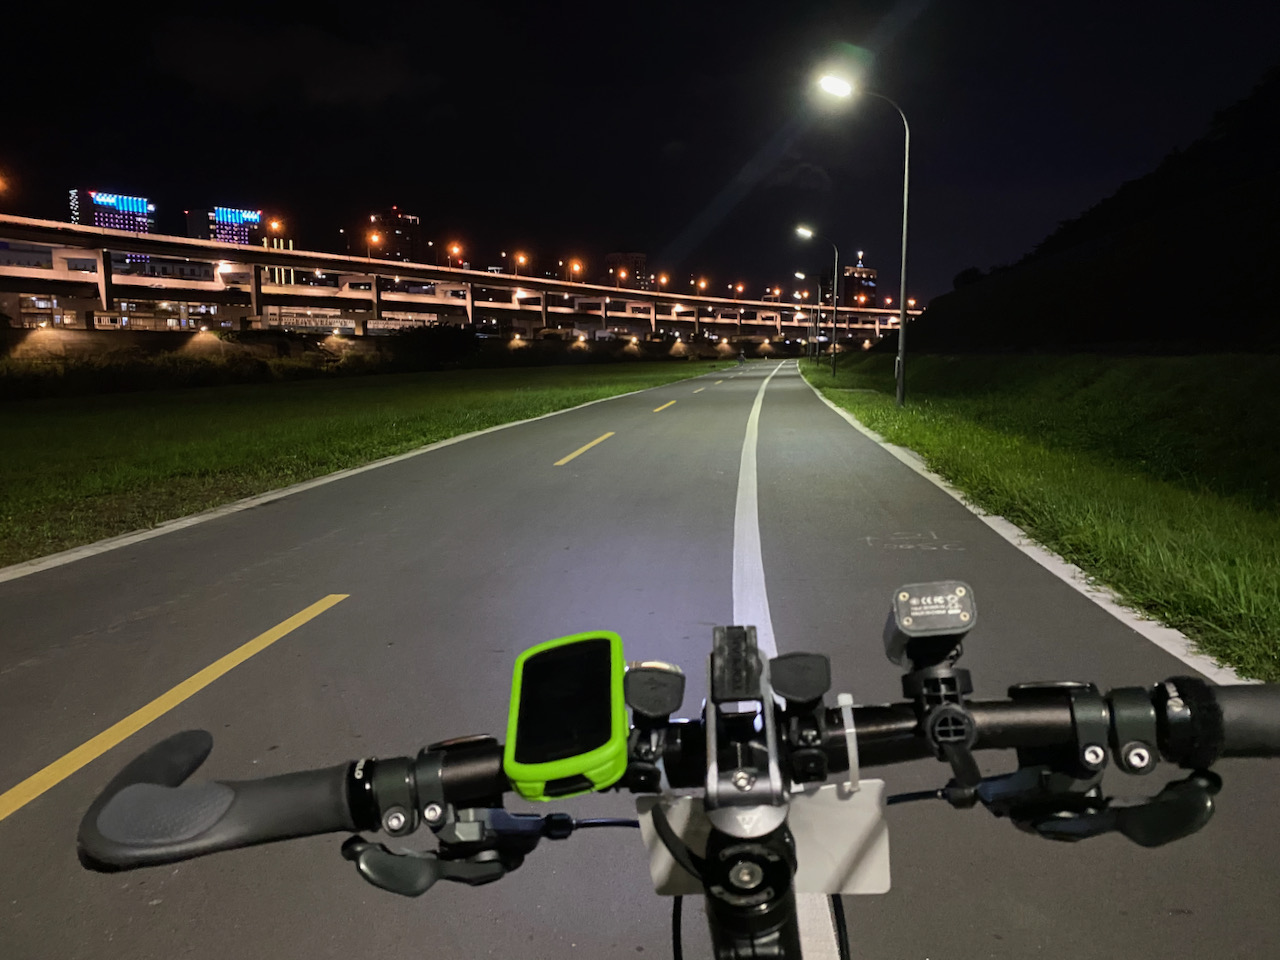
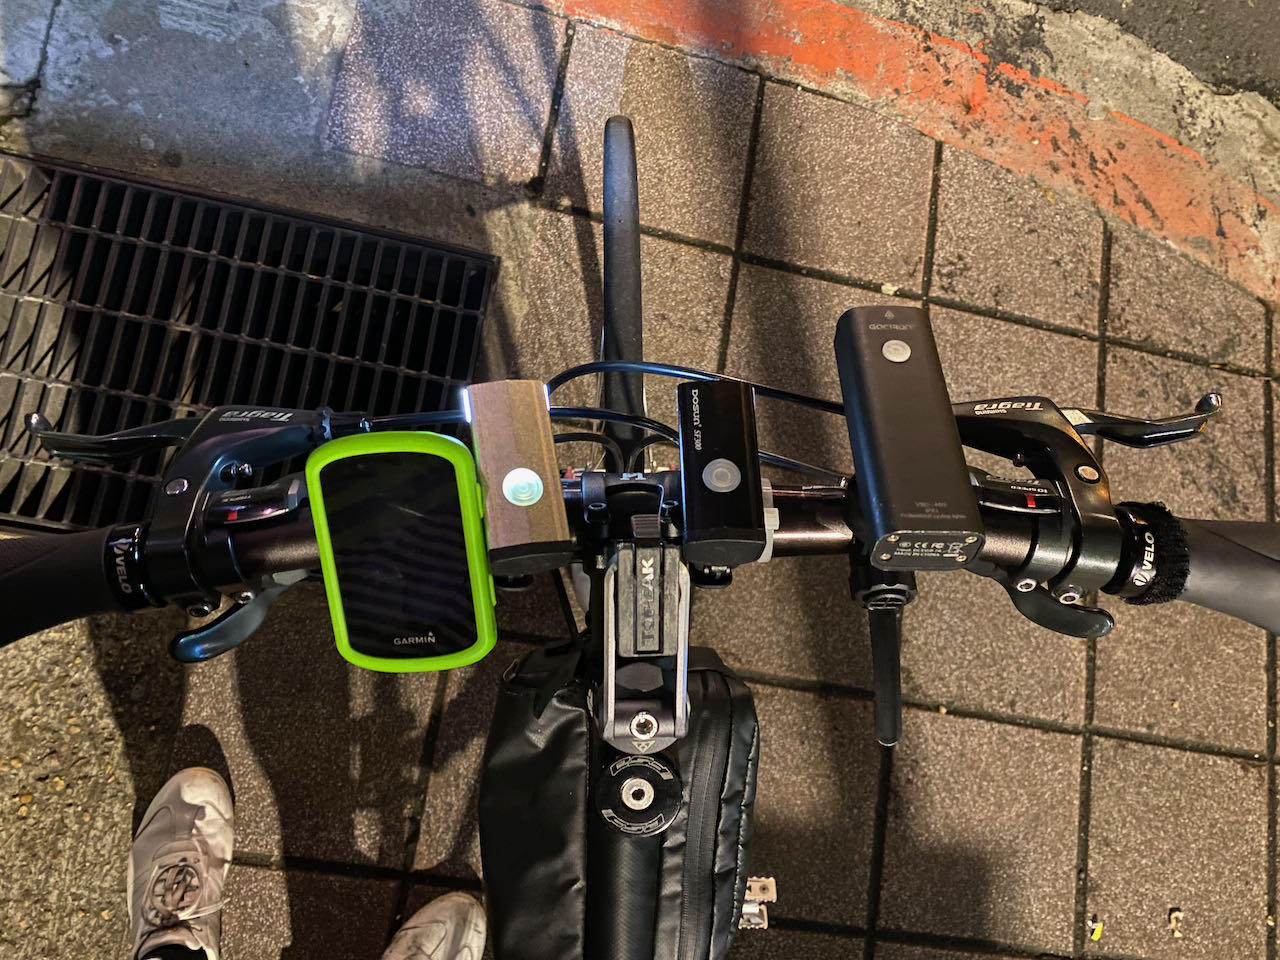
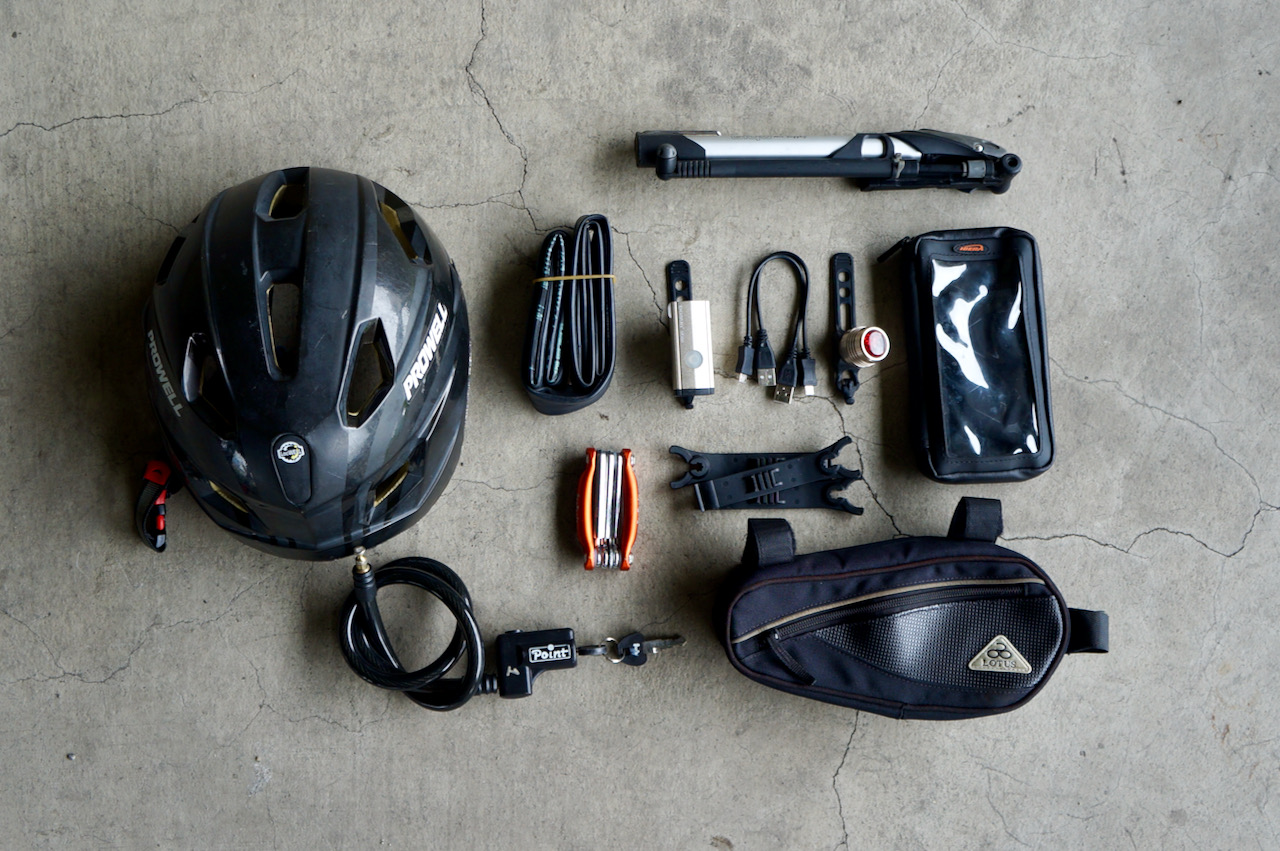
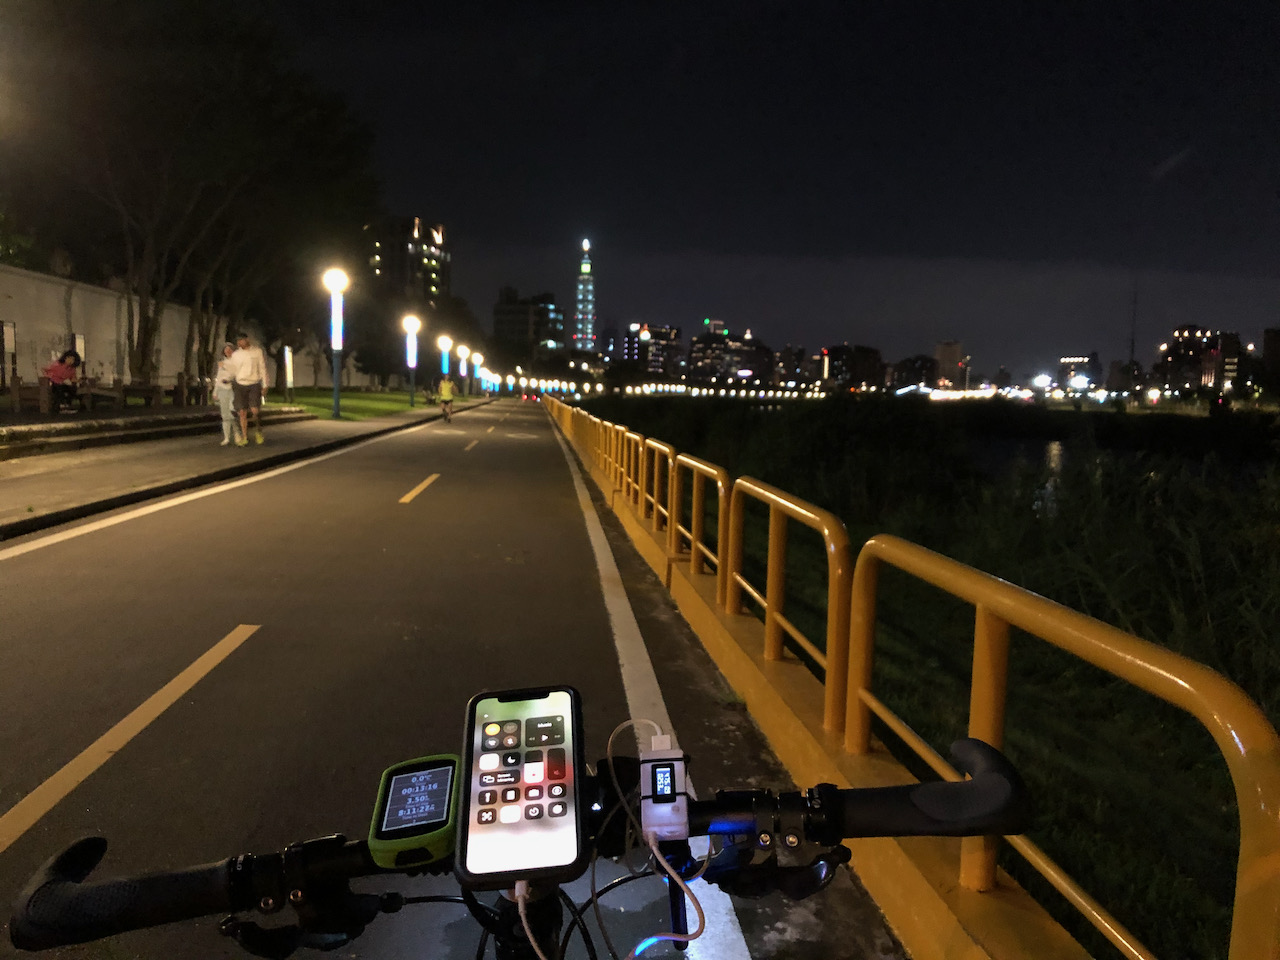
    Lights

    Lights are vitally important. There are segments with no street lamps at all and there are about 18 hours in which we need to cycle in the dark. One of my friends lent me a powerful one with 1600 lumen. I did not need such a bright light but it comes with a big big battery, which proved to be a huge benefit. During the event, I only set it to half its brightness and it went on for 6 straight hours, showing no signs of exhaustion. It could probably last through the second night if I had continued with the Challenge. 
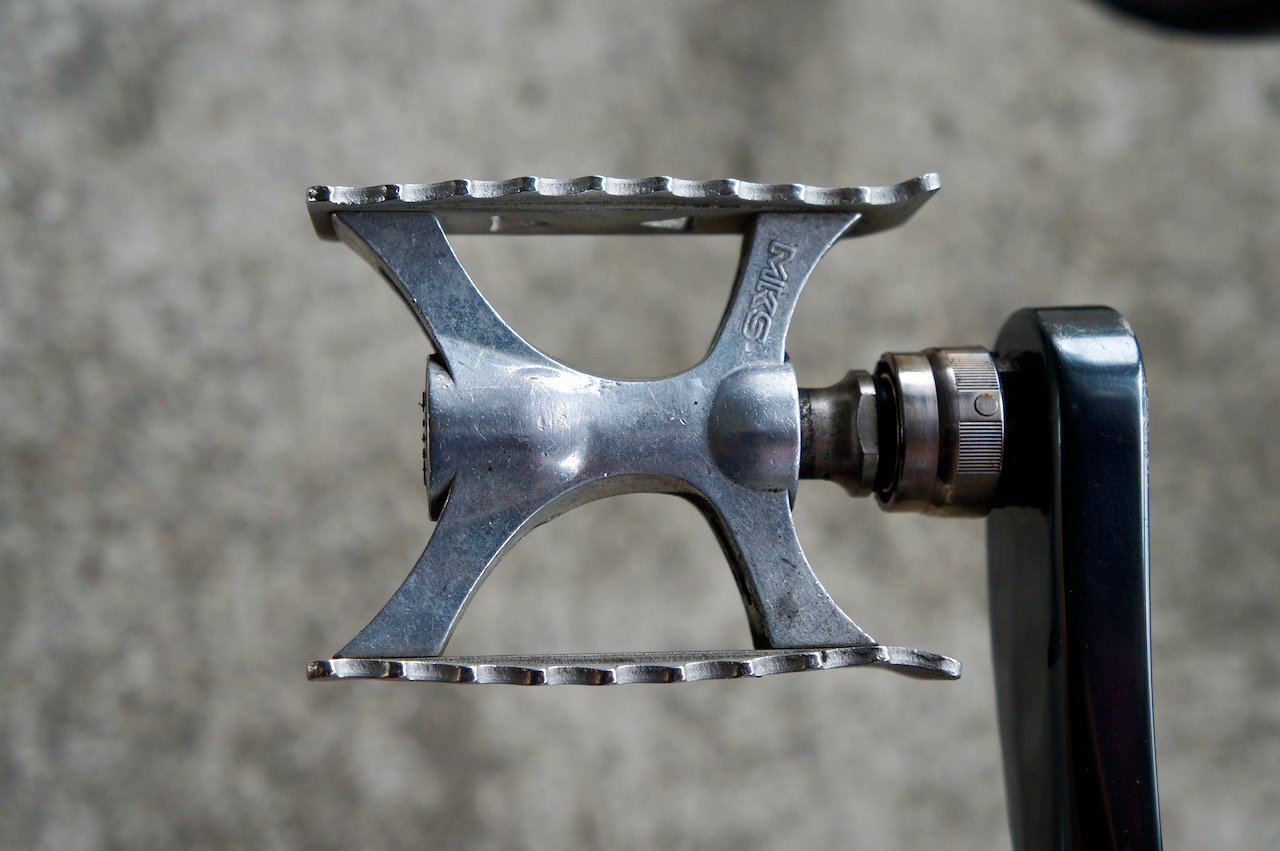
    Pedals

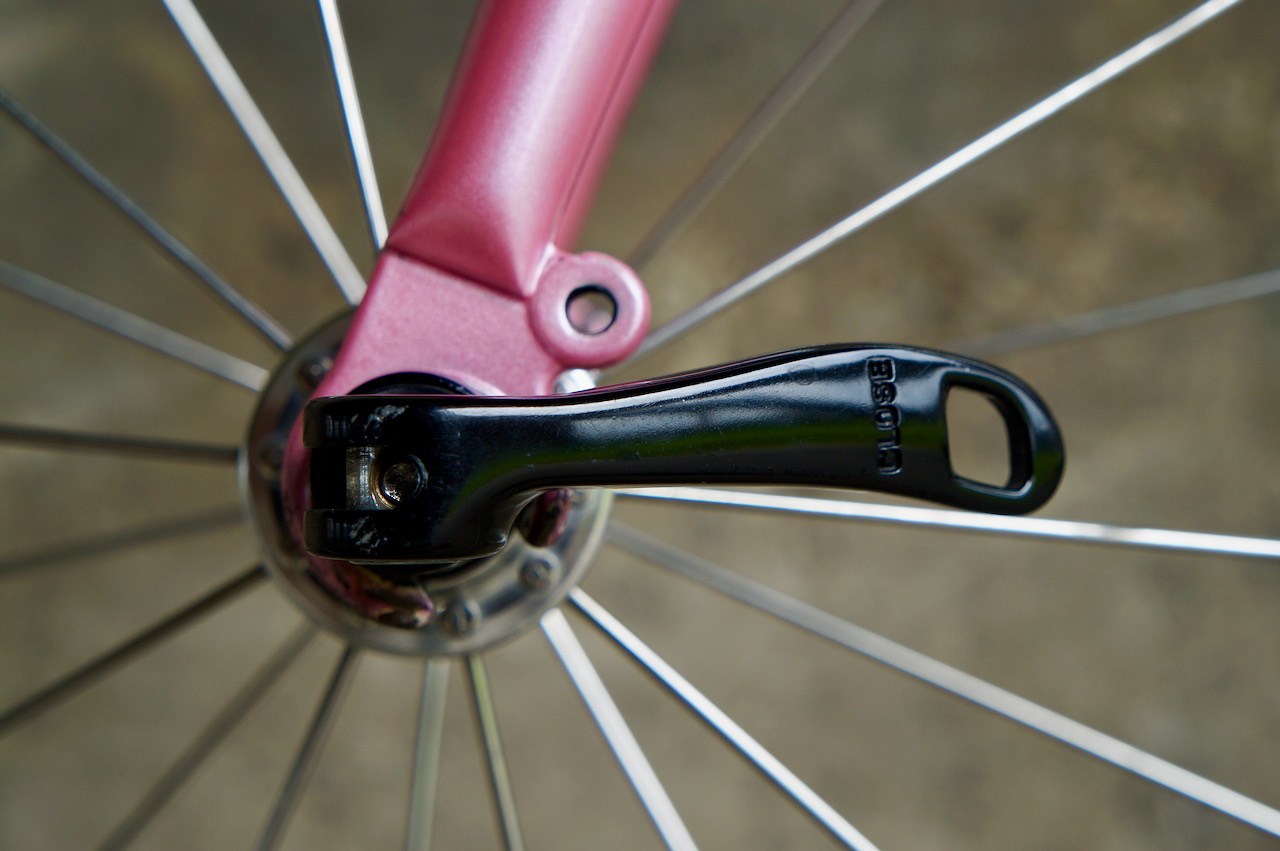
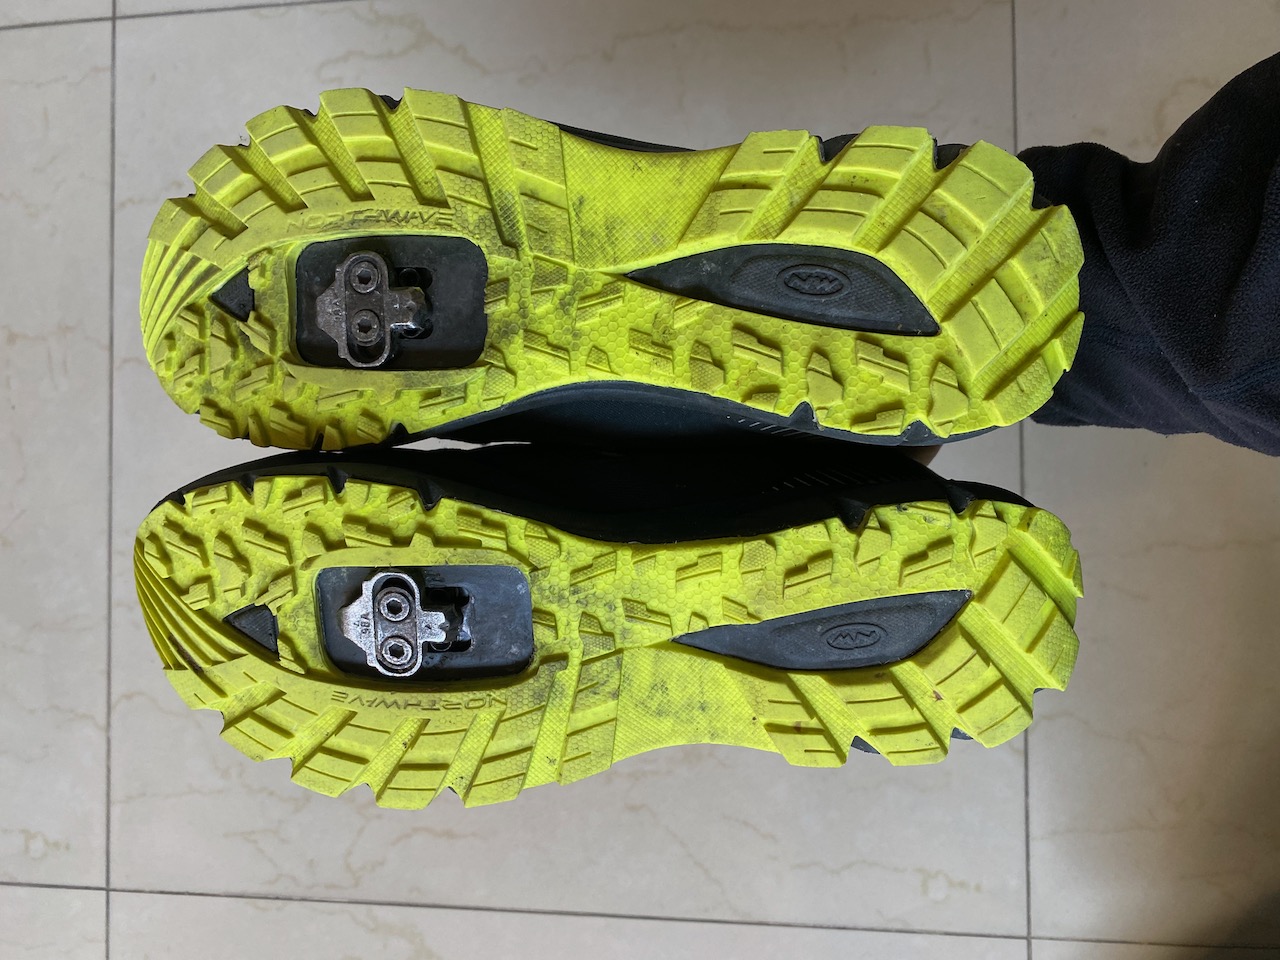
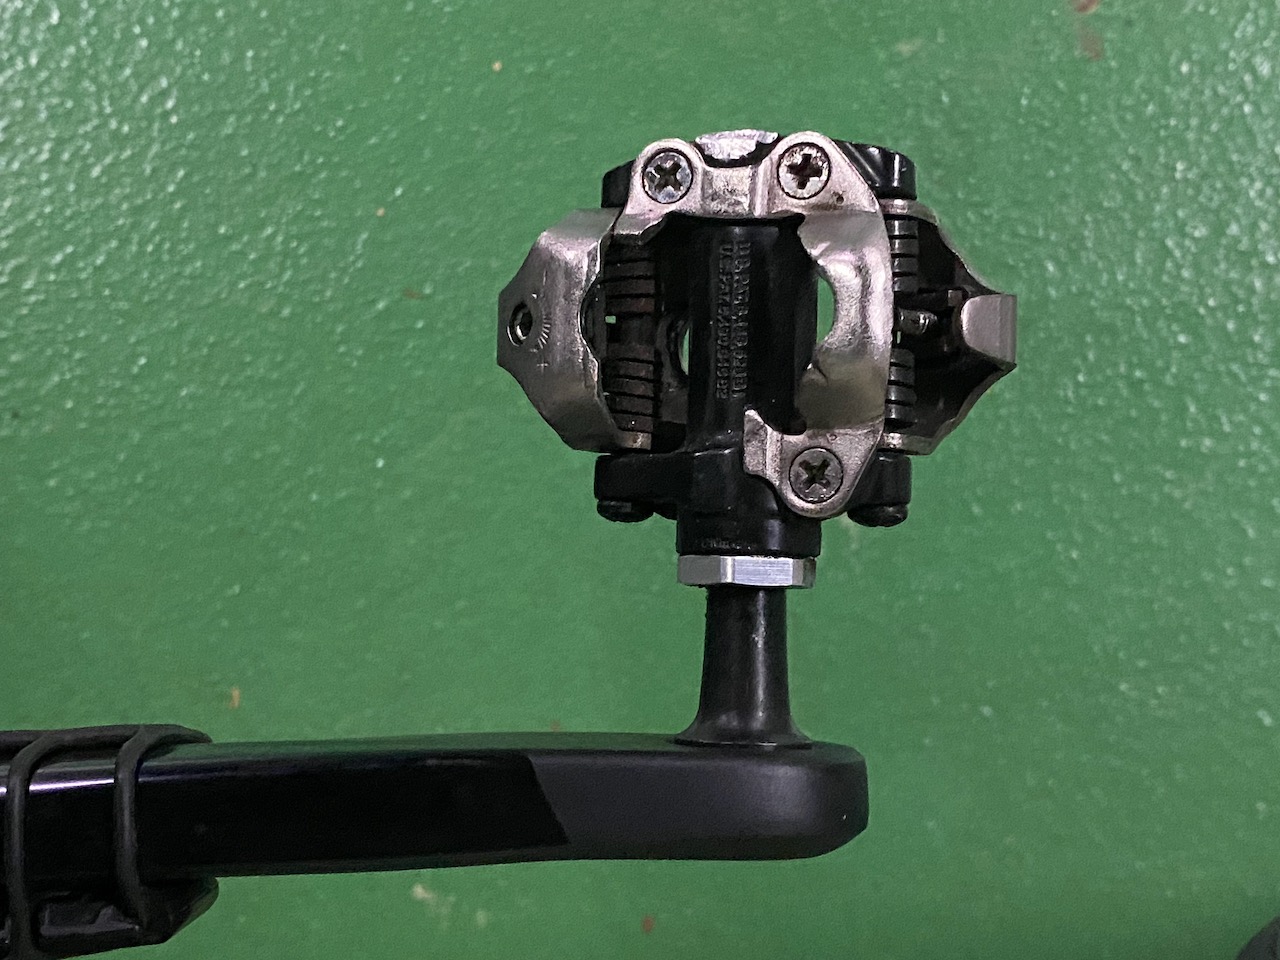
    I used Shimano SPD pedals (generally used on mountain bikes) because the cleats for these pedals are recessed into the shoe soles so that I can walk in them normally. I did not want to pack an extra pair of shoes for the return trip. Also, in case I could not ride on my bike, I could still walk.

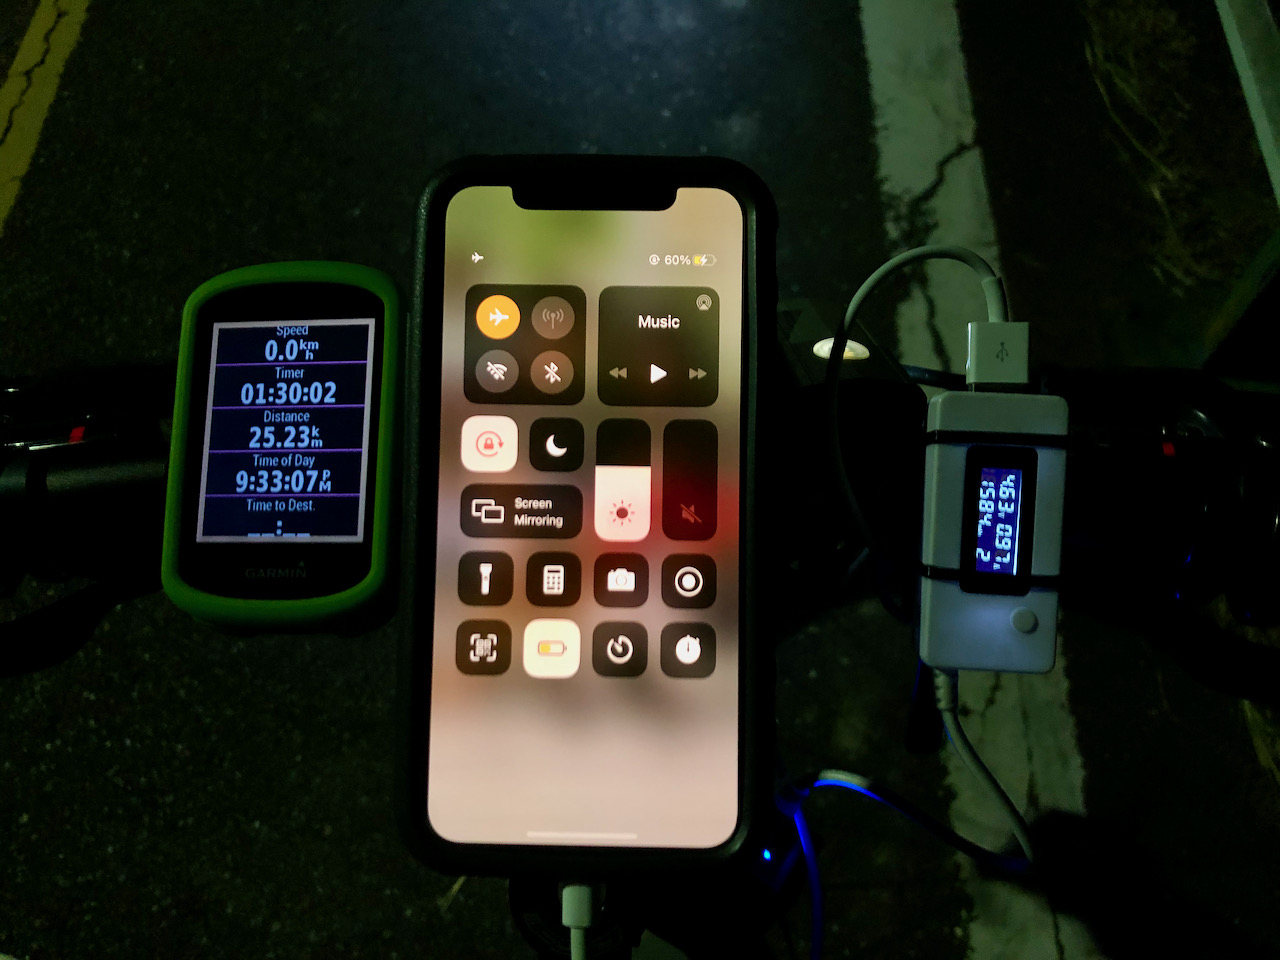
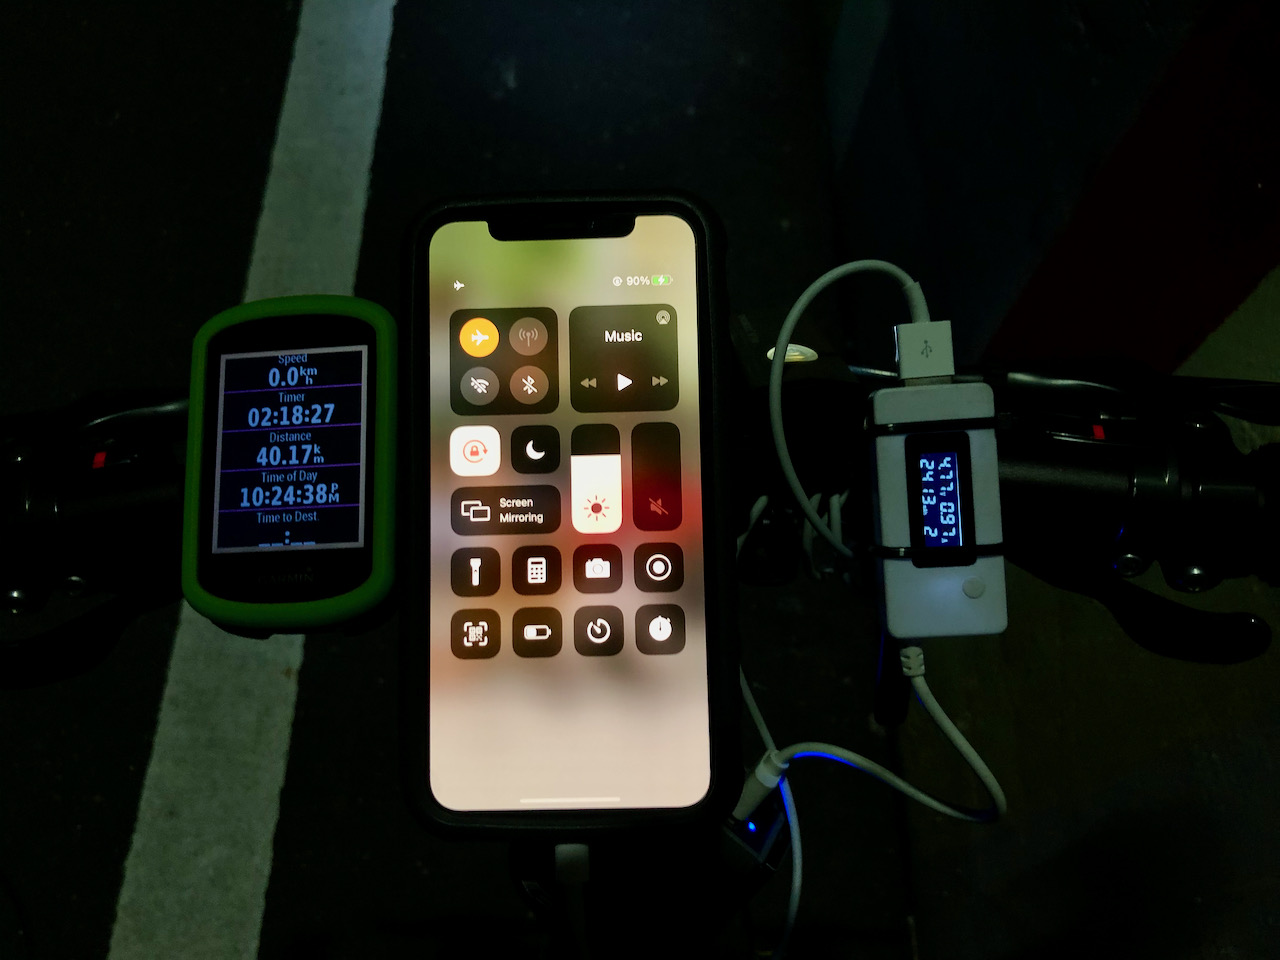
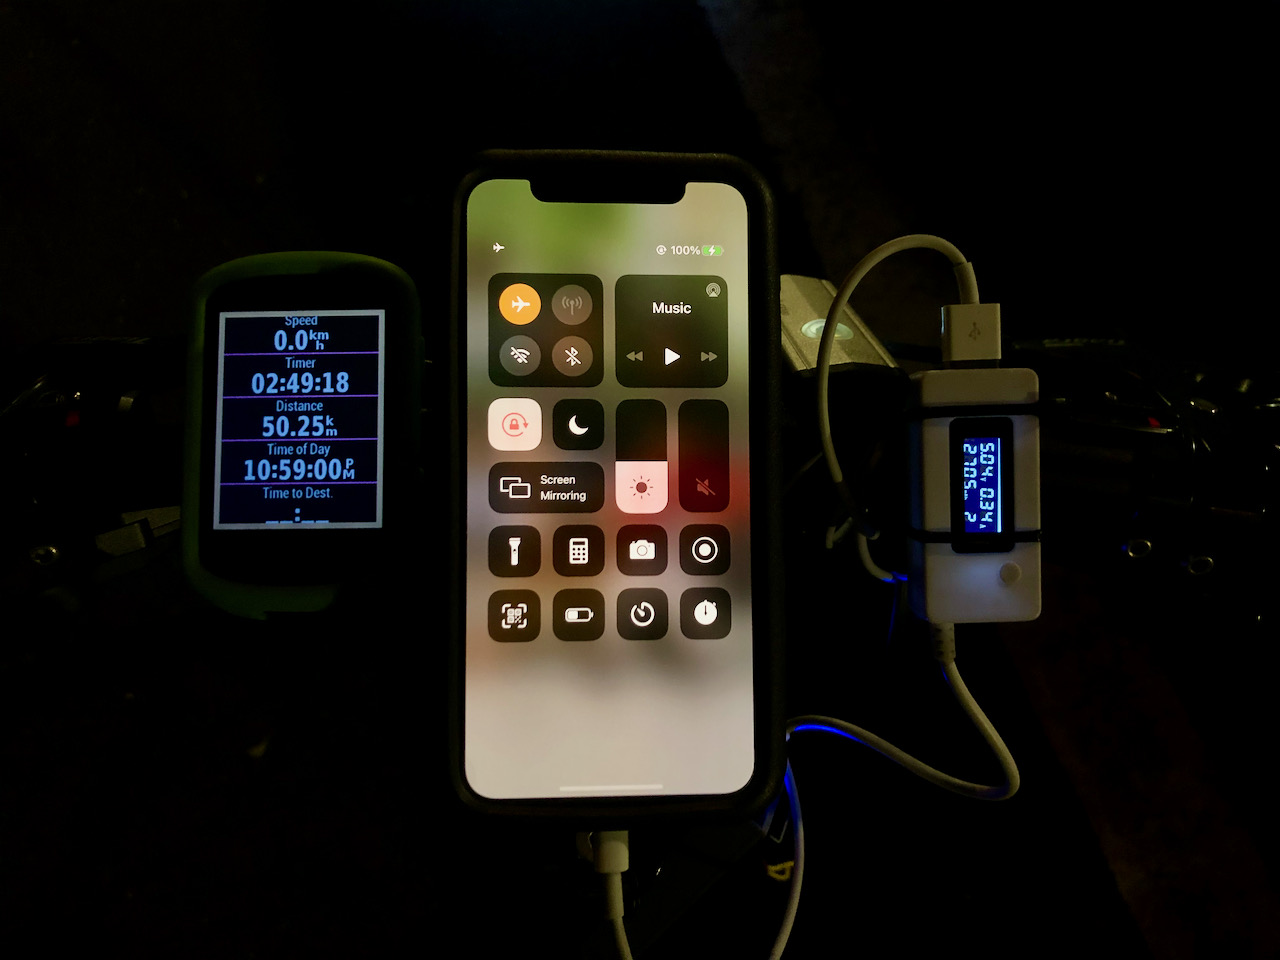
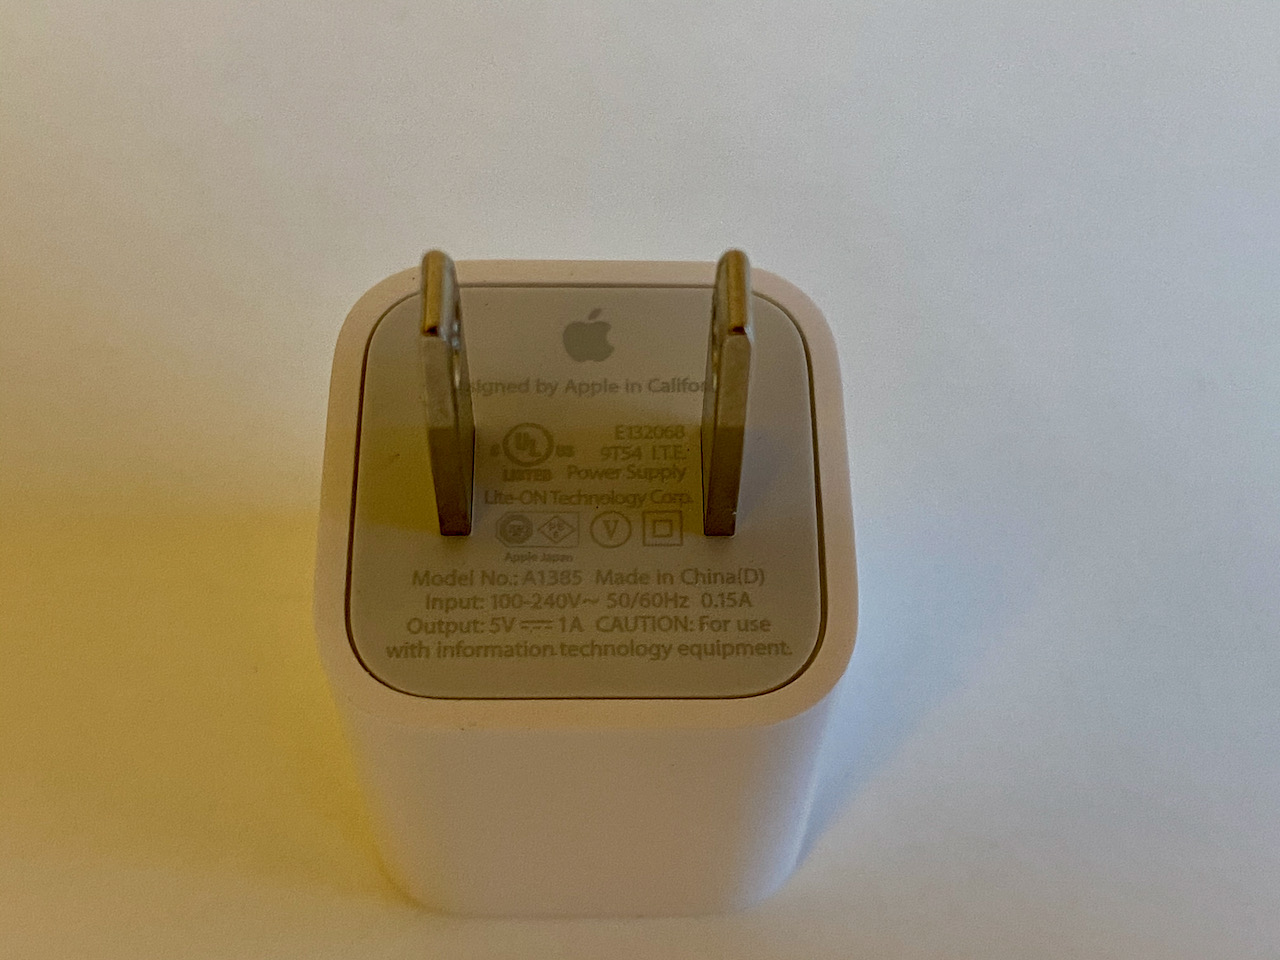
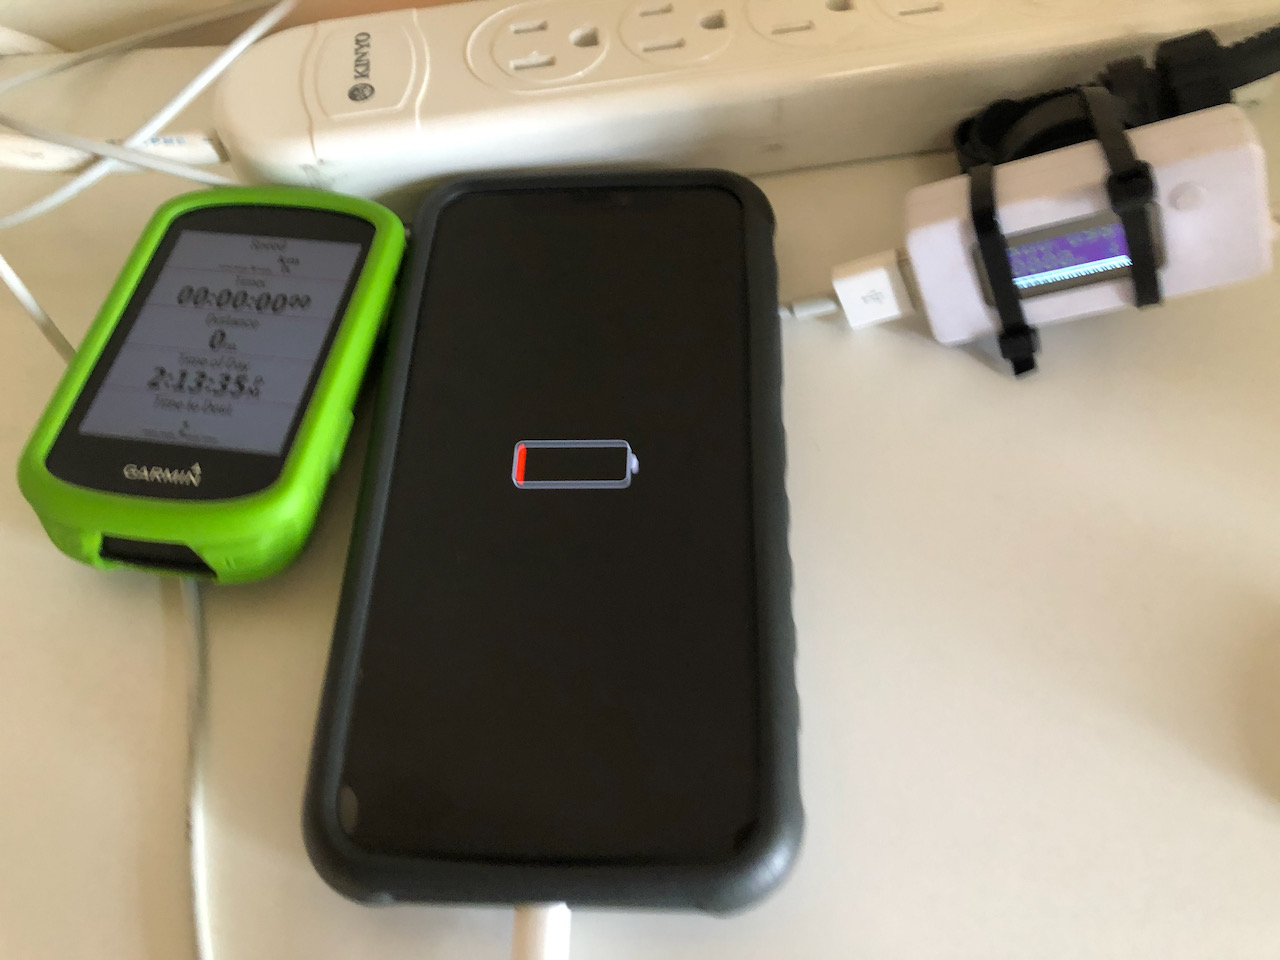
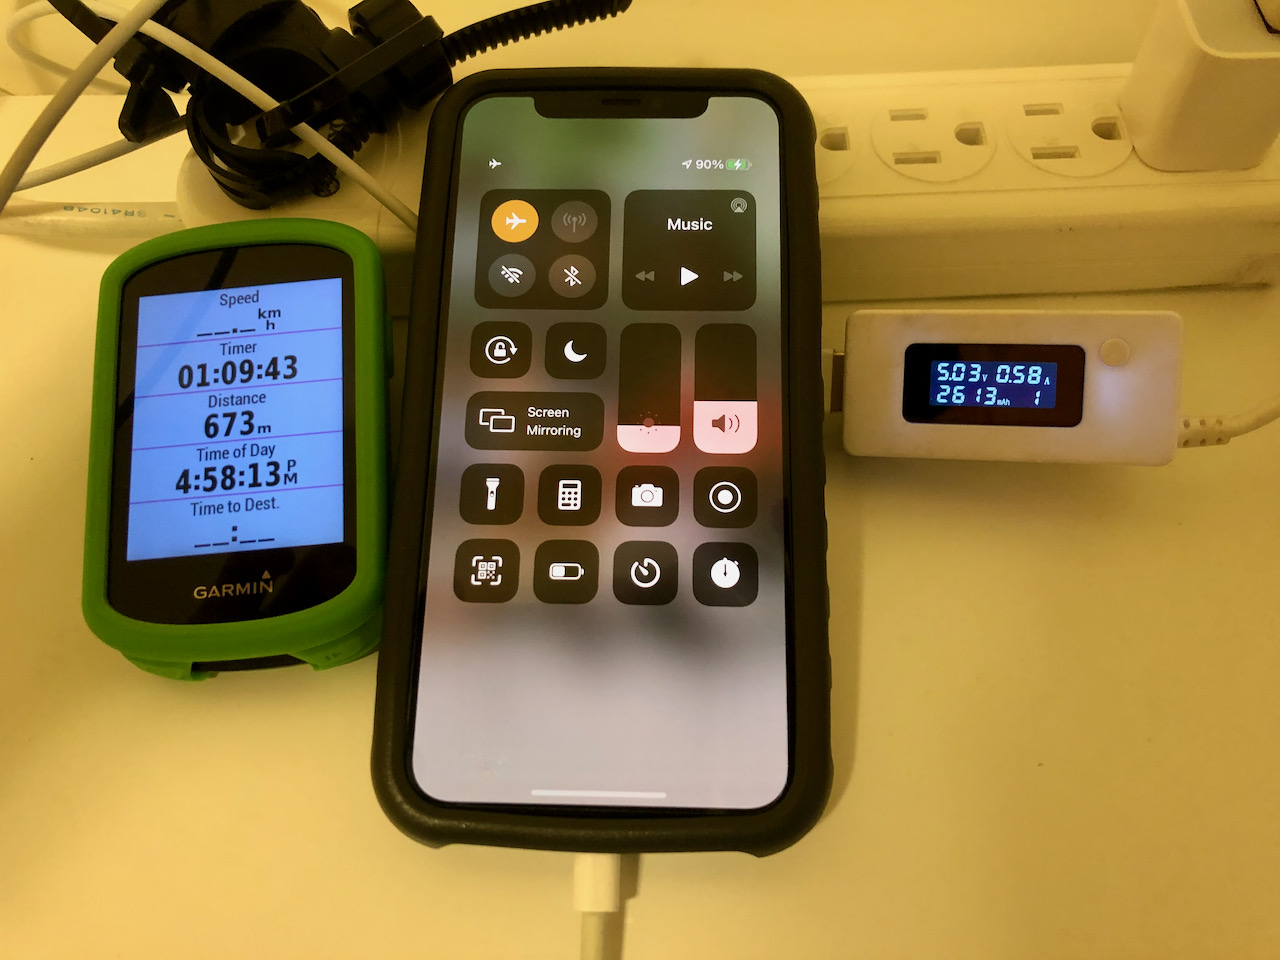
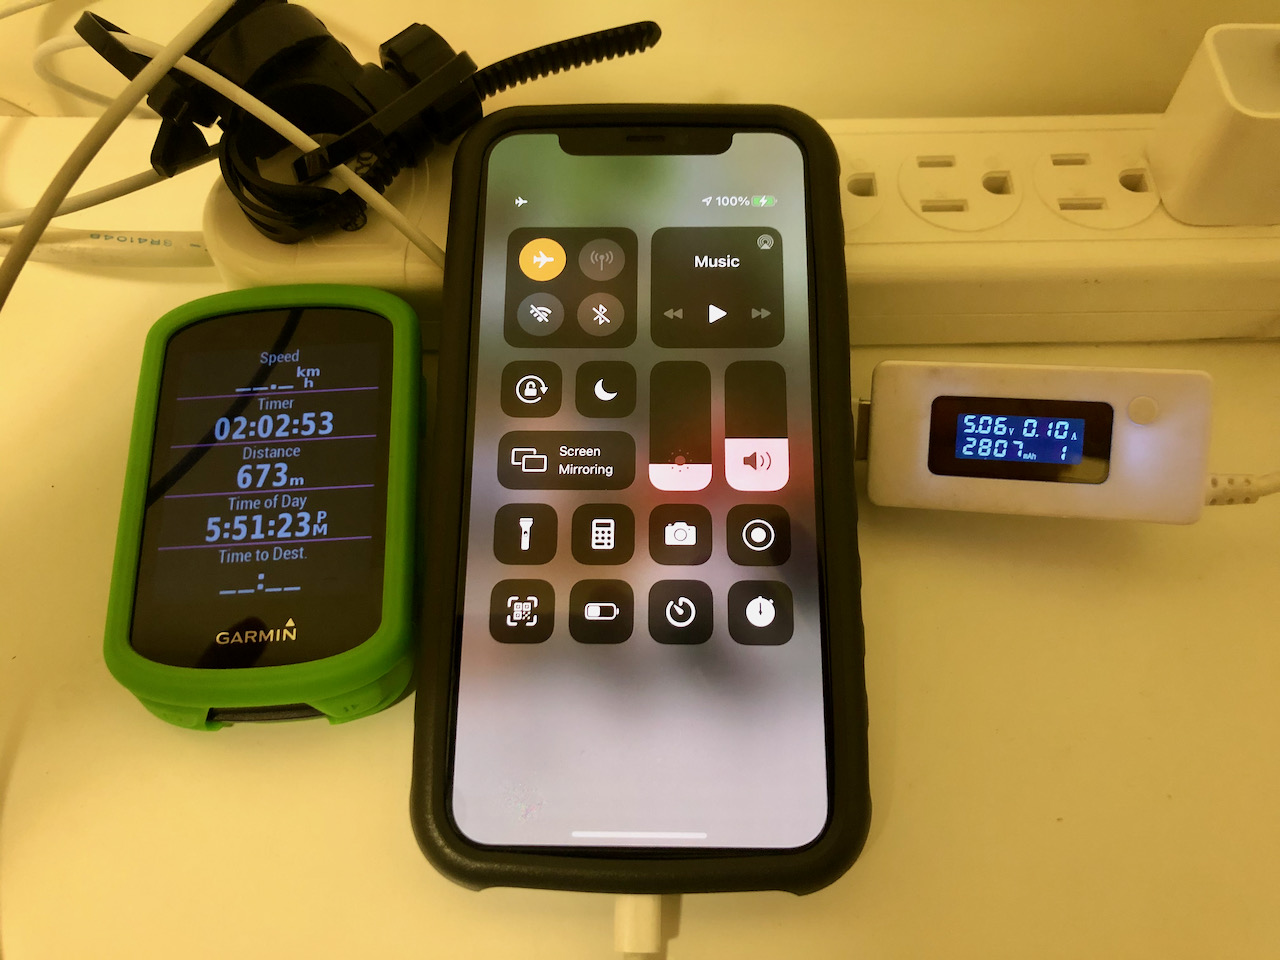
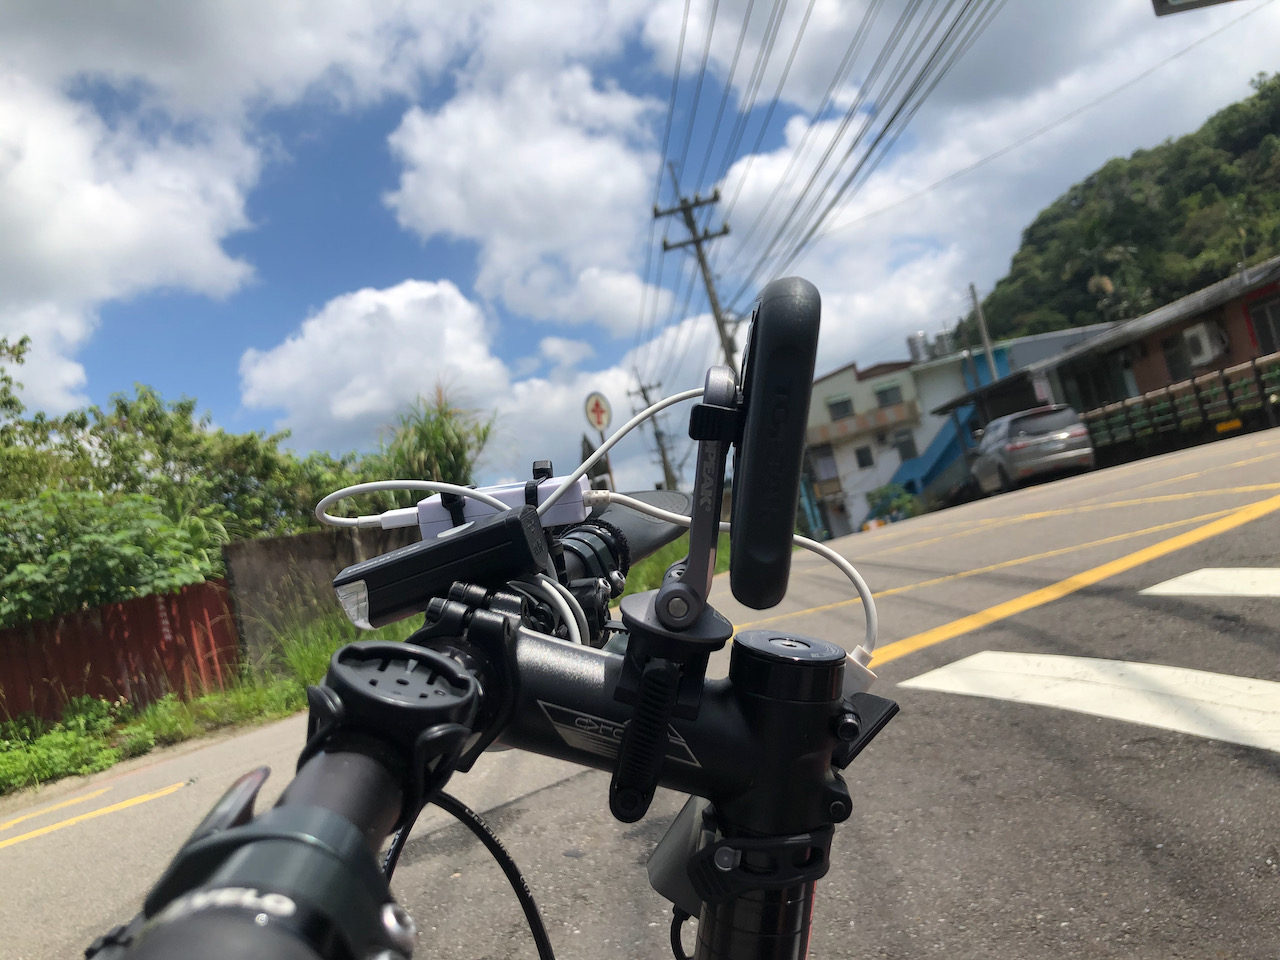
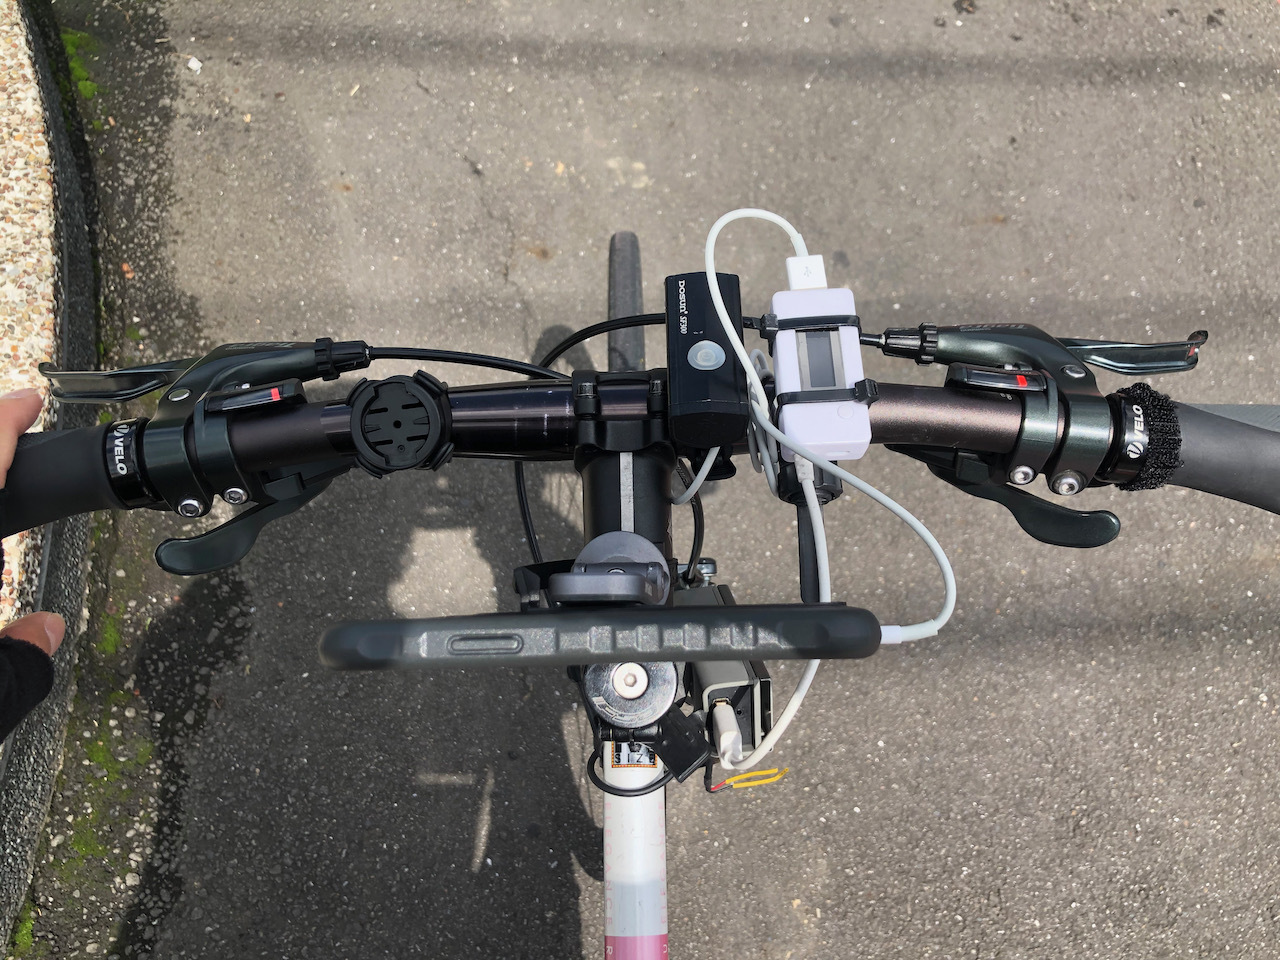
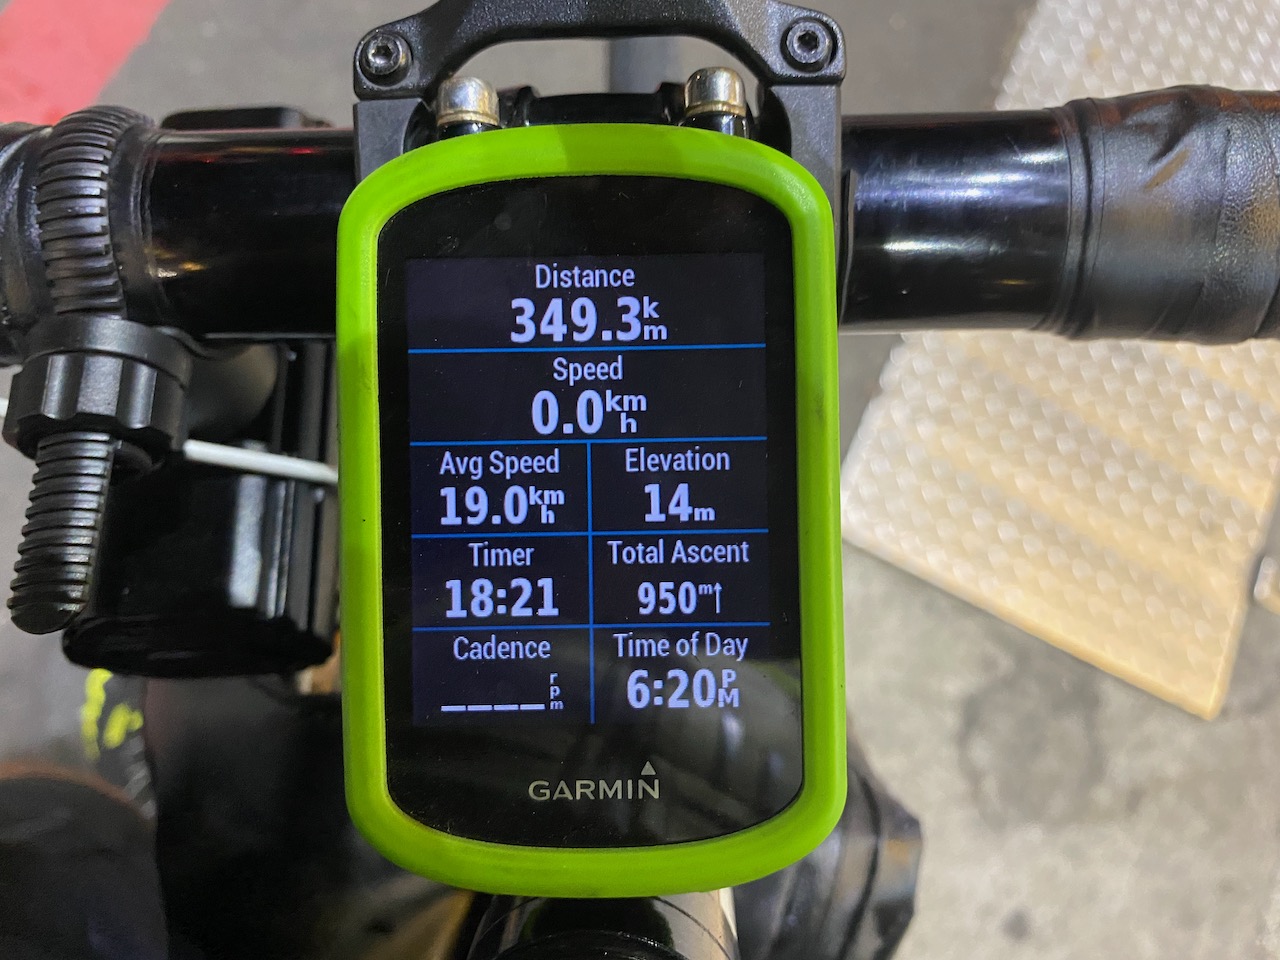
    The route is rather straightforward but it would be a waste of time and effort if I miss a turn. So I loaded the route into my Garmin Edge 530. Smartphones could do the job but they consume much more power and are vulnerable to rain and rattles.

    Water Proofing

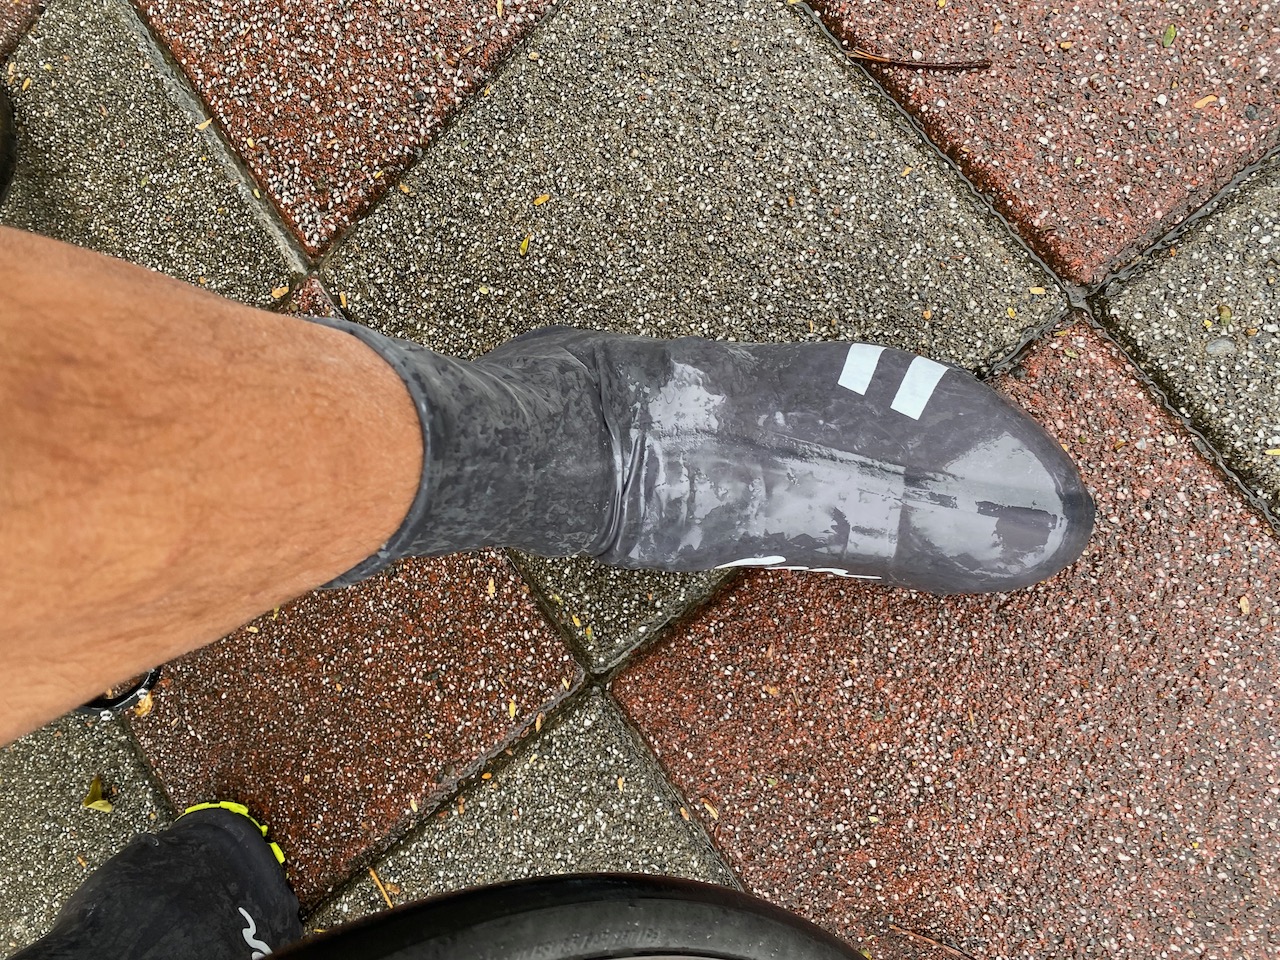
    It is likely to rain in winter in northern Taiwan. I have no problem cycling in the rain except I really hate it when my shoes are soaked. So I have got these velo Toze cycling shoe covers. They remind me of those latex swimming caps. It is really difficult to put them on but totally worth the trouble. I tested in the rain for more than an hour. My socks and shoes were as dry as they should be. 

    Electronic devices were sealed in water tight bags in case it rained.

    Repair Kits

    I packed a spare inner tube, tyre patches, a tyre boot, a hand pump, a chain tool and a quick link, a multi-tool, a rim stripe. I did not pack CO2 canisters and a second inner tube because the chance of getting flat tires was not high. One insurance policy should be enough (which proved to be not quite enough).

    Training

    In the few weeks before the event, I cycled more than 35 km every morning on weekdays. I had also done some long distance training when I was preparing for the “Taipei to Kaohsiung” Challenge (Ahem… last year). I believe it should be enough for me to complete the challenge. 

  • Cycling Route: Buddha’s Palm – Climb Training

    Cycling Route: Buddha’s Palm – Climb Training

    このブログ記事の翻訳を進行中です。もうすぐ完成しますので、後ほど再度ご確認ください。ご不便をおかけして申し訳ありません。現在は、こちらで提供されているGPXルートや地図などの情報を自由にご利用ください。

    The cycling route known as “Buddha’s Palm” 如來神掌 is one of the most challenging route in Taipei and New Taipei. It consists of a total distance of 135km and an accumulated elevation gain of 3,130 metres. Those who have completed the route will find themselves climbing over the Yangmingshan twice and drawing a palm in their GPS tracking apps. In order to draw a finger, you need to climb from the north coast at 280m to the hillsides of Yangmingshan at 500m. In total, there are 6 climbs to complete. The downloadable GPX file of this cycling route is at the end of this post. 

    Recently we had a customer from Europe, a Taiwan KOM finisher, who hired a bike from us just to do this route. I did some research to provide him more information to help him achieve his goal. Might as well share it here with all of you.

    “Start as early as possible, like 5:00 a.m.” is the first advice I got from a fellow cyclist who completed this route last November. It is a long route that involves a lot of climbing and descending. We should try to finish it when we still have daylight. Descending in the dark is dangerous especially when we are tired on the last leg. Some would even start at 3:00 a.m. or 4:00 a.m. for the long climb at the very beginning and do the first descent when the sun comes out. This is particularly applicable in winter as we have only around 10.5 hours of daylight with the sun setting around 17:15.

    “Wind did not seem to be an issue. But there are some segments that could be very very steep, so be careful when descending”, my fellow cyclist gave me this advice when I was trying to figure out if we should do it clockwise or anticlockwise by taking the wind and the terrain into consideration. She recommended doing it anticlockwise. Though wind was not an important parameter,  the prevailing wind in winter coming from the north-east did make it easier in the coastal open area when doing it anticlockwise. And in summer, the prevailing wind is not strong.

    For supplies, except for the middle finger, you can find at least one convenience store (7-eleven, Family Mart or Hilife) before each climb on the forearm and the fingertips. In those convenience stores, you can find various kinds of drinks, energy gels, chocolates, bananas and even some simple microwave hot meals. At the middle fingertip, there are some small grocery stores around for you to buy water.

    Toilets can be found in most of the convenience stores but it was not open to the public due to the Coved-19 alert level 3 when my customer was to take on this challenge. Clean public toilets can be found easily in those tourist spots like LengShuiKeng 冷水坑, Fuguijiao (or Cape Fugui) 富貴角 and the beginning of the GPS route available in this post. Some petrol stations will open their toilets to the public too.

    Those spots for supplies and toilets are marked on GoogleMaps for your easy reference.

    For contingency, we can use Provincial Highway No. 2 to get to Tamsui. You may also board the MRT at Hongshulin Station if the time is right. Please refer to this post for more details. Some taxis or Ubers may also be willing to take you with your bike.

    Good luck and all the best if you are planning to do the Buddah’s Palm. 

    Route:

    NOTE: To use the routes, please install the App on your smartphone. The App will launch and load the route automatically after you tap the above links on your smartphone’s browser. For Garmin Connect, you can then use the APP to send the route to your garmin device. If your Garmin device is not purchased in Taiwan, you will also need make sure you have the Taiwan map on your device. Here is our blog post on this topic.

  • Cycling Route: Guanyinshan – Climb Training

    Cycling Route: Guanyinshan – Climb Training

    このブログ記事の翻訳を進行中です。もうすぐ完成しますので、後ほど再度ご確認ください。ご不便をおかけして申し訳ありません。現在は、こちらで提供されているGPXルートや地図などの情報を自由にご利用ください。

    Guanyinshan 觀音山 is another popular cycling destination for a quick climbing exercise at the north-west side of New Taipei City, right next to the the left bank of Tamsui River. It makes it easily accessible via the Riverside Bikeways. I went there for a half day cycling exercise with my friend Tom on a Sunday in December 2020. We met in the Shilin District 士林區 and used the Guandu Bridge 關渡橋 to get to the left bank. So, the route I plotted starts and ends at the bridge. There is a convenience store nearby on Provincial Highway No. 15 for supplies. The downloadable GPX file of this cycling route is at the end of this post. 

    The Guandu Bridge has a separated bike lane connecting the bikeways on the right bank to the left one. We cycled on the Bali Bikeway after leaving the bridge. Then, Tom led me into a small lane that merges with Provincial Highway No. 15. And soon we took a branch, TP50, on our left hand side. There were vehicles rushing at high speed. Be aware.

    The climbing started immediately on TP50. I managed to keep up with Tom and even chatted some with him. From my research the night before, I’d learned that this route could include Zhongzhi Road 中直路, which is notorious for its steepness. The altitude gains 224 metres in 2.59km, meaning an average gradient of 8.65%. There is one 600-metre segment with a gradient of 19%, so steep that a gate was built to stop vehicles over 2.5 metres from using that road. Tom said he had descended on this road before. It’s no fun at all. It isn’t my cup of tea, either going up or down!

    Fortunately Tom did not lead me onto this road. We switched to TP53 for the peak and it became steeper. Tom had long disappeared into the turns ahead. I had to take a short break. After that I struggled to clip in my clipless pedal when trying to start again. The logical procedure would be to point the bike downward when starting so that the bike would move without pedalling. That way I could balance the bike easily while I was trying to clip in my other foot. But I did not want to lose an inch of altitude in that process. So I tried to start by holding on something on the roadside to clip in both feet. It didn’t work. A fellow cyclist passing by had seen my failed attempt. He told me the way I had tried to avoid doing was possibly the best and only way. I tried and voila! I was back on the pedal with both feet. All I needed to do was ease the brakes slightly to let the bike move a little. It’s so much easier to clip back in when your legs are not responsible for powering the bike. Actually the U-turn I made was so natural that I didn’t even need to think. It was a tight, swift one and I might only just go down less than a foot.

    Tom waited for me at the top at 365 metres where there is a tourist information centre and a nice cafe. It was quite busy with some hikers who drove up in their cars to climb the 1.5km of stairways for a viewing platform at 616 metres. Guanyinshan is a lonely small hill that offers a 360 degree view of the city. It’s definitely worth the effort to get to the viewing platform if you can lock your bike safely.

    Tom and I treated ourselves to coffee and cakes before starting our descent back to the Riverside Bikeways on TP55 before noon. It is a nice route for a half day ride.

    Route:

    NOTE: To use the routes, please install the App on your smartphone. The App will launch and load the route automatically after you tap the above links on your smartphone’s browser. For Garmin Connect, you can then use the APP to send the route to your garmin device. If your Garmin device is not purchased in Taiwan, you will also need make sure you have the Taiwan map on your device. Here is our blog post on this topic.

  • “Taipei to Kaohsiung in One Day” Challenge (2)

    “Taipei to Kaohsiung in One Day” Challenge (2)

    このブログ記事の翻訳を進行中です。もうすぐ完成しますので、後ほど再度ご確認ください。ご不便をおかけして申し訳ありません。現在は、こちらで提供されているGPXルートや地図などの情報を自由にご利用ください。

    Execution

    In order to make sure I have a quiet place to sleep in the afternoon before the event, and also to welcome me at the finish line, Lois brought the kids to a resort in Kaohsiung in the morning of the event. I was left alone at home to prepare for the event. There had been a typhoon near the southern part of Taiwan but it left just in time. The event went on as planned. I had a big lunch to load up more calories before putting myself to sleep. Perfect! So I thought.

    Unfortunately, I was met with an unexpected issue. I woke up in the evening with a weird feeling in my stomach. My digestive tract must have shut down when I was asleep. It didn’t get a chance to deal with the food I ate and now the food was frozen up inside! Oh… I should not have eaten such a big meal before sleeping.

    I cycled 35km to the starting point from home. As I was approaching the gathering point, the convenience stores were getting more crowded. The weather was so fine and my stomach started to wake up. I stopped at a convenience store and ate microwave noodles to encourage my bowel movement. But instead I made it worse. My stomach froze up again. Well, anyway, now I had a full load of food inside my digestive tract. I wouldn’t need to stop to eat. 

    There were coaches and vans unloading bikes everywhere near the gathering point. Some of the participants were actually from Kaohsiung or the southern part of the island. They had already spent hours in the coaches just to get there. It must be harder for them as they had a much longer day on the road. 

    When it was about time, I pushed my bike to the starting line. There was already a long queue building up, occupying a traffic lane. But the crowd was quiet and orderly. There was no need to fight for any specific positions as individuals’ records would be taken when we passed the gates.

    The race started finally! The whole fleet moved forward slowly feeding into the starting gate. When it’s my turn to go through the gate, I heard through the PA system lots of beeping sounds and the organiser’s repeated announcements about the latest weather conditions. Then we were free to set our own pace as the road before us became wider. It was fun to have so many people doing something together. I took it easy, kept my effort constant and managed to keep up with my friends at the first stop, Yongan Fishing Harbour, at 50km. I had a full load of energy bars and energy gels in my bags but I did not eat much because I wanted to take this opportunity to burn some fat. And in any case, my digestive tract had not been moving.  
    At 100km, the 2nd stop Baishatun Gontian Temple, I could hardly keep up with my friends. I arrived just when they had taken a good rest and were about to leave. My average speed was 23km/hour. It was acceptable. But I was on my own from that moment onward.

    My energy level started to plunge and the typhoon, as it was heading west leaving the island, had driven the air to the opposite direction, making the wind blow against us on the southern part of the island. It took me longer and longer to reach my target speed again after each pause in front of the traffic lights. When I was about to cross a long bridge, a fellow cyclist, while catching up from behind, shouted to me telling me to follow tight with the group ahead to save some effort. But it was too late. The wind had nipped me away from the group. I had to press on against the wind all by myself on the bridge.

    Here is the link for the latest forecast

    Then I tried to follow those groups in double pace line. They were moving steadily ahead like a locomotive and radiating a spirit of determination. I could save myself some energy from the wind by joining them. But they were moving at a much faster pace than I could manage so I kept dropping off. I tucked myself in the wind shadows of some solo riders who were cycling slightly faster than I did. The benefit and help was noticeable. The resistance from my pedals was lower so that I could switch my gear one stop higher. I could pedal in a lower cadence with less effort. I kept scanning for other riders with speeds that suit me better, rather like a parasite jumping from rider to rider. But I felt no shame at all. I had seen others using their support vans to push away the wind for them at the front. After the challenge, I learned that not only the riders at the back could save energy as high as 30%, the riders being followed could also save 10% of power. I am glad I reciprocated their favor. 

    It began to rain. I did not bother to put on my rain jacket. It’s good to take away some heat from me. A driver in a support van at the traffic light rolled down his window and offered to give me a disposable poncho. 

    A friend of mine was running a supply stall as a way to promote their cycling App, Velodash. She invited me to get some food or drink when I was there. I asked nicely for a banana from a group of people sitting next to their banner. They enthusiastically offered everything they had. Then I realized I had mistaken them as the staff of my friend. They were actually just there to support their own friends. But they were so ready to help, like most people in Taiwan, who are always kind and generous. 

    I was not worried about my progress as my meter showed an average speed well above 23km/h. Then at around 15:00, I texted Lois to tell her about my progress. I had completed 263km already and with 97km more to go. It’s down to a two-digit figure now! But wait a minute! That meant my average speed for the 263km was only 17.3km/h instead of 23km/h! If I were to finish the whole trip within 20 hours, my average speed had to be well above 18km/h. I was misled by my meter. It was the Average Moving Speed. The timer would stop when I was not moving! 

    Just when I realized that I had to speed up, something magical happened: bowel movements. I discarded some significant weight of burden in the toilet and my body was more willing to take in energy bars and energy gels! I started to follow the experienced riders’ advice: eat before feeling powerless, at least once an hour.  

    I had packed lots of Snickers because of their high energy concentration of weight and volume. Each bar has 220kcal of energy, weighing only 47 grams. In case all the food was sold out or there were long queues in the convenience stores, I would still have enough kcal available with me. I could tear open the bag and eat it while I was cycling. Though it has to go down with lots of water, drinking water is easier to get. These are the upsides I found during the training sessions. But there are downsides. I almost choked on it when I was in a rush to finish it in front of a traffic light. And there are 10 grams of fats, corresponding to 90kcal, in each bar. I have a copious amount of fat in my body. If I wanted to burn my own fats, I should just eat pure carbohydrates, which are also essential to boost muscle power output. 

    There was no shortage of food as I was told by one of my friends who had participated in this event years ago. The convenience stores along the route are getting smarter. They knew that there would be lots of cyclists looking for supplies during the event. So they would load up much more food and energy gels in their shelves and storage. The only thing in short supply is toilets. The queue for toilets in the gas stations and temples were always shorter. They were very generous in letting the participants use their toilets.

    To my surprise, my legs were working afresh after I adopted this energy intake strategy. My speed was picking up and my legs never felt tired. Actually, they had not been tired the whole time. I had mistaken the feeling of lack of fuel as tiredness. It got dark but the rain stopped. I was cruising powerfully. No more wind shadow chasing. Instead, I was aiming at overtaking the others. I had the idea of taking a short break but shook it off my head. I knew there would be many traffic lights inside the Kaohsiung city before I reached the finishing line. I did not want to risk having the finish gate closed in front of Lois and my kids. 

    Finally, I made it to the finishing line at 19:50, 10 minutes before the cut off time of 20:00. 

    Along the way, I saw quite a number of bikes pulling over upside down, probably with flat tires. Lucky me! I had puncture resistant tyres. If there were any flat tyres, I probably would not make it in time. My Apple watch showed that my active calorie burned that day was 8319 CAL. I burned at least 415CAL per hour. So, It’s really important to keep eating to refuel the body.

    After finishing the challenge, my friends took the HSR back to Taipei right away. I went to the resort with my family for a good night’s sleep and a family day in Kaohsiung before returning to Taipei. For those who still want to cycle after finishing the challenge, how about heading to the east coast and completing the around the island? You have done half way anyway.

    Routes:

    This is a suggested route by the organizer. Participants can plot their own routes as long as they passed the gates/checkpoints.

    NOTE: To use the routes, please install the App on your smartphone. The App will launch and load the route automatically after you tap the above links on your smartphone’s browser. For Garmin Connect, you can then use the APP to send the route to your garmin device. If your Garmin device is not purchased in Taiwan, you will also need make sure you have the Taiwan map on your device. Here is our blog post on this topic.

  • “Taipei to Kaohsiung in One Day” Challenge (1)

    “Taipei to Kaohsiung in One Day” Challenge (1)

    このブログ記事の翻訳を進行中です。もうすぐ完成しますので、後ほど再度ご確認ください。ご不便をおかけして申し訳ありません。現在は、こちらで提供されているGPXルートや地図などの情報を自由にご利用ください。

    The “Taipei to Kaohsiung in One Day” Challenge 一日北高 is one of the most popular cycling events in Taiwan, organised by Taiwan Bike Association 台灣自行車協會 and held every November. In order to be awarded the certificate of completion, participants need to cycle from Taipei to Kaohsiung along the west coast within 20 hours. The total distance is around 360 km. There is actually another more advanced challenge held at the same time and along the same route, the “Two Towers in One Day” Challenge 一日雙塔,  which starts at the island’s northernmost lighthouse Fuguijiao Lighthouse and ends at the southernmost lighthouse Eluanbi Lighthouse, making it a 520 km route instead. To get the certificate of completion, you have to complete the route within 28 hours. These two Challenges are so popular that on average there are more than 3,000 participants signing up for the events every year. I was one of them in 2020. It was such a wonderful experience! I have learned a lot and I would like to share with you in this post.

    Rules and Administration

    Participants can usually sign up and pay for the event online from 1 January to 30 June via the organizer’s website. Participant’s pack will be distributed 2 weeks before the event commences. A sticker with an IC chip will need to be stuck onto the helmet for the sensors at the starting point and finish line to mark your time. There are also 3 gates/checkpoints en route which the participants will have to pass by a certain time. As the roads won’t be closed for the event, participants will need to follow traffic rules like other normal road users. But there will be voluntary helpers stationed at important junctions to direct traffic.  A suggested route in GPS format is also available for download. 

    Supports

    The organiser provides essential support only, which includes transferring a small backpack for each participant from the starting point to the finishing point. No food nor drinks are served at checkpoints so you will have to prepare for your own. In case of emergency, participants can reach out to an emergency hotline for help. But everyone is responsible for arranging their own transportation home.

    The organizer recommends participating in groups so that it will become more affordable to hire support vehicles to provide services like supplies, repair and maintenance, luggage transportation, charging of phones and navigation devices, and the return trip home.

    But for a free soul like me, I prefer doing it at my own pace. I can get my own supplies from the convenience stores and small shops in the towns along the route. I am also able to fix any small issues with my bike if needed.

    Bike 

    Bikes used in this event were predominantly road bikes but there were also folding bikes like Bromptons. I think as long as your bike is comfortable for long rides, properly fitted and has enough gear ratio, it would be fine. 

    For me, I picked an Audax Hercules, a flat bar road bike from Rikulau specifically designed for long distance cycling. It is one of the most popular models in our rental fleet for multi-day rides. I could ride in a more relaxed posture on this bike for the long journey. And I wouldn’t need a drop bar for the benefit of aerodynamics as there would be prevailing winds from the north east to give me a push. 

    I supposed weight is not that important for this event as the route is mostly flat. Therefore I had packed everything I needed on the bike. 

    Accessories

    Lights were paramount. The event started at midnight and when we arrived at Kaohsiung, it would be dark again. We would need to cycle in the dark for more than 10 hours. The roads on the west coast are not well lit. Potholes and stones can ruin your bike or throw you off balance if you ride over them unexpectedly in the dark. I have a friend who crashed because of a small piece of stone when she was doing night training on that route. A big bright front light can provide you with better vision and help you go faster and safer. For safety’s sake, participants of the event are also required to wear reflective stripe vest when it’s dark.

    November is the wet season so you should prepare to cycle in the rain. Your spare clothes and electronic devices should be kept in watertight bags.

    My other advice is to load up your Easy Card for quicker transactions in the convenience stores. You may also keep some small change in hand so that you can buy water from those betel nut booths if needed. They can be found in the middle of nowhere and they have long opening hours, too.

    Training

    My goal was just to finish it within the required time. I didn’t think I needed any extra training as I had been cycling regularly and would cycle once or twice a month for routes more than 70km with elevation gain of 800 metres or so. The route of this challenge is rather flat with a short climb of 100 metres elevation gain. It shouldn’t be too difficult. Nonetheless, I did do 3 training rides on this route with my friends to see how my body would react to long rides. I had cycled from Taipei to Lukang (180km) twice, the first one during daytime to familiarize myself with the route and the second one at night just to simulate what I would need to do in the event. Then I did the second half from Taichung to Kaohsiung (200km) just to find out what to expect from the route.

    I was totally fine during those training rides except that my forefeet hurt a little bit after pedalling for numerous times. I expected that it should be easier in the event with the help of the wind in November. However, the full effect of cycling 360 km in one go was yet to be discovered. 

    After these three training sessions, I started to formulate a strategy. If my average speed was 25km/h, I would be able to cover 360km in 14.4 hours. I would then have 5.6 hours (20 – 14.4) for breaks and meals, which seemed to be quite sufficient. Even if I did it at a slower pace like 22km/h, I would still be able to cover the whole route in 16.4 hours with 3.6 hours to spare. So, I just needed to keep my speed well above 25km/h. And if It’s too hard for some parts, 22km/h was also good enough. Just take it easy lest I drive myself too hard and get hurt, this was what I had believed at the time. I would also need to keep myself awake for 20 hours. My strategy was to take a day off right before the event. I would start sleeping after lunch and then get up at 21:00 to start going to the starting point. For my friends, they planned to do it as fast as they could the first half when they still had the tail wind and then see what would happen.

  • Product Review: Audax Hercules from Rikulau Taiwan

    Product Review: Audax Hercules from Rikulau Taiwan

    このブログ記事の翻訳を進行中です。もうすぐ完成しますので、後ほど再度ご確認ください。ご不便をおかけして申し訳ありません。現在は、こちらで提供されているGPXルートや地図などの情報を自由にご利用ください。

    Audax Hercules from Rikulau, a flat bar road bike, is the most popular model in our fleet for multi-day cycling trips in Taiwan. I have been using one for more than a year now mainly to explore cycling routes in Taiwan, and also very intensively in Nov 2020 for a 360 km within 20 hour challenge that goes from from Taipei to Kaohsiung.

    Here is an introduction of some of the features of Audax Hercules.

    Frame

    The frame is made of Rikulau’s Hercules steel tubeset, which belongs to the 4130 Chromoly family. Chromoly steel is light and strong. While it flexes well and absorbs unpleasant shocks and vibrations, it maintains its forms, making the bike durable and easily remain at its peak performance even after numerous, prolonged heavy uses. 

    According to Rikulau, The raw material of the Hercules steel tubeset is from the renowned Nippon Steel (Japan). Precision extrusion, heat treatment and all other processes are done in Taiwan to assure the precision level required by Rikulau is achieved. 

    The frame size available in our fleet ranges from XXS to XL with effective top tube length from 495mm to 570mm. If your height is 150cm or more than 185cm, you will find a bike with the correct size for you.

    The geometry of the Audax series is optimized for comfortable long distance rides, and our fleet of Audax Hercules is specifically configured to adapt to the different road surfaces and terrains in Taiwan, which makes them ideal for exploring the island.

    Wheelset

    The 700c wheelset is strong and can carry around 100kg of loading. The tyre width of 25/28c enables the bike to run efficiently on most cycling routes in Taiwan, mainly consisting of intracity and intercity roads and designated bike trails. They are usually paved with asphalt or cement, both perfect matches for road bikes. But some segments may get damaged because of weather or heavy uses, and are not always repaved in time. There are also segments of roads that are decorated with wood stripes or bricks, making them rather bumpy. That’s why we err on the wider side of the tyre width. 

    We use clincher tyres (with inner tubes) for easier and quicker roadside fixes in the case of punctures. Replacement tools and spare tubes are included in our rental package. But we hardly have any clients returning with punctured tubes because those tyres are puncture resistant. 

    The wheelsets are attached to the bike with quick release skewers so that you can remove the wheels and bag your bikes easily when boarding public transportation in Taiwan.

    Groupset

    Audax Hercules comes with Shimano Tiagra, a mid-range groupset made for endurance, sports and fitness, or Apex, its SRAM equivalence. The compact chainring on the bike (50/34, front) runs with a 11/32 cassette (rear) instead of the 11/28 cassette found on most road bikes. The 32-teeth sprocket at the rear wheel gives you more leverage to climb steeper slopes or to press against the head wind. When it is set to the gear combination of 50 teeth with 11 teeth, for each turn you made on the crankset, you turn the rear wheel by 4.54 turns and a normal fit person can usually pedal at the speed of 60 turns per minute (cadence). The groupset and the wheelset will then make you travel at 34.95km/h. Of course, you could pedal faster to race with the tail wind or add some more speed when you are diving down from the hills.

    TerrainGear SettingChainring (front)Cassette Sprocket (rear)Gear Ratio
    HillyLowest Gear30-tooth for 3x crankset32-tooth0.9375
    HillyLowest Gear34-tooth for 2x crankset32-tooth1.06
    FlatHighest Gear50-tooth11-tooth4.54

    Here’s the maths:

    50/11 (gear ratio) X 2.136 (tyre circumference) X 60 (Cadence RPM) X60 (convert to hour) = 34,952 metre/hour

    With 2 chainrings and 10 speeds at the cassette, you have 20 combinations of speed to choose from. Some of the bikes in our fleet come with three chainrings (50/39/30), which gives you an even wider range of gear ratio and more choices of speeds (30).

    After each use, the bikes are sent back to the workshop of our partner Rikulau, manufacturer of the bikes, for thorough cleaning, oiling and tuning to keep them at their peak performance. 

    One of our customers commented on our bikes:

    Honestly the bikes were way better than we had expected! You guys maintained the Tiagra groupset like a charm, I had never had such crisp shifting experience on rental bikes 🙂

    Handlebar Grips

    The Velo ergonomic grips have a broad surface to provide comfortable support to your hands. The “L” shaped grip gives you one extra position to hold the handlebar so that you can relax your wrists by rotating between different positions during long rides. 

    Saddle

    The road bike saddles that come with Audax Hercules have narrow noses to avoid chafing when pedalling for hours. The saddle position can be fine tuned to support your seat bone properly. As mentioned in the beginning of this review, I had spent close to 20 hours on an Audex Hercules in a 360km challenge and my butt did not complain.

    There is a quick release on the seat post clamp for you to adjust the height on the fly. There is also a thumb screw on the other side to adjust the pressure of the quick release so that you can make sure the desired height is firmly secured. 

    Pedal

    The pedals found on our Audax Hercules are made-in-Japan Touring lite ezy superior from MKS. According to the official website, it “features MKS’s High-Polished Cup and Cone bearing system for smooth rotation and serviceability, combined with a directional wave shape tooth profile on the step plates to keep your foot from slipping without the need for straps or toe-clips”.

    If you prefer, you can also bring your own clipless pedals.

    A versatile bike made for Taiwan 

    With the aforementioned built and configuration, Audax Hercules is a good looking, versatile bike that is easy to manage for beginners and works brilliantly for more experienced cyclists. It also stays in good shape during your multi-day cycling trips. We provide a smartphone case, a repair tool kit for inner tube replacement, an optional pannier with a pair of saddle bags.

    We have customers hiring the bike for leisure rides on the Riverside Bikeways in Taipei, for exploration of small townships in the rural areas, for the classic route of around-the-island, for sprinting along the coastlines, for bikepacking in the Huadong Valley, for climbing the mountains and enjoying the tranquilizing dive from the tops… you name it. Audax Hercules have proved to be a great companion for all of them. Here are some examples of the configuration and the accessories with the the bike.

  • Cycling Route: Fengzhongjian – Climb Training

    Cycling Route: Fengzhongjian – Climb Training

    このブログ記事の翻訳を進行中です。もうすぐ完成しますので、後ほど再度ご確認ください。ご不便をおかけして申し訳ありません。現在は、こちらで提供されているGPXルートや地図などの情報を自由にご利用ください。

    Fengzhongjian 風中劍 is a 24km cycling route linking up a numbers of roads sprawling across Shilin District 士林區 and Neihu District 內湖區 of Taipei City. It comes with three peaks at 160m, 321m and 600m respectively, and therefore ideal for climb training. The downloadable GPX file of this cycling route is at the end of this post. 

    Its usual starting point as set in this post, Meiti Evacuation Gate, is less than 8km from most parts within the city and easily accessible via the Riverside Bikeways, which also helps make the route popular among Taipei cyclists. After each climb, you can decide whether to keep going or not, subject to your own preference, capability, or time constraint etc. The name of this route, Feng Zhong Jian, is coined by the local cycling communities by taking the first character out of the names of the major roads and locations (Fengguizui, Zhongshe Road, Jiannan Road) that make up this route. The coinage ends up with a hint of grandeur, carrying the meaning “Sword in the Wind” in English.

    Meiti Evacuation Gate is one of the access points to the Riverside Bikeways in Taipei. I can’t emphasize enough how enjoyable these bikeways are with their motor vehicle free and traffic light free paths, tranquilising views offered by the surrounding rivers and grasslands, and their vast coverage. You may refer to this post to find the access point closest to your location and have a nice warm up before the climb. Then the GPS links available at the end of this post will guide you through the route from Meiti Evacuation Gate.

    Jiannan Road 劍南路

    The first climb you would soon encounter after leaving Meiti Evacuation Gate is Jiannan Road. It is short with little elevation gain. The climb from the southern side is steeper than from the northern side. An elevation gain of 145m in 2.25km means you have an average gradient of 6.4%. Traffic is not busy on this road. Besides some fellow cyclists, you may also meet hikers occasionally. When you see the sign of Wugang Barrack 武山營區, you would have finished half the climb. When you reach the top, there will be a simple shelter for you to take a break.

    After that, head north and descend to Zhishan Road 至善路. On this side of the hill the road surface could sometimes be wet as water overflows from the drainage during wet season or after days of rain. There is also a sharp narrow turn. So, take it easy when you do it the first time. 

    When you reach Zhishan Road, you are at an elevation of 50m. Turn right for Zhongshe Road for the next climb.

    Zhongshe Road 中社路

    An elevation gain of 250m in 3.9km makes an average gradient of 6.2%. It is a cul-de-sac leading only to the residents up the hill. There are buses and cars occasionally. But it is totally fine when climbing because the road is wide with a shoulder that serves as a bike lane. At the top, there is a trail for hikers and a portable toilet. 

    Descending on Zhongshe Road is fun because there are several wide hairpin turns. But be careful with the cars and buses as we will use more road surface for turns and some cars may try to overtake bikes.

    Back to Zhishan Road, it’s time to head for the last climb.

    Fengguizui 風櫃嘴

    Shuangxi Industry Road 雙溪產業道路 and Wanxi Industry Road 萬溪產業道路 make up the climbing route to Fengguizui Lookout. An elevation gain of 412m in 6.4km makes an average gradient of 6.4% again. Although this climb is longer with more elevation gain, I found it the most enjoyable and it is one of the most popular cycling routes in Taipei.

    When you reach the top, the GPX route provided here will bring you back to Zhishan Road and the Riverside Bikeways via the National Palace Museum, using the same route that you have just climbed. Zhishan Road will reward you with a mild long descent but please be aware of the thick rumble strips, which could shake your hands off from your handlebars. So hold them tight.

    Another post for Fengguizui here

    Fengzhongjian is one of my favourite because it offers a lot of flexibility, especially for those who do not have a whole day for cycling or who are not yet competent in climbing. You can always decide when you want to stop and turn around. The route is also so accessible that some people do it in the evening.

    But if you have time to spare and don’t like returning on the same route, you may head south east after Fengguizui, which will lead you to Dahu Park 大湖公園 in Neihu District of Taipei City (TP28 → Dahu Street 大湖街) or Xizhi 汐止 in New Taipei City (TP28 → TP29) . The route to Dahu Park is quite steep while the route to Xizhi is more agreeable, wide and well maintained. 

    You may also head north along TP28 for the north coast and do a counter-clockwise route to return to Taipei via Tamsui District. There are many points of interests en route and will probably take up a full day.

    Route:

    NOTE: To use the routes, please install the App on your smartphone. The App will launch and load the route automatically after you tap the above links on your smartphone’s browser. For Garmin Connect, you can then use the APP to send the route to your garmin device. If your Garmin device is not purchased in Taiwan, you will also need make sure you have the Taiwan map on your device. Here is our blog post on this topic.

  • Cycling Route: Yulao Lookout – Climb Training

    Cycling Route: Yulao Lookout – Climb Training

    このブログ記事の翻訳を進行中です。もうすぐ完成しますので、後ほど再度ご確認ください。ご不便をおかけして申し訳ありません。現在は、こちらで提供されているGPXルートや地図などの情報を自由にご利用ください。

    On a Friday in October 2020, I went cycling from Yingge District 鶯歌 to Yulao Lookout 宇老觀景台 (altitude 1500m) via the Northern Cross-Island Highway 北部橫貫公路 / 北橫, and then descended to Hsinchu High Speed Railway Station 新竹高鐵站. It was a 127km route with a maximum elevation of 1500m, plotted by my friend Sandy, who would be joining a cycling event the next day in Zhudong Township 竹東鎮 with her friend Teresa. The downloadable GPX file of this cycling route is at the end of this post. 

    She wanted to challenge herself by climbing to the lookout en route. She invited me to join them because the two ladies wanted a guy for company in the wilds. The route looked much like the one we did in Dongyanshan 東眼山, which I had enjoyed a lot. So I immediately said yes without putting much thought into it nor doing any further research. 

    We took a train from Taipei to Yingge and started our trip there at 7:00 am (more details about bikes on public transportations can be found here). We made good progress and merged with the Northern Cross-Island Highway at San-min before 9:00. Then we had some supplies in the convenience store Hilife at Jiaobanshan 角板山. Toilets are available in the gas station nearby. Beyond this little town, the only supplies available (bottled water and soft drinks) will be from those small stalls outside the settlements of the indigenous tribes along the road. From the two Fuxing Bridges 復興橋,  I saw some big trucks on the river bed loading up sand. That explained why there had been heavy trucks passing by occasionally.

    After hanging around there for some photos, Sandy found that she got a flat tire on her tubeless wheel. The sealant inside could only slow down the leaking, so I fixed it by installing an inner tube and at the same time gave the ladies a short course on how to do it. 30 minutes later, we were good to go.

    The Northern Cross-Island Highway (Provincial Highway No. 7) linking Taoyuan to Yilan is one of the three cross-island highways that connect the island’s east coast to its west coast by climbing over the Central Mountain Range 中央山脈. The other two are the Central Cross-Island Highway 中部橫貫公路 / 中橫 (Taichung to Hualien) and the Southern Cross-Island Highway 南部橫貫公路 / 南橫 (Tainan to Taitung supposedly). While the Central Cross-Island Highway becomes so famous because of the Taiwan KOM Challenge, the Southern Cross-Island Highway is still being reconstructed after damages caused by a typhoon in 2009. Some sections of the highway are reopening and attracting many cycling enthusiasts.

    With a total length of 130km and maximum altitude of 1250m, the Northern Cross-Island Highway is so enjoyable and suitable for cycling that I sometimes wonder if it was built especially for bikes. Road surfaces are well maintained except for some sections with the hazard of falling rocks.

    We had a great time cycling in the gorge and reached a junction called Sule 蘇樂 for lunch before 14:00. The small restaurant there was open and serving hot meals. Lucky! At that time, we had covered 53km and reached 660m altitude without spending too much effort on climbing. Yulao Lookout was around 25km away and there was around 900m to climb. And once we reached the top, we just needed to glide back to the ground level without pedalling.

    After lunch, we left the Northern Cross-Island Highway and turned to Yufend Road 玉峰道路  (TY113 or 桃113 and then 竹60-1 or HC60-1) for Yulao Lookout and then Zhudong Township, the east fringe of Hsinchu. The views were even better and we had the whole route to ourselves. Sandy was in the mood of taking short detours to find indigenous tribes settlements and take photos for her social media account. I told Teresa that we might have to descend from Yulao Lookout in the dark because the sun sets around 17:30 in October.

    The mild slopes in front of us fooled us into believing that the route ahead would be easy. Then, we hit the real climb after Yufeng Bridge 玉峰橋. It is a 750m gain in 10km to reach Yulao Outlook, an average gradient of 7.5%. We had long passed the point of no return. We had no choice but to keep going. I was not worn out yet but I needed to get off and push the bike half the time. I needed to be conservative lest I got spasm on my legs. We finally made it to the top to catch the last glimpse of sunlight at around 17:45. All the stalls were closed. Even the police station was vacant. 

    Then it went dark completely when we started to descend. The 20km of 8% downhill slope ahead was not lit. The countless hairpin turns made the descending even trickier. We had bike lights but they could not light up the road far enough. If we went too fast we would not have enough reaction time and could have thrown ourselves into the bush or rocks on any one of the sharp turns. On the other hand, my inability to descend with my hands on the drops had created another problem. I have only been using drop bar road bikes for less than 2 years. I can only do a decent with my hands on the hoods, where the braking leverage is substantially less than that on the drops. Therefore I had to squeeze the brakes very hard to limit my speed because of the slope and poor lighting. Soon I was losing my gripping power. We had to take breaks regularly for my hands to recover. The effortless downhill dive I had imagined turned out to be a survival challenge. There were cars passing by though I had no idea where they came from. One gentleman rolled down his window and yelled “Jiayou 加油” at us to give us some moral support. Thank you! That really helped. I meant it.  At least he did not say that we were stupid. 

    Sandy was not bothered by the aggressive downhill slope even though she could only cycle with her hands on the hoods, too. It’s probably because she weighs around half my weight. Less braking force was needed to control the speed. But she started to worry about the lights. We did not expect to be stuck in the mountain like this and we did not know how long the lights would last because we could not recall when was the last time we charged them. Anyway, this was just a potential problem. We should focus on getting back to the ground level. After something like forever, we finally saw a betel nut stall, the first sign of civilization. I stopped to buy a bottle of water just to reconnect with other human beings. The road was still not lit but the slope got milder which was easier to handle. Then, we were back to those well lit county highways and were able to pick up some speed to get to Zhudong Township, where the two ladies would stay overnight for the event next day.

    After a quick dinner, they went to collect their luggage from a convenience store before checking in to a hotel. They used the courier service of the convenience stores to send their stuff over so that they wouldn’t need to carry the luggages while cycling. For me, there were buses bound for Taipei that could take my bike, but I decided to take the High Speed Railway instead because it is much faster and I live close to one of the stations in Taipei. So, I hopped on my bike and cycled 12km more to the Hsinchu HSR station. When I reached the station, it was around 3.5 hours after we left Yulao Lookout. In an hour, I would be home.

    It is an unforgettable cycling trip. I will definitely try to complete the Northern Cross-Island Highway in the future. But we have to be more careful when planning for a long cycling trip in an area where the population is so sparse. We were really lucky this time. There were many things that could have gone wrong. What if the restaurant was not open? We would have to climb with empty stomachs.  What if it got cold and wet when we were heading down from the top? Our fingers would have been frozen and unable to control our speed. What if either one of our lights were out of battery… 

    Be well prepared. I don’t just mean your bike, but also your muscles. Fuel them with plenty of carbohydrates. Don’t follow your friends blindly. They don’t know your limits. Study the route beforehand and plan your time carefully. This is a lesson I learned from this trip. 

    Routes:

    NOTE: To use the routes, please install the App on your smartphone. The App will launch and load the route automatically after you tap the above links on your smartphone’s browser. For Garmin Connect, you can then use the APP to send the route to your garmin device. If your Garmin device is not purchased in Taiwan, you will also need make sure you have the Taiwan map on your device. Here is our blog post on this topic.

    Afterwords

    After writing this post, I learned the story about Daniel Greenhoe, an American PhD student studying in Hsinchu years ago, who once volunteered to teach English in a small primary school in Shihlei 石磊, after learning that the school was struggling to find an English teacher to teach the kids of the indiginous Taiya tribe. He started to travel the 60km with 1700m of climbing in the small hour of every Monday for 3 years. The vehicle he used was a mountain bike. The route he climbed was the one that had freaked me out when I was descending.

    More details here:

    https://www.taipeitimes.com/News/taiwan/archives/2006/01/17/2003289400

  • Product Review: SPIN UP F12W-PRO Bicycle USB Charger Dynamo from SunUp Eco (3)

    Product Review: SPIN UP F12W-PRO Bicycle USB Charger Dynamo from SunUp Eco (3)

    このブログ記事の翻訳を進行中です。もうすぐ完成しますので、後ほど再度ご確認ください。ご不便をおかけして申し訳ありません。現在は、こちらで提供されているGPXルートや地図などの情報を自由にご利用ください。

    The bike dynamo with its Intelligent Power Management System (IPMS) can pump out a stable 1A current from its 5V USB port when the speed of the bike reaches 15-17km/hour.  I have done some field tests to find out its charging performance with an iPhone 11 Pro in different scenarios, including when the phone is in Airplane mode with no Apps running, when the phone is in Non-Airplane mode with no Apps running, when the phone is in Non-Airplane mode and used for navigation and tracking, and when the route involves some climbing. I also did a test with a USB wall charger for comparison. At the end of this post, I will share some tips on how to get the most from the Dynamo for charging.

    Here is my setup for the test: 

    • My iPhone 11 Pro mounted on the handle bar
    • A bike meter on the left to monitor my speed and to record the timestamp of the data collected
    • A USB power meter to monitor the charging current, voltage and energy fed to the phone

    How long does it take to charge an iPhone 11 Pro from flat to full with a SPIN UP F12W-Pro?

    I did the test by draining all the power from my iPhone’s battery and charging it with the bike dynamo whilst cycling on the Taipei Riverside Bikeways at the speed of around 17km/h. When the phone was booted up, it was automatically set to Low Power mode. I then put it on Airplane mode so that the test result wouldn’t be affected by the conditions of the mobile cellular network especially when the cell phone is moving, like my distance from the base station, how frequent the phone needs to switch over to the next base station, and are there any barriers between the phone and the base station, etc. When the battery level had reached 80%, the iOS was automatically switched back from Low Power mode to Normal mode. 

    Turned out it took a bit more than 3 hours to charge an iPhone 11 Pro from flat to full. Here is the full record.

    Table 1: iPhone in Low Power, Airplane mode charged by SPIN UP F12W-Pro
    Record TimeTime Elapsed / Total Time ElapsedMeter Reading (mAh)Battery Level (%)
    19:550:00 / 0:0000
    20:450:50 / 0:5080130
    21:330:48 / 1:38158460
    22:2400:51 / 2:29241390
    22:590:35 / 3:042705100

    You may have noticed that the voltage of the USB meter is around 4.6V-4.7V in the pictures. It is because I needed to stop cycling to take pictures. When the bike is not moving, the USB port will be powered solely by the dynamo set’s built-in reservoir battery. When it is moving at an average speed of 16km/h, the reading will be slightly more than 5V.

    I have done another test with the iPhone put on Low Power, Non-Airplane mode. The result shows that it took 4 hours and 13 minutes and needed 3420 mAh (as compared to 2705mAh in the Airplane Mode test) to bring the battery level to 100%. It is because when the wireless systems, including Wifi, Bluetooth and cellular network, are ON in the non-airplane mode, the iPhone consumes more energy. Also when the iPhone is on the move, it moves from cell to cell covered by different base stations of the cellular network systems. That means it needs to talk to the network more frequently to negotiate for a new base station for connection, which will in turn require more energy.

    Table 2: iPhone in Low Power, Non-Airplane mode charged by SPIN UP F12W-Pro
    Record TimeTime Elapsed / Total Time ElapsedMeter Reading (mAh)Battery Level (%)
    18:270:00 / 0:0000
    19:301:03 / 1:03100530
    20:341:04 / 2:07204861
    21:401:06 / 3:13307890
    22:401:00 / 4:133420100

    How is it compared to a 1A USB wall charger?

    In order to make a comparison, I used this 1A USB wall charger from Apple to charge the same iPhone with a drained battery. Same as the previous test, I manually put the phone to Airplane mode after it booted up at Low Power mode. And again, the iOS was automatically switched back to Normal mode when the battery level had reached 80%. Here is the full record.

    Table 3: iPhone in Low Power, Airplane mode charged by Apple 1A USB wall charger
    Record TimeTime Elapsed / Total Time ElapsedMeter Reading (mAh)Battery Level (%)
    14:130:00 / 0:0000
    15:100:57 / 0:5791831
    16:000:50 / 1:47175060
    16:580:58 / 2:45261390
    17:510:53 / 3:382807100

    As you can see, to charge my iPhone 11 Pro from flat to full, it took the USB wall charger 3 hours 34 minutes, more than the time required for SPIN UP F12W-Pro, which is 3 hours and 4 minutes. It also appears that more energy (2807mAh vs 2705mAh) is required for the wall charger to fully charge the battery.

    Conclusion: When the bike is traveling at an average speed of 17km/h, the SPIN UP F12W-Pro is able to serve as a stable power source and charge my iPhone from flat to full within the time range of a 1A USB wall charger from Apple.

    How about when the iPhone is running some Apps?

    On a September morning, I cycled on the Riverside Bikeways with my iPhone connected to the SPIN UP F12W-pro. Strava and Google Maps were launched to track my activity and for navigation. The screen was on the whole time with brightness level at around 80% for the first hour. At 9:53 when I started cycling, the battery level was 17%. About an hour later at 10:57,  the battery level reached 27%. The reading on my USB meter was 1007mAh. That means, even when the iPhone was in heavy use, SPIN UP F12W-Pro could still raise the battery level by 10% in an hour. From a previous experiment as shown in Table 2, we’ve learned that the dynamo can raise the battery level by 30% in one hour when the iPhone is ON and standby (Low Power, Non-Airplane mode). So, we can deduce that about two thirds of the charging power was consumed by the two apps and the screen.  

    Then, I left the two apps on but kept the screen off and cycled for another hour. At 11:59, the battery level was 56% (gained by 29%). It shows that when the two apps were running with the screen off, they consumed much less energy.

    Table 4: iPhone in Normal, Non-Airplane mode charged by SPIN UP F12W-Pro, with Apps running
    Record TimeTime Elapsed / Total Time ElapsedMeter Reading (mAh)Battery Level (%)Battery Level Gained (%)AppsScreen
    09:530:00 / 0:00017Strava, Google MapsON the whole time with 80% brightness
    10:571:04 / 1:0410072710%Strava, Google MapsON the whole time with 80% brightness
    11:591:02 / 2:0620155629%Strava, Google MapsOFF most of the time and ON occasionally

    Conclusion: The SPIN UP F12W-Pro’s stable 1A output can raise the battery level even when the Phone is in heavy use.

    How about when we are not cycling on a flat road? 

    On the flat Riverside Bikeway, the Spin Up F12W pro is capable of charging my iPhone 11 from flat to 90% in 2:49 and to 100% in 3:04. The performance is just like an 1A Apple USB wall charger. It could also power the iPhone when it is running Apps and at the same time put more energy into the iPhone’s battery. 

    How about when we are cycling on hilly routes? To find out, I plotted a 88km route with three 3 peaks (211m, 283m and 721m) to see how it goes. During the cycling trip, I used my phone the way I normally do and charged it with the Dynamo while I was cycling.

    My Strava record for this test here

    Here is the full record. 

    Table 5: iPhone in Normal, Non-Airplane mode charged by SPIN UP F12W-Pro, at different activity levels
    Record TimeMeter Reading (mAh)Battery Level (%)Activities
    9:3909Start Cycling
    10:0829317After a short urban ride and a short breakfast break
    10:3466725First climb, reached the first peak (211m)
    10:3974026Descended from the first peak
    11:51173952After the second climb, long but mild
    12:49173941Lunch break
    13:10201749Right before the third climb
    15:01229938After the third climb, reached the top and took lots of pictures
    15:26264348Descended from the top
    17:15397577Return leg, 27km of intracity cycling

    During the first climb, the charging light was ON the whole time even when my speed dropped below 10km/h. The second climb was long and mild. My speed was well above 15km/h and the battery level was raised by 26%. The third climb was even longer and steeper. I gained 540m to the Wufenshan Meteorological Radar Observatory at the elevation of 721m. The charging light was OFF most of the time because of my low speed. I also spent a long time taking lots of pictures with my iPhone at the top. So, even though I managed to put 282mAh energy into the battery, the battery level dropped to 38%. 

    My 27km return leg was a flat, intracity ride mainly along Provincial Highway 5A. When I was home, the readings were 3975mAh on the meter and 77% on my iPhone battery.

    I went out for a 88km hilly route with the battery level at 9% and was home with a battery level of 77%. I no longer need to worry about draining my smartphones’ battery when I have a SPIN UP F12W-Pro.

    How to Get the Most Out of a SPIN UP F12W-Pro?

    While the SPIN UP F12W-Pro is designed to work in various harsh conditions, it may not be the same for our smartphones. We will need to take good care of our smartphones when they are being used in an outdoor environment so that they can take in the maximum power from the dynamo.

    Charge the Hungry Device First

    One tip about battery charging is, when the battery level is close to full, it will take a lot more time to fill up the remaining capacity. As shown in our previous experiments, the average time needed to charge the phone from 90% to 100% is much longer. So, if the battery level of the phone has already reached 90% or so and you have another phone with lower battery level, it’s probably wiser to charge the other phone instead. You will make better use of your charging time and the Dynamo.

    Keep the Phone Cool

    Lithium ion batteries are meant to be charged at cool temperatures. We need to keep our smartphones in well ventilated places and avoid long exposure to direct sunlight in order to prolong the life of the lithium ion batteries within. The handlebar or the stem is usually a good place for the smartphone because we can use it while cycling and sunlight is often blocked by our body. It can also be kept cool by the apparent wind. However, if during summer and my shadow is not covering the phone, I would often tilt the phone until only one of its edges is facing the sun, so as to minimize the impact of direct sunlight. It helps to keep my smartphone as cool as possible. 

    A Bright Screen is also a Heat Source

    The screen, when turned on, is another heat source especially when it’s being used in broad daylight, because the brightness level of the screen will be maxed out for clearer display. It also means more energy is being consumed by the screen and more heat being generated. So, when it’s hot, keep the screen off as much as possible. 

    There were times when I had to cycle under the heat in the Summer days of Taipei. I set my iPhone with only its edge facing the sun and its screen turned off. The charging current was at 1A, meaning that the phone was still able to be charged with maximum power available. Then once I received and finished a quick phone call during one of these rides, the USB meter showed that the charging current dropped. When the screen was off, the charging current almost dropped to zero and the screen felt hot to the touch. The phone must be overheated so that it couldn’t be charged. After I found shelter and wiped the screen with a piece of wet cloth to cool it down, the charging current resumed to normal. 

    There were also a couple times when I cycled with my phone facing upward and the screen turned on for navigation under the heating sun. The current shown on the meter was around 0.5A even when I was travelling at the minimum required speed. The battery level was not rising. The screen was hot because it was heating up by itself and the sun at the same time. This made the phone too hot to be charged. But why was the phone still accepting the current from the Dynamo? And why was the battery level not dropping either? My conclusion is the phone must be tapping the power source for immediate consumption, like powering the screen. Therefore for those who need to use their phone while cycling, they can still preserve the energy in the battery if they use a Dynamo.

    Use a Clean Connector To Maximize Charging Performance

    Another possible issue that would hinder the charging process is the oxidized pins of the connector. I had once used the lightning connector shown in the picture. Even when the charging status was ON, the current was not stable and fluctuated between 0.5A to 1A. Therefore it’s important to use a clean connector for maximum charging performance.

    Keep the Connectors Dry

    The SPIN UP F12W-Pro dynamo set (including the dynamo on the wheel and the USB charging unit) is water resistant with a rating of IPX4. I have cycled with the dynamo set in heavy rains several times. I have also washed my bike with the dynamo installed on the wheel but the USB charger unit removed. So far no harm has been done and the dynamo set is working totally fine. On the other hand, my iPhone is water and dust resistant with a rating of IP68. However, it is not supposed to be charged when it is wet. It can even tell when the lightning connector is wet and subsequently suspend the charging process. So, when you are out cycling in the rain, it may be a good idea to charge your phone in a waterproof bag and make sure it is dry.

    More Room For the Connectors

    I used to mount my iPhone on the centre of the handlebar. Once I had the lightning connector bumped against the stem when I rolled over an uneven road surface at high speed. That’s how I got a broken lightning cable as shown in the picture. The lesson is: make sure you have enough room for the connector or tilt the phone horizontally.

  • 台湾で自転車を公共交通機関に持ち込む方法

    台湾で自転車を公共交通機関に持ち込む方法

    [この記事の最終更新:2025年11月]

    自転車を持って移動する際、台湾ではさまざまな公共交通機関を利用できる。私の経験をもとに、台北MRT、桃園MRT、都市間バス、高速鉄道、台湾鉄道への自転車の持ち込み方法を紹介する。

    桃園MRT・台北MRTでの自転車持ち込み

    一部の例外的な駅を除き、桃園MRT台北MRTは、平日10:00~16:00と週末・祝日は終日、輪行袋なしで自転車を持ち込むことが可能だ。さらに、2022年6月20日から台北MRTでは平日22:00以降の時間帯にも自転車の持ち込みが可能 となった。

    利用方法

    • 乗車券はサービスカウンターで購入する。
    • スタッフが案内し、専用の入り口 から改札内に入る(通常、サービスカウンターの隣にある)。
    • 階段やエスカレーターの利用は禁止 されているため、エレベーターを使用 する。
    • 自転車は先頭車両と最後尾車両のみ乗車可能。
    • 他の乗客の邪魔にならないように配慮し、安全確保を心がけること。

    降車時の手続き

    • 改札を出る際は、サービスカウンターで自転車のチケットを返却 し、再び専用の入り口 から駅の外に出る。

    私は主に週末にこのサービスを利用 している。通常、列車内はあまり混雑していないが、例外的に混雑する場合もある。特に乗り換え駅に近づくと、乗客が増えて自転車の取り回しが難しくなることがある。例えば、紅樹林駅で乗車した際、最初は空いていたが、市中心部に近づくにつれ乗客がどんどん増え、乗り換え駅で降りられなくなったことがある。また、観光エリアの駅(例:西門駅)は特に混雑しやすい。これらの駅では、ベビーカー、年配の乗客、大きなスーツケースを持った観光客が多く、エレベーターの利用も非常に混み合う。そのため、こうした駅で乗降するよりも、一つ前または一つ後の駅で乗り降りする方がスムーズ になることが多い。

    以下の駅では輪行袋なしでの自転車持ち込みは禁止 されている。リストは随時更新する予定だが、最新の情報は台北MRTの公式ページで確認することを推奨する。

    輪行袋なしで自転車持ち込み不可のMRT駅

    • 文湖線および環狀線の全駅
    • 淡水站
    • 台北車站
    • 忠孝新生站
    • 大安站
    • 忠孝復興站
    • 南京復興站

    高雄MRTでの自転車持ち込み

    高雄MRTでは、オレンジラインとレッドラインで営業時間内はいつでも自転車の持ち込みが可能だ。

    利用方法

    • 駅のサービスカウンターでチケットを購入 (自転車+乗客でNTD 60)
    • エレベーターまたはスロープを利用してプラットフォームへ移動
    • 列車の最前車両(First Car)に乗車する(台北や桃園MRTとは異なり、最前車両のみ利用可)

    詳しい情報は公式サイトを参照:高雄MRT公式ページ

    高雄は交通量の多い都市だが、MRTを利用することで市街地の混雑を避けてスムーズに移動できる。

    都市間バスでの自転車持ち込み

    台湾の6大直轄市 やほとんどの中規模都市には「バスステーション」が設置されている。毎日、数多くのバスがバスステーション間を高速道路 を通って運行しており、鉄道や国内線の航空路線を補完する広範な都市間バスネットワーク を形成している。

    主な都市間バスの運行会社

    • 國光客運
    • 統聯客運
    • 阿羅哈客運
    • 和欣客運
    • 日統汽車客運

    これらのバスには通常、座席デッキの下に大きな荷物収納スペースがあり、トイレも完備されている。各バス会社は自転車の持ち込みに関する独自のルールを設けている。輪行袋なしの自転車を荷物収納スペースに置けるが、乗客運賃の半額が追加料金としてかかる場合がある。輪行袋に収納すれば無料で持ち込み可能な場合もある。私は週末にこのバスを利用したことがあるが、荷物収納スペースはほとんど空いていた。

    夜行バスの利用について

    台北と高雄・台南などの南部都市を結ぶ夜行バスも運行されており、リクライニングできる広々とした座席で寝ながら移動可能。以前、深夜0時発の台南行きの夜行バス に乗車し、車内で仮眠を取ってからサイクリングを開始しようとした。しかし、高速道路の街灯の点滅がまぶしく、アイマスクが必須だった。なんとか寝ることができたが、午前3時30分に運転手に起こされた。予定では5時間の移動だったが、深夜の交通量が少ないため、わずか3時間で台南に到着してしまった。

    公式の都市間バス情報はこちら台湾観光局 – 都市間バス概要

    台湾高速鉄道での自転車持ち込み

    台湾高速鉄道(HSR)は西海岸を縦断し、台北と高雄を効率的に結ぶ移動手段である。台湾鉄道(TRA)や都市間バスで台北〜高雄を移動する場合、4〜6時間かかるが、HSRなら最短1時間45分で到着できる。

    HSRでは、自転車を持ち込む場合は輪行袋に収納し、前後の車輪を取り外す必要がある。さらに、以下のサイズ・重量制限を満たす必要がある。

    • 各辺の長さが150cm以下
    • 幅・長さ・高さの合計が220cm以内
    • 重量40kg以下

    車内での自転車の保管

    • 列車内では、自転車は各車両に設置されている大型荷物専用スペースに置く必要がある。
    • ただし、荷物スペースがすでに埋まっている場合 は、最後尾の3列シートと壁の間のスペースに自転車を置くことも可能。ただし、このスペースは正式な荷物置き場ではない点に注意。

    自転車トラベルケースのサイズ制限と座席予約について

    220cmの制限を超える自転車トラベルケースを持っている場合、1~5号車の指定席を1席または2席購入することで持ち込むことが可能。ただし、ケースの寸法には以下の制限があり、HSRが発表するピークシーズンにはこのオプションは利用不可。

    • 高さ:120cm
    • 長さ:100cm
    • 幅:35cm
    • 高さ+長さ+幅の合計:240cm以内
    • 重量:40kg以内

    2020年の台湾高速鉄道(HSR)の自転車持ち込みルール変更 について、Diane Sさんからのメールで情報を得た。その後、HSRの公式ウェブサイトを確認し、カスタマーサービスに問い合わせた結果をもとに、このセクションを2021年5月7日 に更新した。正確な情報の維持にご協力いただいたダイアンさん、ありがとうございます!

    台湾鉄道での自転車持ち込み

    台湾鉄路管理局(TRA)は、台湾全域をカバーする広大な鉄道ネットワーク を運営している。私はサイクリング旅行の際に最もよく利用する交通手段だ。TRAは、列車の設備やルールの面でより自転車フレンドリーな環境を整備 しているが、公式ウェブサイトの情報は分かりにくいことがある。そこで、ここでは基本情報を簡単にまとめる。

    このセクションの最後に、最新の情報を公式サイトで確認する方法も紹介する。

    輪行袋に収納すればすべての列車に持ち込み可能

    輪行袋に収納すれば、すべてのTRAの列車に自転車を持ち込める。持ち込み可能なサイズ制限は、台湾高速鉄道(HSR)と同じ である。

    • 各辺の長さが150cm以下
    • 幅+長さ+高さの合計が220cm以内
    • 重量40kg以下

    注意点

    • 乗客自身が自転車の管理を行い、他の乗客の迷惑にならないようにする
    • 普悠瑪号(Puyuma Express)に乗車する場合は、1号車または8号車の「大型荷物スペース」に自転車を置く必要がある
    • TRAは自転車の安全管理に責任を持たない

    台北周辺の小さな町で日帰りサイクリングをする際には、通常、ローカル列車/準急列車(區間車)を利用する。これらの車両は地下鉄に似ており、中央部分が広々としている。この列車はほぼすべての駅に停車し、通常1時間に3~4本運行されている。切符のシステムも地下鉄と似ており、乗車日と出発駅・到着駅のみが記載されている。座席指定や列車番号の指定はなく、どのローカル列車にも乗車でき、座席は先着順となる。週末の早朝に出発することが多く、大きな荷物(輪行袋に入れた自転車)を持っていても、列車が混雑していることはほとんどない。通常、写真のように自転車を置くことができる。しかし、ラッシュアワーの時間帯では状況が異なる可能性がある。

    私はこれまで、對號列車(座席指定列車)、つまり普悠瑪号(Puyuma Express)、莒光号(Chu-Kuang Express)、自強号(Tze-Chiang Limited Express) に自転車を持ち込む機会がなかった。これらの列車は運行本数が少なく、大きな町にしか停車しないためだ。座席はすべて前向きに並べられており、床のスペースは座席で占められている。自転車を置くことができるのは、高速鉄道と同様に、最後尾の座席列の後ろの狭いスペース しかない。

    輪行袋なしで自転車をそのまま列車に持ち込む(自転車持ち込み乗車)

    乗客は、指定された一部の列車 において、輪行袋なし(裸のまま)の自転車を持ち込むことが可能。この場合、乗車券の半額に相当する自転車専用のチケットを購入 する必要がある。

    ただし、すべての駅が輪行袋なしの自転車を改札内に持ち込むことを許可しているわけではない。例えば、台北駅(Taipei Main Station)では持ち込み不可。そのため、仮に列車がこれらの駅に停車するとしても、乗車や降車はできない ので注意が必要。

    ローカル列車/準急列車

    多くの**ローカル列車/準急列車(Local Trains / Semi Express Trains)**では、輪行袋なし(裸のまま)の自転車の持ち込みが可能。前述の通り、乗客用のチケットは当日中のローカル列車/準急列車であればどの列車でも利用可能で、座席の指定はない。しかし、自転車用のチケットは異なる。輪行袋なしの自転車を持ち込む場合、対象となる特定の列車のチケットを購入する必要があり、持ち込みは1号車または最後尾の車両に限定される。

    以下の写真のように、自転車用のチケット(左側)には列車番号が記載されているが、乗客用のチケットにはその情報がない。

    私はいつも指定された列車に乗り、自転車用のチケットを購入するようにしている。なぜなら、自転車を袋に入れて運ぶのが面倒だから だ。そのため、時には何本かの列車を見送る必要がある。

    また、その日の自転車用チケットがすべて売り切れてしまうこともある。そんな時のために、輪行袋を予備として持っておく ことにしている。

    急行列車

    一部の急行列車でも輪行袋なし(裸のまま)の自転車を持ち込むことが可能。

    指定された車両には自転車ラックが設置されており、安全に自転車を固定できるため、近くの座席に座って快適に移動できる。列車によって異なるが、自転車ラックの数は15~45台分。また、チケット購入時に自転車ラックの予約も可能。

    これは最も快適な輪行方法だが、運行本数が少なく、自転車ラックの数にも限りがあるため、事前の計画が重要となる。

    こちらが該当する列車番号のリスト。残念ながら、この情報は中国語のみで提供されている。後ほど、オンラインで列車の時刻表を検索する方法を説明する。

    駅Aで自転車を預け、駅Bで受け取る(手荷物託送サービス)

    台湾各地にある約50の鉄道駅では、個人手荷物の配送サービス を提供しており、リーズナブルな価格で自転車を送ることが可能。自転車も個人手荷物として扱われ、通常1日で目的地の駅に到着し、受取人が受け取れる状態になる。また、到着後2日間は無料で保管 されるが、3日目以降に引き取られない場合は追加料金が発生 する。

    このサービスを提供する「行包中心/行李房」は、必ずしも駅のメインビル内にあるとは限らない。しかし、駅のスタッフに尋ねれば案内してもらえる。

    以下の地図では、このサービスを提供する駅をトラックのアイコンで表示 している。

    (最終更新日:2025年6月。最新の情報については、台湾鉄路管理局の公式ウェブサイトをご確認ください。)

    手荷物託送サービス(鉄道による自転車輸送)を提供している駅のリスト
    Northern Taiwan
    Keelung 基隆Qidu 七堵Songshan 松山Wanhua 萬華Shulin 樹林
    Taoyuan 桃園Zhongli 中壢Yangmei 楊梅Hukou 湖口Zhubei 竹北
    Hsinchu 新竹Nan’ao 南澳Dong’ao 東澳Su’ao 蘇澳Su’aoxin 蘇澳新
    Luodong 羅東Yilan 宜蘭Shuangxi 雙溪Ruifang 瑞芳
    Central Taiwan
    Zhunan 竹南Yuanli 苑裡Dajia 大甲Qingshui 清水Shalu 沙鹿
    Changhua 彰化Yuanlin 員林Tianzhong 田中Ershui 二水Linnei 林內
    Douliu 斗六Dounan 斗南
    Southern Taiwan
    Dalin 大林Chiayi 嘉義Xinying 新營Longtian 隆田Shanhua 善化
    Tainan 台南Gangshan 岡山Nanzi 楠梓Fengshan 鳳山Pingtung 屏東
    Chaozhou 潮州Linbian 林邊Fangliao 枋寮
    Eastern Taiwan
    Taitung 台東Guanshan 關山Yuli 玉里Ruisui 瑞穗Fenglin 鳳林
    Shoufeng 壽豐Hualien 花蓮Xincheng (Taroko)
    新城 (太魯閣)

    (2025年6月更新:中壢田中駅、二水善化駅、瑞芳では、工事のため現在自転車託送サービスが一時停止中。)

    このサービスが大好き!このサービスは、私にとってとても便利で自由度が高い。台湾で最初のサイクリング旅行をしたとき、自分がどこまで走れるのか分からなかった。でもこのサービスがあったおかげで、「もう十分楽しんだ」と思ったタイミングで自転車を台北に送り、観光モードに切り替えることができた。また、不要な荷物やお土産を一時的に預け、後で好きなタイミングで受け取る こともできた。

    ただし、事前に計画を立てる際は、必ず利用予定の「行包中心/行李房」に連絡し、その日に自転車を送れるか確認することを強くおすすめする。なぜなら、春節(旧正月)の前日など、列車が非常に混雑すると予想される日は、自転車の託送サービスが一時的に利用できなくなる場合がある からだ。念のため、事前に確認しておくに越したことはない。

    台湾鉄道(TRA)の公式サイトでのサイクリスト向け情報

    TRAの英語版ウェブサイトでは、各ページの恒久的なリンクがない場合がある。つまり、必要な情報にたどり着くためには、サイトのトップページから順にナビゲートしなければならないことがある。

    以下は、サイクリスト向けサービスのページへアクセスする方法。スクリーンショットはスマートフォン版のものだが、デスクトップ版でも同様の手順で操作可能。

    1. 以下のリンクをタップ(またはクリック):TRA英語版サイト → 英語版のTRA公式サイトが開く。

    2. ナビゲーションメニューを開き、「Tour package booking」をタップして展開。→ 「Bicycle-friendly train(自転車持ち込み可能な列車)」のページにアクセス可能。デスクトップ版の場合:「Tour Ticket(観光チケット)」を探してそこからアクセス。

    3. 「Bicycle-friendly train」ページでは、これまで紹介したサービスに関する3つのセクション を確認できる。

    • Bicycle Boarding(裸のままの自転車持ち込み)
    • Checked Bicycles(駅Aで自転車を預け、駅Bで受け取る)
    • Carrier Bag(自転車を袋詰めしてすべての列車に乗車可能)。自転車袋の要件に関する詳細情報はこちらで確認可能。
    自転車の空席状況の確認方法

    このセクションでは、自転車を袋に入れずにそのまま車内に持ち込める列車の確認方法を紹介します。また、各列車で利用できる自転車スペースの数も確認することができます。自転車の乗車券は、大人運賃の半額です。

    列車には2種類あります。指定席付きの特急列車(指定席個人)と、自由席の普通列車(自由席個人)です。特急列車の乗車券はオンラインで予約でき、普通列車よりも早く予約受付が開始されます。ただし、本数が比較的少なく、私たちのスケジュールに合わないこともよくあります。普通列車は運行本数が多く、乗車券は全国の台鉄駅の窓口で3日前から購入できます。

    袋なし自転車スペースの空き状況を確認するには、以下のリンクをご覧ください。

    https://www.railway.gov.tw/tra-tip-web/tip/tip00D/tipD11/goEmptySeat?lang=JA_JP

    デスクトップ版

    デスクトップでアクセスすると、次のような画面が表示されます。検索の手順はとても分かりやすいです。列車の種類を選択するのを忘れないようにしてください。一部の駅(例:台北駅)は、自転車を袋に入れずに乗車することができないため、選択肢として表示されません。

    スマートフォン版

    リンクをタップすると、スマートフォンでは次のような画面が表示されます。

    • 左のボタン(個人) → 急行列車(Express Trains)を検索
    • 右のボタン (非ペア個人)→ 普通・準急列車(Local/Semi Express Trains)を検索

    また、裸のまま自転車を持ち込める普通・準急列車の本数は多く、小さな駅にも停車するので、より柔軟な旅程を立てやすい。

    予約の具体例

    例えば、2025年11月20日に松山発・台中着の急行列車を検索したところ、1つの結果が表示された。検索結果には、「10 empty seat(自転車用の空席が10席)」と記載されていた。グレーの「訂票」ボタンをタップすると、チケットの予約が可能。

    予約には以下の情報が必要:

    • パスポート番号の入力
    • チケット受取時にパスポートの提示

    この手順で、特急列車に自転車を持ち込む際の予約が完了する。

    2025年11月19日に松山発・鶯歌着の急行列車を検索したところ、「データがありません」と表示。この場合、両駅を直接結ぶ特急列車は運行されていないことを意味する。

    他の駅の組み合わせを試すことで、適切な列車が見つかる可能性がある。

    普通・準急列車(Local/Semi Express Trains)の検索

    右側のボタン(非ペア個人)をタップすると、普通・準急列車の検索結果が表示される。例えば、2025年11月19日に松山発・鶯歌着の列車を検索したところ、複数の結果が表示された。オンライン予約ボタンはなし。このタイプの列車は、オンラインでの事前予約が不可。乗車日の3日前から駅の窓口で購入可能。