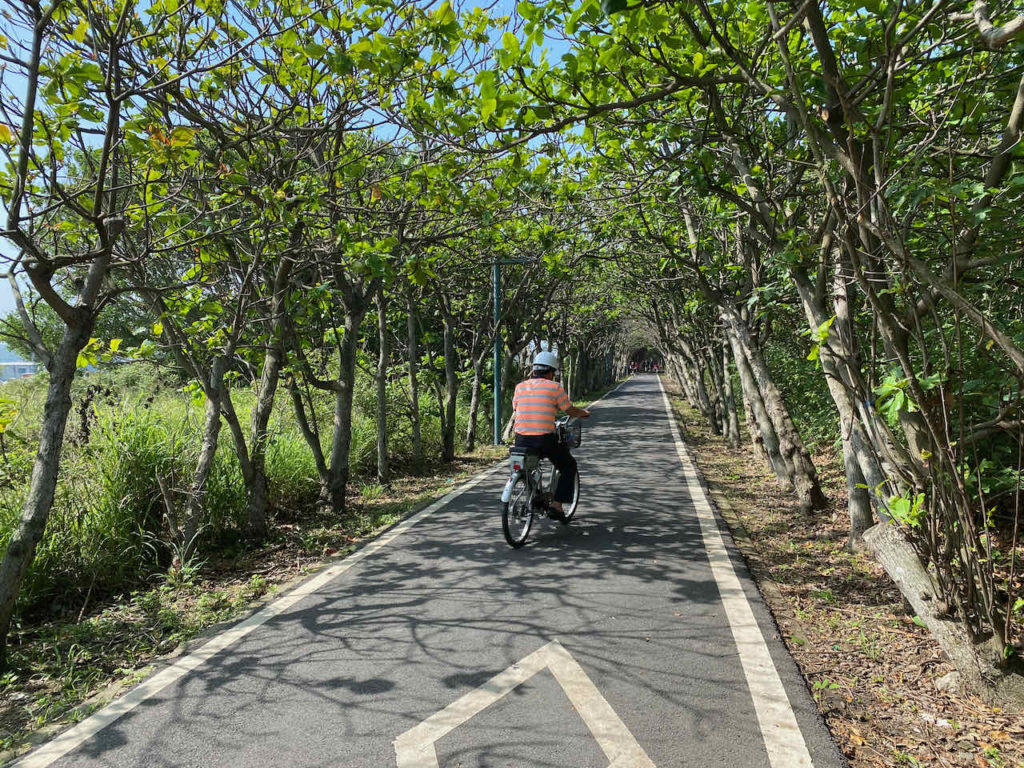
SPIN UP F12W-PRO, a new front-mount model added to SunUp Eco’s line of bike dynamos released to the market in late 2019, is a high-power low-drag 3-phase bicycle USB phone charger that promises to keep your smartphones and other electronic gadgets charged while you are pedaling along. Robust, durable, and efficient, it starts pumping out a stable current of 1A through its USB port as soon as your cycling speed reaches 15km per hour, without having to wait until a certain amount of energy has been accumulated in the reservoir battery.
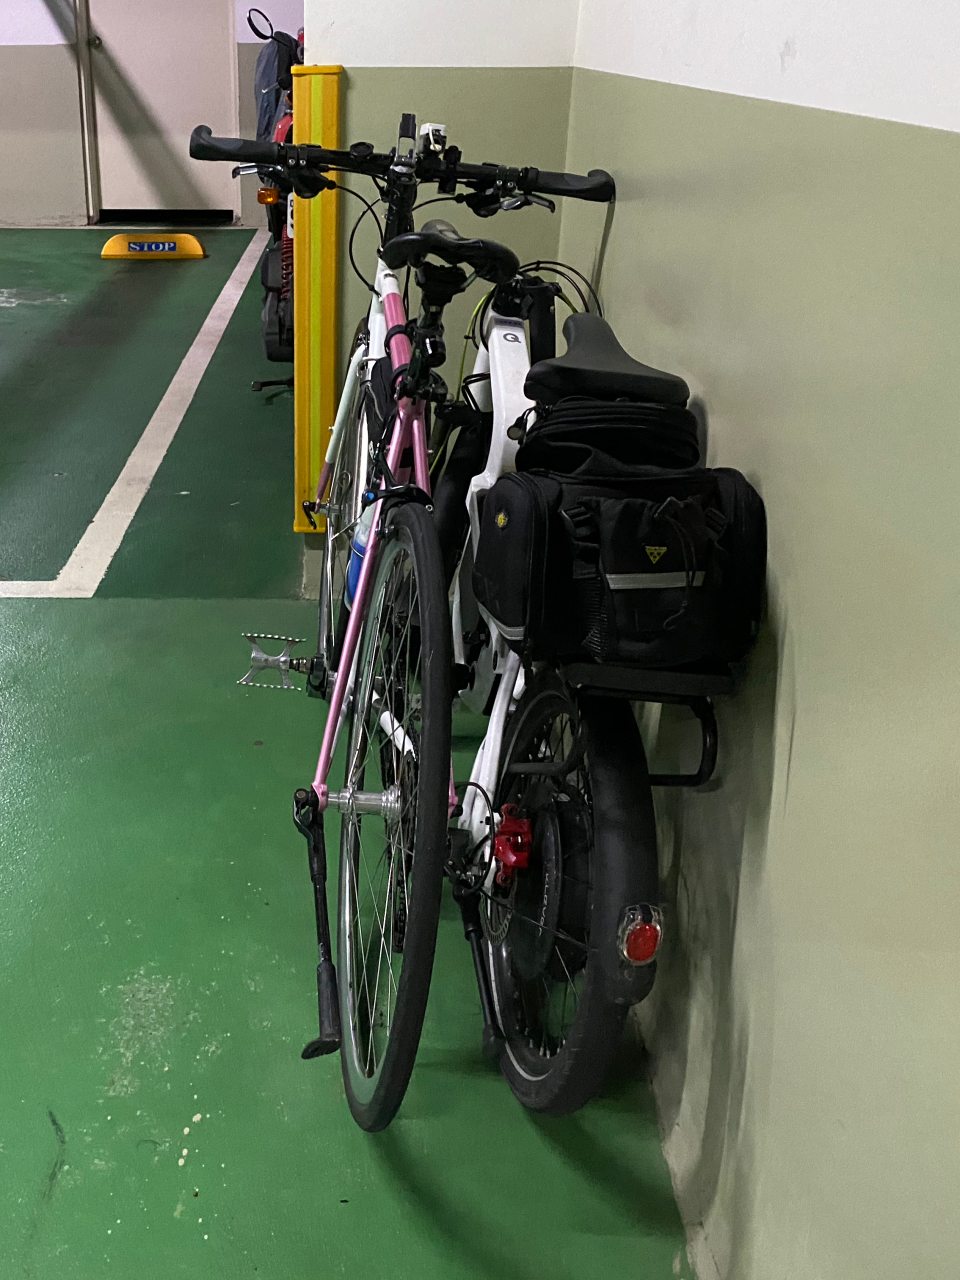
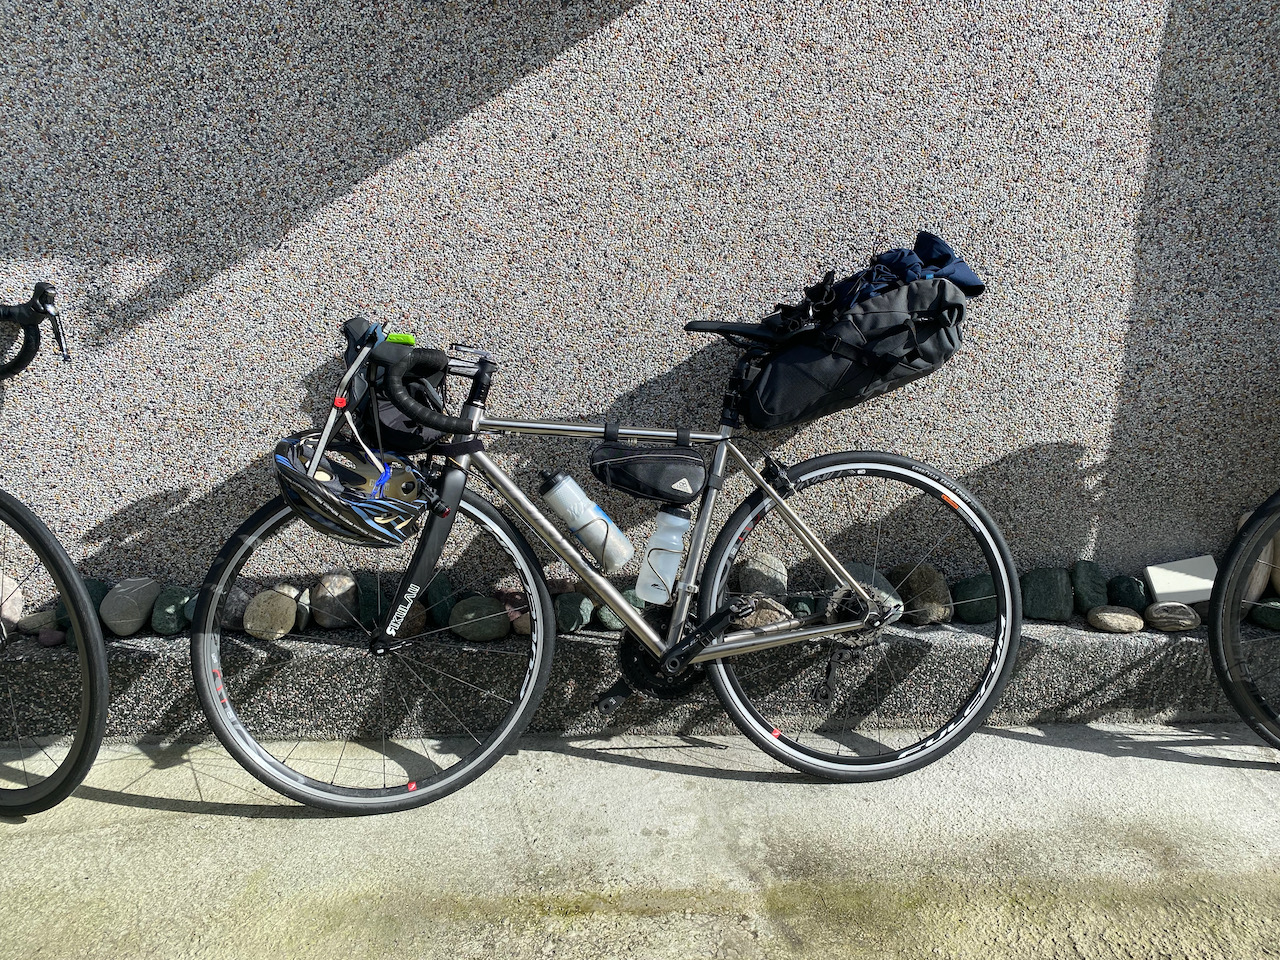
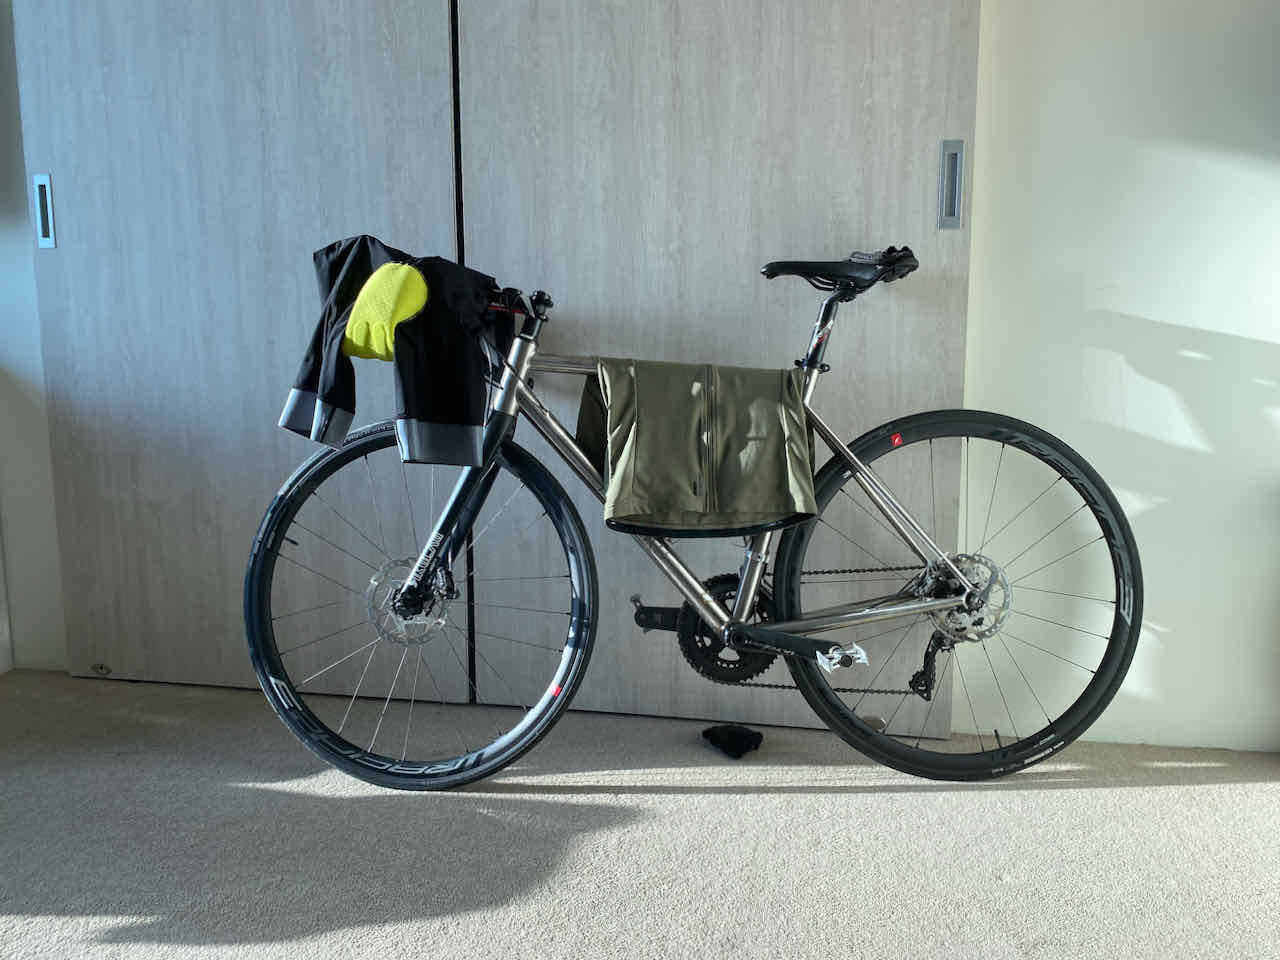
The generator, weighing a portable 370g, is to be mounted on the spokes of the front wheel and will be driven directly by the wheel to achieve minimum mechanical drag. It works with both disc brake and rim brake, and is compatible with 26”, 700c, and 29er wheels. An assist kit is included to help make the installation easier, quicker, and more precise.
The most distinctive feature of F12W-PRO may be its adoption of Intelligent Power Management System (IPMS), which is the first among bicycle dynamos. It helps maximize energy efficiency, prevent unnecessary energy loss, prolong the life of the reservoir battery, and charge your phone as fast as possible.
The more adventurous touring cyclists will surely welcome the all-weather feature of F12W-PRO. Operative in a wide temperature range between -25 and 65 degree Celsius and with a water resistant rating of IPX4, which means it can stand water splashing from any direction with no harmful effect, F12W-PRO is your reliable source of power even in the toughest of times.
But, let’s be honest, the bundle of all these wonderful features does not come cheap. A hefty price tag of USD499 per set will make most who are interested in F12W-PRO think twice, if not stopping them at all. So, we try to find out if it is worth the price or not.
I have always wanted a bicycle dynamo to save me from my “range anxiety” for my smartphone. We all know how indispensable our smartphone is. When I’m on my bike, especially during cycling trips, I need it for photo-taking, navigation, ticket booking, searching of accommodations, checking of train schedule, communicating with my friends, and a bunch of other random tasks. There is not one phone with battery life long enough to sustain such extensive use, so I have been using power banks along with my iPhone. But the capacity and output power of power banks deteriorate as they age. When we are using old power banks, we may often find our phones stop charging soon after they are plugged in, while the power banks indicating they are still full of power. Without dwelling further into the technical explanations behind this, I should only say this does not help much in easing my range anxiety.
Besides, even though I don’t do multi-day cycling trips often and seldom go bike touring in the wild, and therefore don’t really have a pressing need for a bike dynamo, I still want one on my bike as I like the idea of being self-sufficient and untethered by electric outlets.
My First Try with SPIN UP F12W-PRO
I contacted SunUp Eco, the developer of F12W-PRO, to see if they can loan me a trial set. As a former electric engineering major, I am also very interested to meet them in person to learn more about the design and development their bike dynamos. It turned out they are friendly with Rikulau Taiwan, one of our partners, and have heard about us. The answer is: yes, they’re happy to loan us a set of F12W-PRO and happy to meet with us.
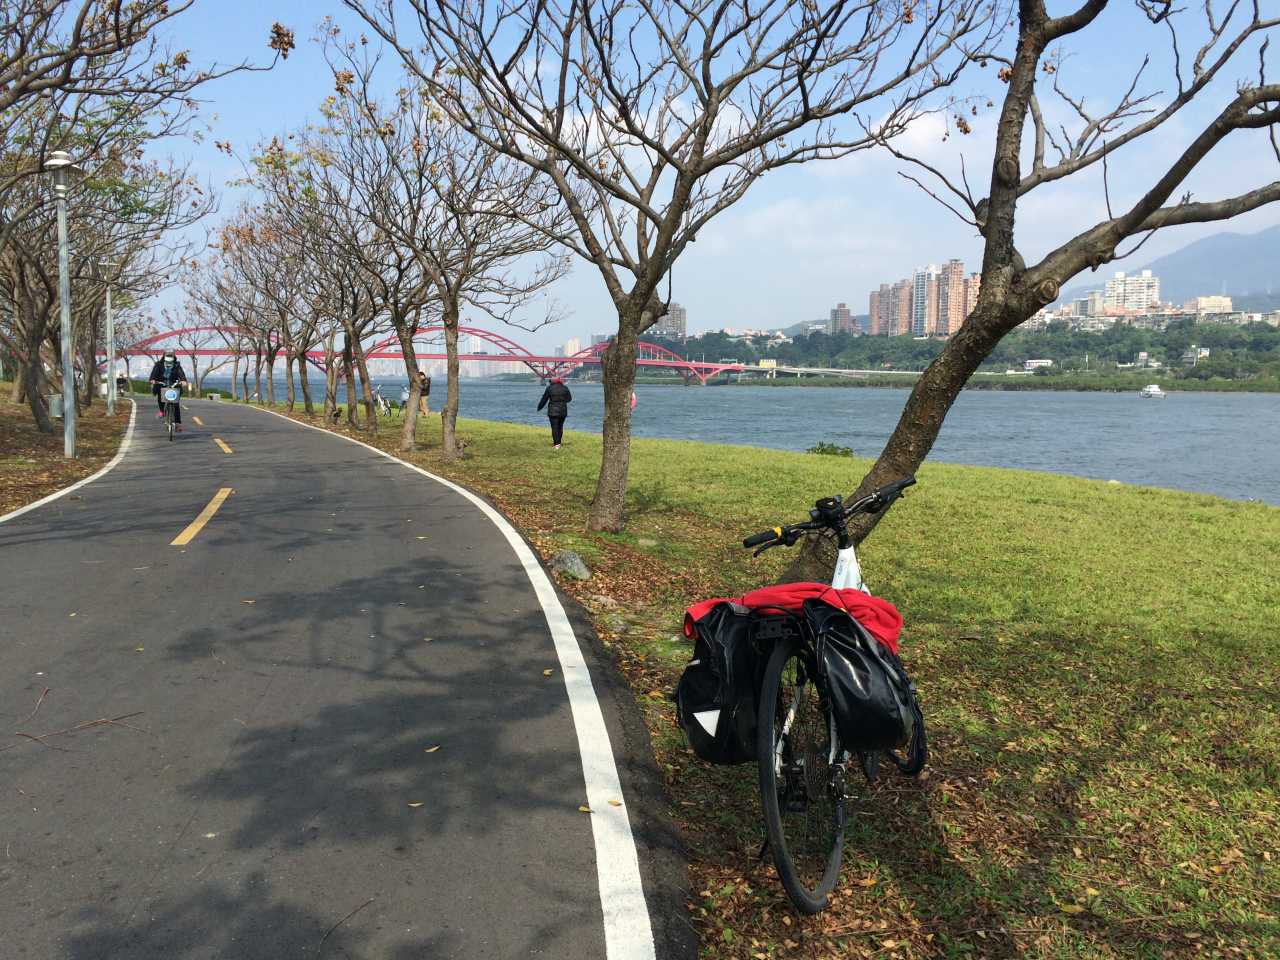
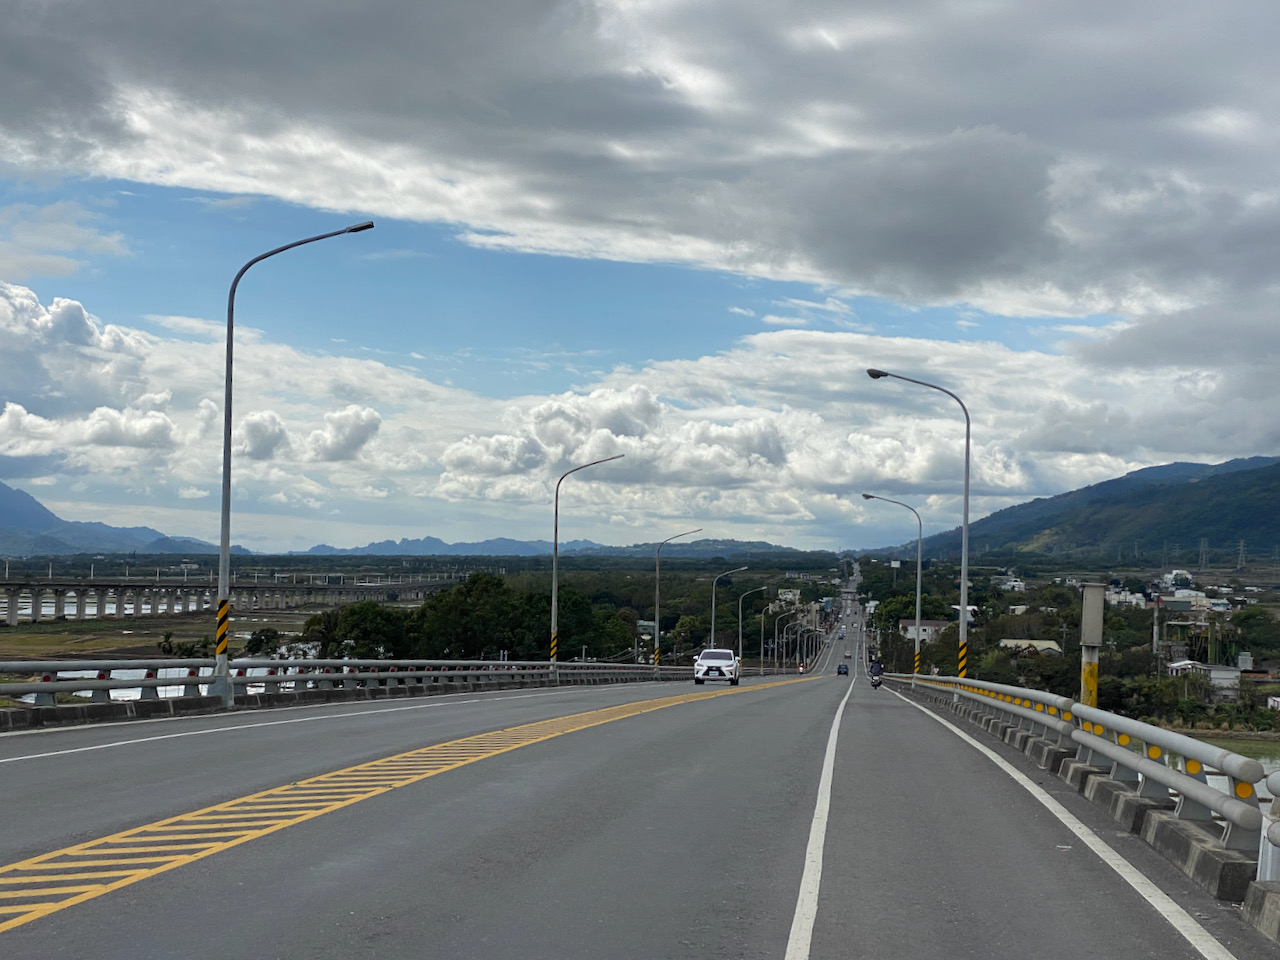
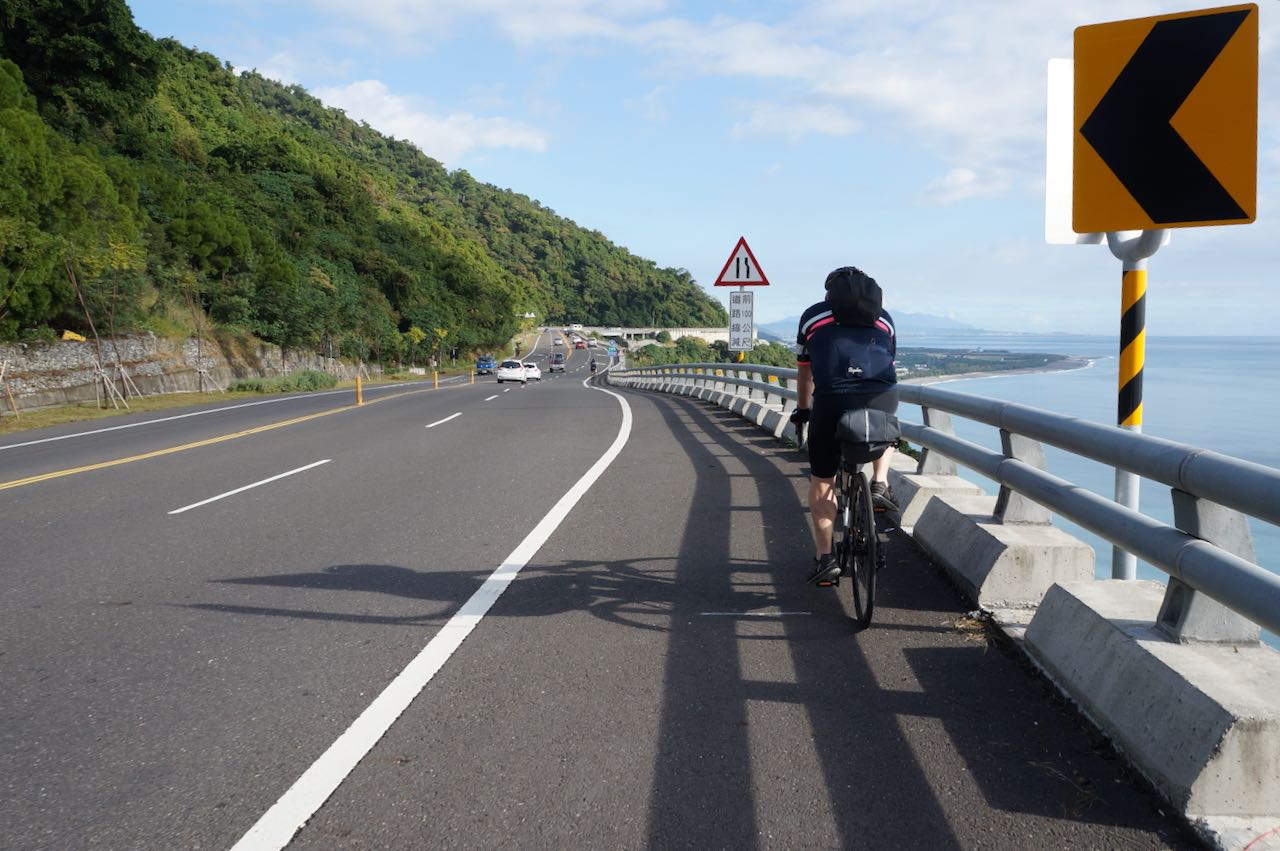
We were greeted warmly by Mr. Mark Yang, founder and President of SunUp Eco, in their workshop on the outskirt of Taoyuan County. Mr. Yang and his team wasted no time to show me how to install the dynamo on a bike. The demo bike happened to be a Rikulau in my size. Within 10 minutes, the generator was ready. I took the bike out right away for a test with my iPhone plugged in. At first, nothing happened. Then I started doing a long climb to the Shimen Reservoir at a speed of around 7km per hour. After 5 or 6 minutes, while I was still climbing, the screen of my iPhone lighted up to show that the charging started. It lasted for around 3 minutes and then stopped. I later learned that it is because my speed then was not fast enough to generate the amount of power that the system needs to accumulate in its reservoir battery before it can pump out the electricity at the required rate. After the climb, I rode for a little bit more on the top of the dam before descending back to the SunUp Eco workshop, with an average speed of over 15km per hour. Electricity was churned out steadily the whole time and my iPhone took in the energy automatically whenever it was available – in the case of some power banks I have used, once the charging has stopped, I have to unplug and re-plug the lightning cable in other to kick start the charging process.
Back in the workshop, I started grilling Mr. Yang and his team on the design and development of F12W-PRO Bicycle USB Charger Dynamo.
The Challenge of Making a Front-Mount Bicycle Dynamo
Before the release of F12W-PRO, two rear-mount bicycle dynamos (R12W and R03W) in the line of SPIN UP have been in the market for some time. Turned out it is quite challenging to develop a front-mount model. While there are many buffers, including the saddle, the pads on our cycling pants, and even our butt, to absorb the vibration coming from a rear-mount generator, for a front-mount one, the slightest vibration could easily find its way to our more sensitive fingers via the fork and the handle bar. On the other hand, any noise from the generator will become more noticeable from affront than from arrear, thanks to the structure of our ears. It may sound trivial, but all these small nuisances will turn into major annoyances during long rides. But a rear-mount bicycle dynamo may not be an ideal choice – I wouldn’t want a generator on the rear wheel because all my electronic devices are on my handle bar. I don’t want to run a long wire from the rear wheel to the front.
Therefore, in seeing the need of a front-mount model, Mr. Yang and his team had been working on minimising the noise and vibration of the generator in the past 3 years until F12W-PRO was all set and ready to meet its users.
How Intelligent Power Management System (IPMS) works
As mentioned earlier, SPIN UP F12W-PRO is the first bicycle dynamo with Intelligent Power Management System (IPMS). Depending on our riding speed and the level of power available in the built-in reservoir battery (a lithium ion battery), the IPMS operates in 4 different ways in order to maximise energy efficiency.
In the first scenario where the reservoir battery is empty or near-empty, and our speed is not fast enough to generate the required output of 5W, any energy generated from our cycling will go straight into the reservoir battery first. It means the charging will not start if you plug in your phone at times like this, not until there is enough energy stored in the reservoir battery.
In the second scenario where our speed is still not fast enough to generate the required output of 5W, but the energy level of the reservoir battery has passed the required minimum, the IPMS draws energy from both the built-in reservoir battery and the generator at the rate of 2.7W and 1.7W respectively, making up a total output of 4.4W, which will surpass the minimum requirement of most smartphones and thus kick start the charging process. Although it is not impossible to tap more power from the generator, the development team decided to limit it to 1.7W for better cycling experience. My guess on the technical reason behind it is that they don’t want the generator to create too much undesirable drag during climbs.
In the third scenario where we are cycling at a medium speed of 15-17km per hour, the generator will happily churn out electricity at the rate of 5W, which, after going through the rectifier and the voltage regulator, is converted into a stable supply of 5V1A that can be fed directly to the USB port and then to your phone or other electronic devices. The reservoir battery is left untouched.
In the fourth and last scenario where our bike is traveling faster than 18km per hour and the energy generated is more than 5W, while keeping on pushing out a stable 1A current to the USB port, the IPMS will direct any surplus energy to the reservoir battery for later use. But again, to avoid creating too much undesirable drag, the maximum energy output is limited to the rate of 6.6W.
To minimise the possible harm and annoyance caused by our electronic device being charged having to stop and resume charging within a short interval, say every time we stop to take a sip of water or in front of a traffic light, the reservoir battery will power the USB port solely for around one minute before it goes off.
When both the reservoir battery and our electronic device are fully charged, the generator will only generate enough energy to power the onboard computer and circuits and thus bring the drag level to minimum.
For those who is also in need of a powerful front light, the additional wire branching out from the upper end of the cable, which is ready to be connected to a front light, will be handy. A Dynamo LED light set that includes a front light and a rear light is also available on the SPIN UP official site.
What Makes SPIN UP F12W-PRO So Special
Most of the other bike dynamos available in the market only have 3W of rated power. It’s good enough to light the bike lamps, but they have to rely on a power bank to collect trickles of energy before it can be used to charge a smartphone, which usually requires a supply of 1A. This really made SPIN UP F12W-PRO, which can feed energy directly from the generator to your electronic device without having to route through the reservoir battery, stand out from the crowd. Apparently, the time it will take to charge your device will be a lot shorter and the energy loss that will inevitably occur during the charging process will be far less.
Mr. Yang and his team have substantial reasons to believe their F12W-PRO is so far the best.
There is a speed limit of 70km per hour set upon the use of SPIN UP F12W-Pro though. If your speed exceeds the limit, excessive high voltage will build up at the generator’s mother board and eventually break down its components permanently. And such limit is set for bikes with 700C wheels, for which 70km per hour is about 550 turns per minute. That means if you are mounting your F12W-PRO to a smaller wheel, the speed limit for you is lower.
It was a very enriching morning. Soon it would be lunch time. Before heading out for lunch together and me bringing a SPIN UP F12W-PRO home for more thorough trial, my conversation with Mr. Yang strayed to Nikola Tesla, the inventor of AC induction motor and the square root of three for the three phase electrical systems…
Would I Pay USD499 for the SPIN UP F12W-PRO
At the time of writing this post, I have been using the dynamo for more than 3 months. I will share my experience with it in more posts to come. All in all, it has been working very well. I have no intention of returning it to Mr. Yang. I will pay the hefty yet worthy USD499.
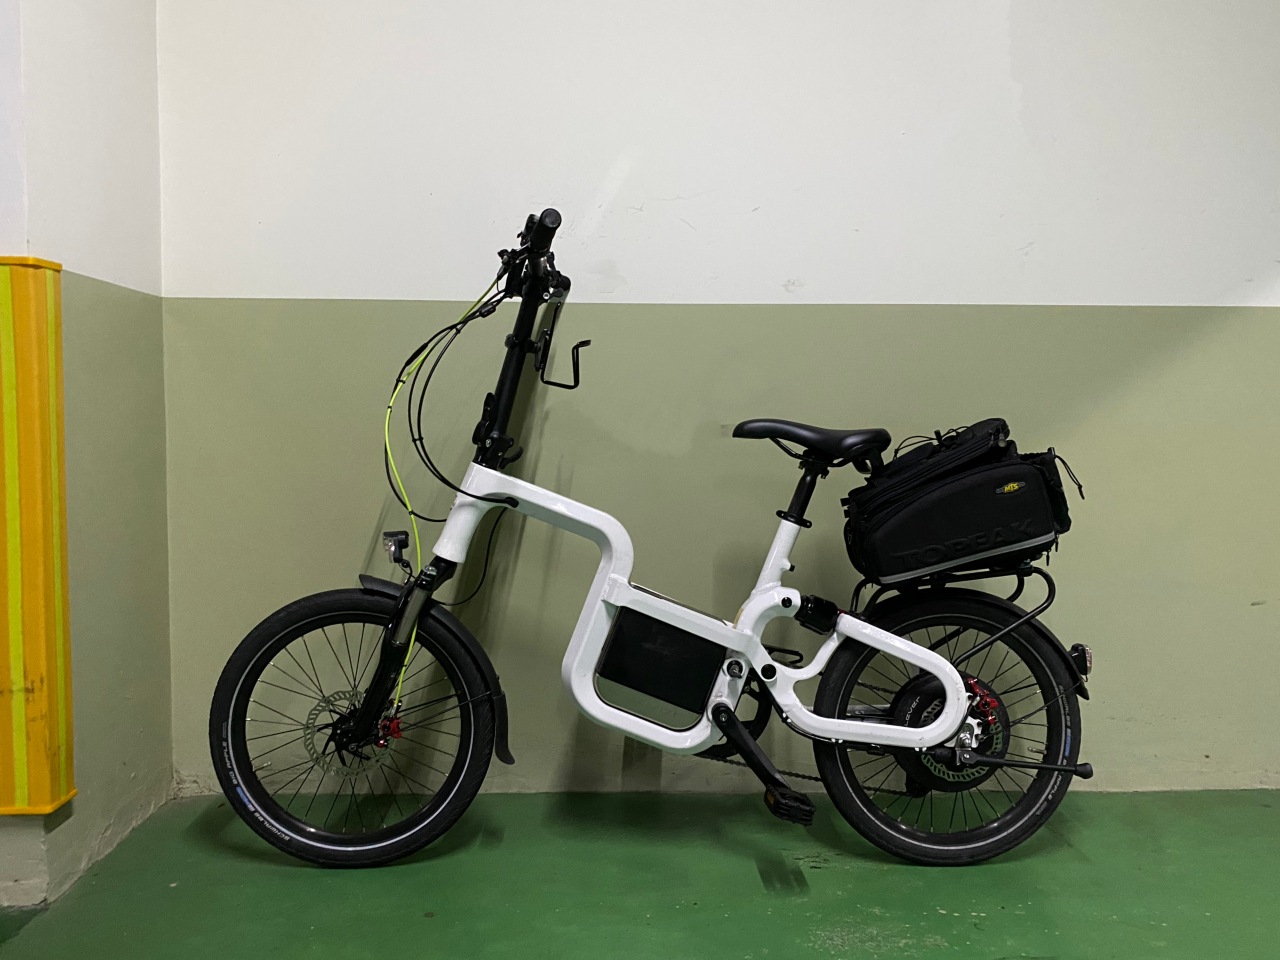
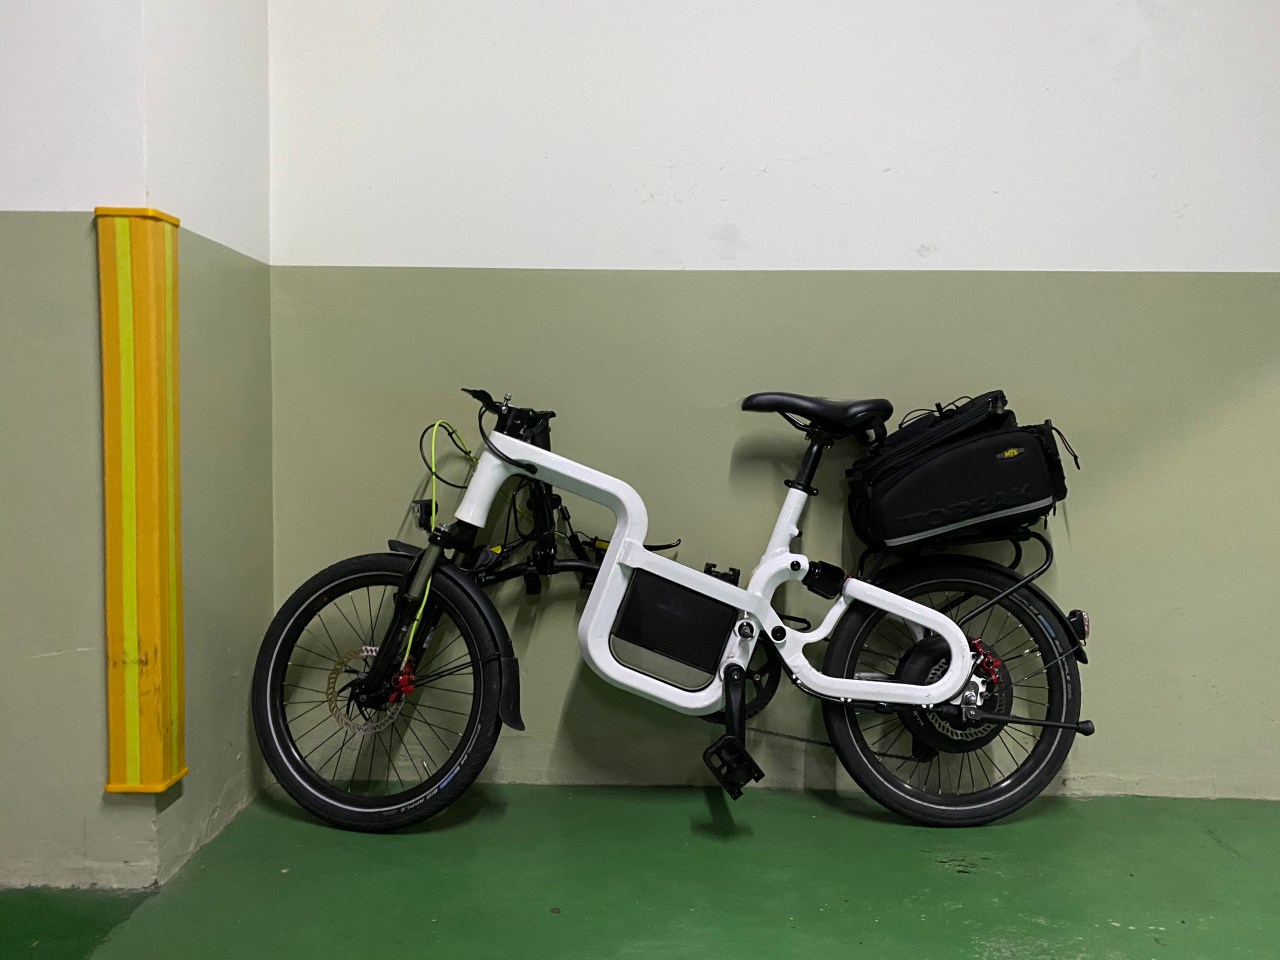
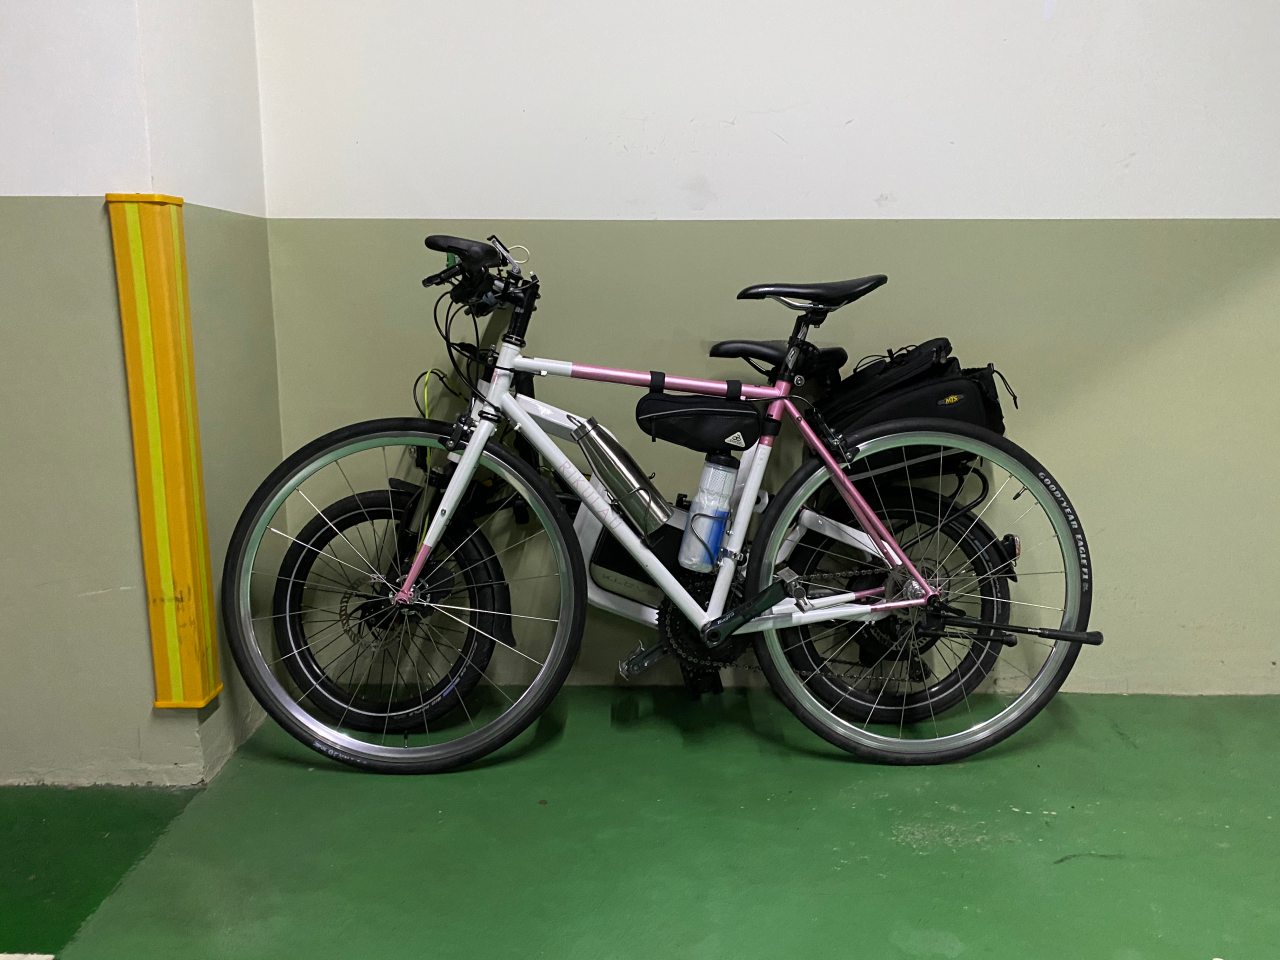
I have to confess that Klever had loaned us the Q Comfort for quite some months. It had been sitting idly at the narrow interspace between our car and the wall of our parking lot. Yes, we had other more pressing things to deal with and urgent projects to finish. But the honest reason is: we almost forgot about it because it took up so little space and hence drew so little attention. With its fork folded up, the handlebar is turned 90 degrees to align with the frame. It looks like there is not much “folding” involved, but it’s actually a clever and useful design. If I need to store some regular bike in our parking lot, I always need to remove the front wheel and turn the handlebar 90 degrees to make it flat enough for that narrow interspace. With the Q Comfort, all I need to do is fold up the fork and the pedals, and then voila: it’s out of sight (and out of mind).
This is how it’s like before the Q is folded.
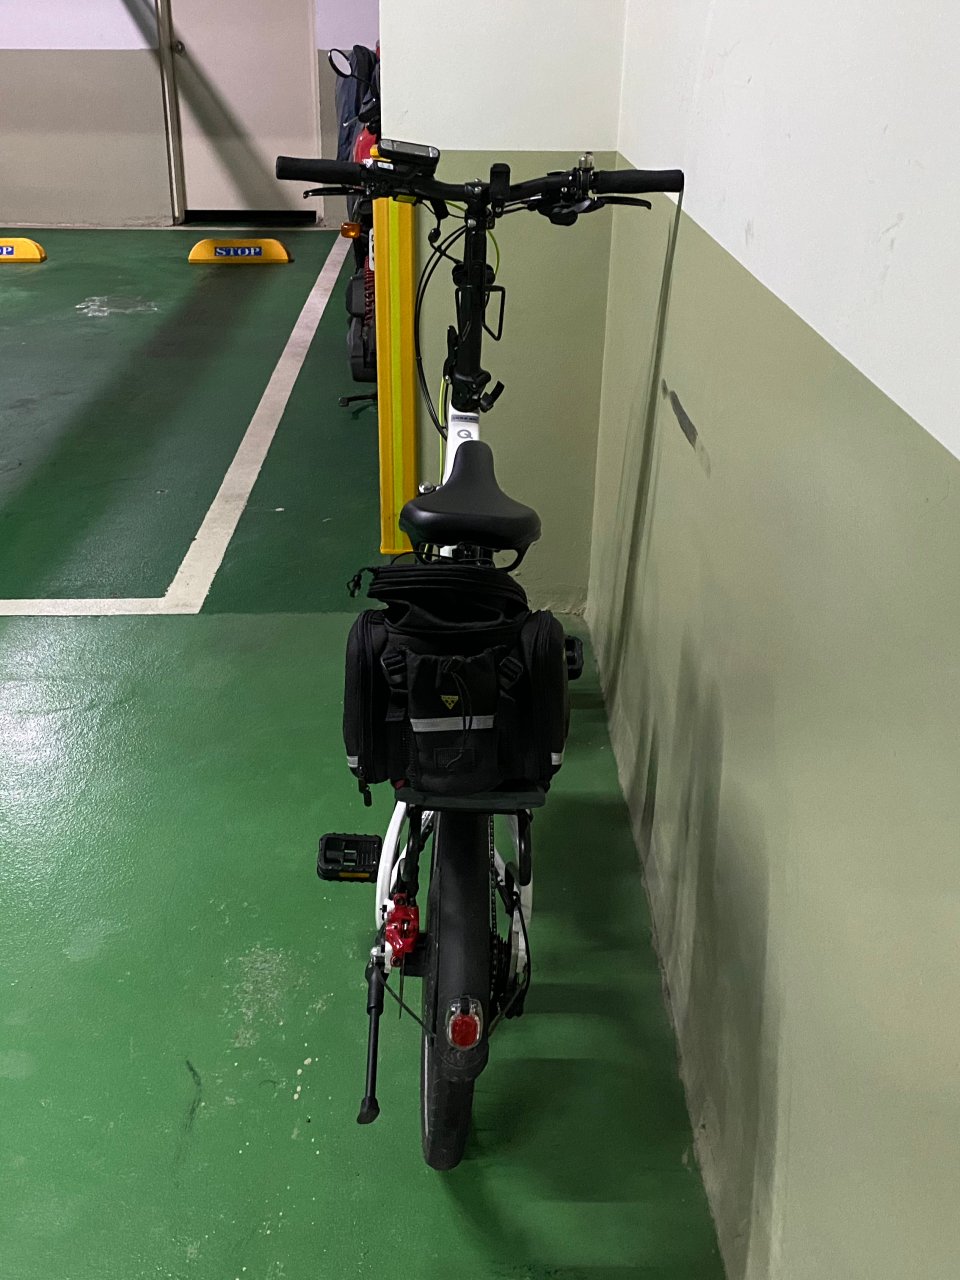
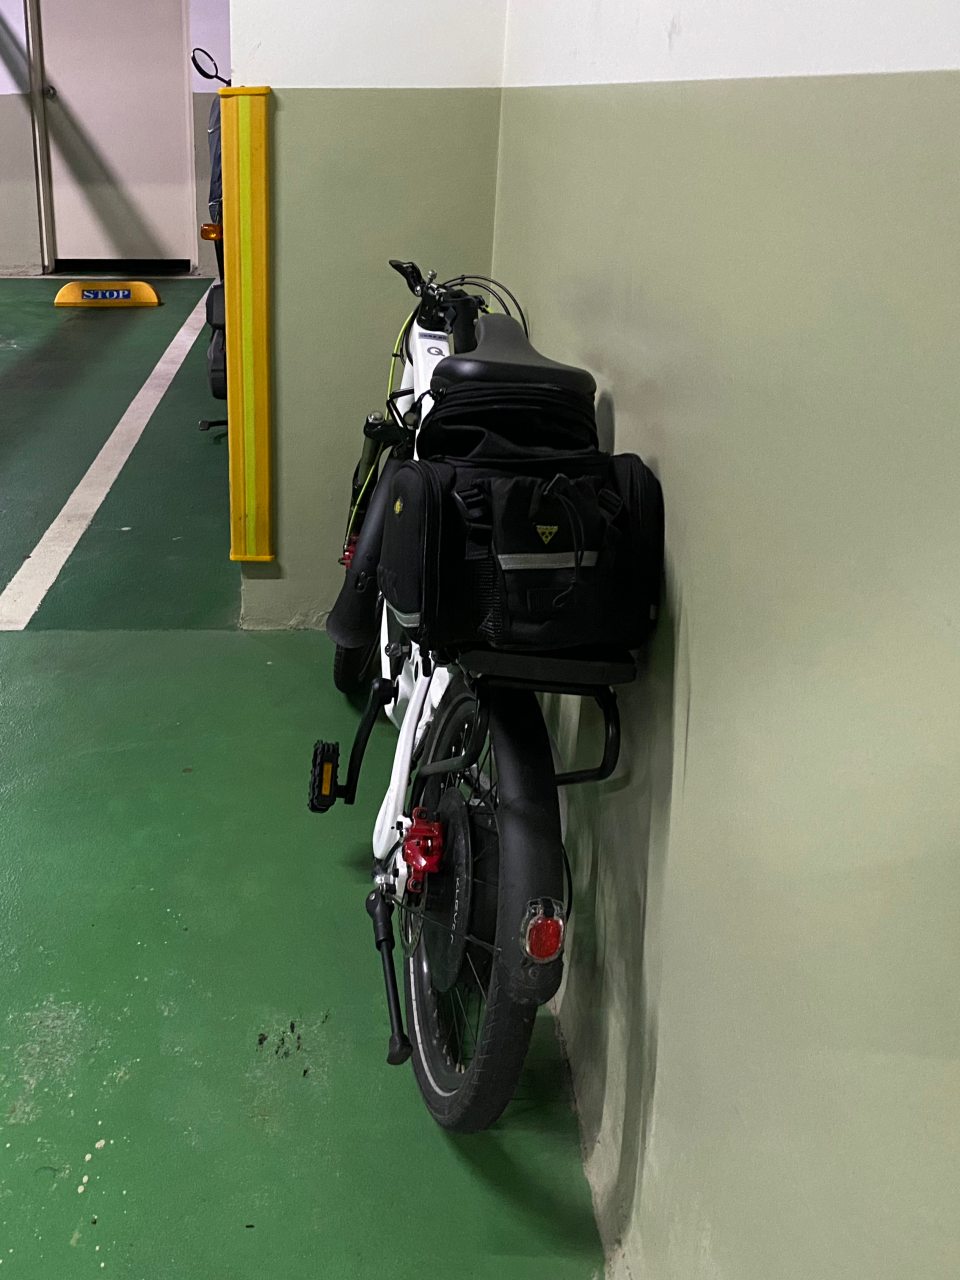
It’s folded and fit snuggly with the Audax Hercules in this tiny space.
But we couldn’t keep it forever, so it’s time for the test ride. In order to do a fair comparison between B Comfort and Q Comfort, I decided to use the Q on the same two routes – the hilly route and the long coastal route.
First Impression:
In terms of size and geometry, Klever’s Q Comfort fits me more than its B Comfort. For my height (1.72m), it is easier to handle and feels nimbler. I can make sharp turns easily and stably. For taller riders or someone who prefers a more upright cycling position, the fork can be extended around 10 cm further. Like the B comfort, when the power is off, the Q works perfectly like an ordinary bike, though heavier. The travel of its suspension system is shorter than that of B comfort. Together with a set of smaller wheels, Q Comfort is shakier on uneven roads. But it doesn’t seem like a big issue for me.
Our friends at Klever told us Q Comfort is good at climbing. So I went the hilly route first – from Nangang to Ruifang along County Highway 109 and 106, then took Provincial Highway 2D for the return leg (total Distance 77km; elevation gain 1,384m; maximum elevation 490m).
The climb to the first peak, 200m in 3.5km, was done easily. The push from the BIACTRON motor was more noticeable than that of B Comfort. Although the motors on the two models are both 350W with the maximum torque of 43Nm, the smaller wheels on Q Comfort transform the torque into bigger push. And because of this, you should try to avoid holding the handlebar with just one hand when the assist level is set to M or L. The strong push had almost thrown me off-balance the other day when I was riding with one hand. Please also be extra careful with your center of gravity when setting off uphill on a steep slope. The front wheel can tilt upward with the sudden thrash.
Top of the first climb
The descent followed was stable and enjoyable in general. I could control the e-bike with confidence even on sharp turns. When the regenerative coasting kicked in at 35km/h to use some of my kinetic energy to charge the battery, I could feel the drag but I was not slowed down.
Then when my speed reached around 45km/h, and when the Q rolled over a set of rumble strips 減速標線, which were raised across the road and painted white, it was rattled momentarily but violently. The battery was disconnected and the panel showed an error sign. I resolved the problem by re-installing the battery and carried on with my ride with no further issues. A couple days later our friends at Klever mailed me a small accessory to be attached to the battery, so that it can fit more tightly into the slot. They help. Apparently this is a bug that Klever has already worked on to solve. I also think I should take it easy when pumping the tyres. I had pumped them to their maximum pressure limit the day when I took the test ride.
Rumble strips
The next climb was a mild one. It took 13.5km to gain 240m to the peak of 290m. In fact, no serious effort was required from either me or the Q Comfort. And soon I was about to do the 3rd climb. After traveling for 5.8km and gaining 315m of altitude, I reached the peak of 488m. That was when the B Comfort had almost exhausted the first battery on my previous test ride. This time, with Q comfort, there were still 2 bars (out of 5) of energy remaining.
Top of the third climb
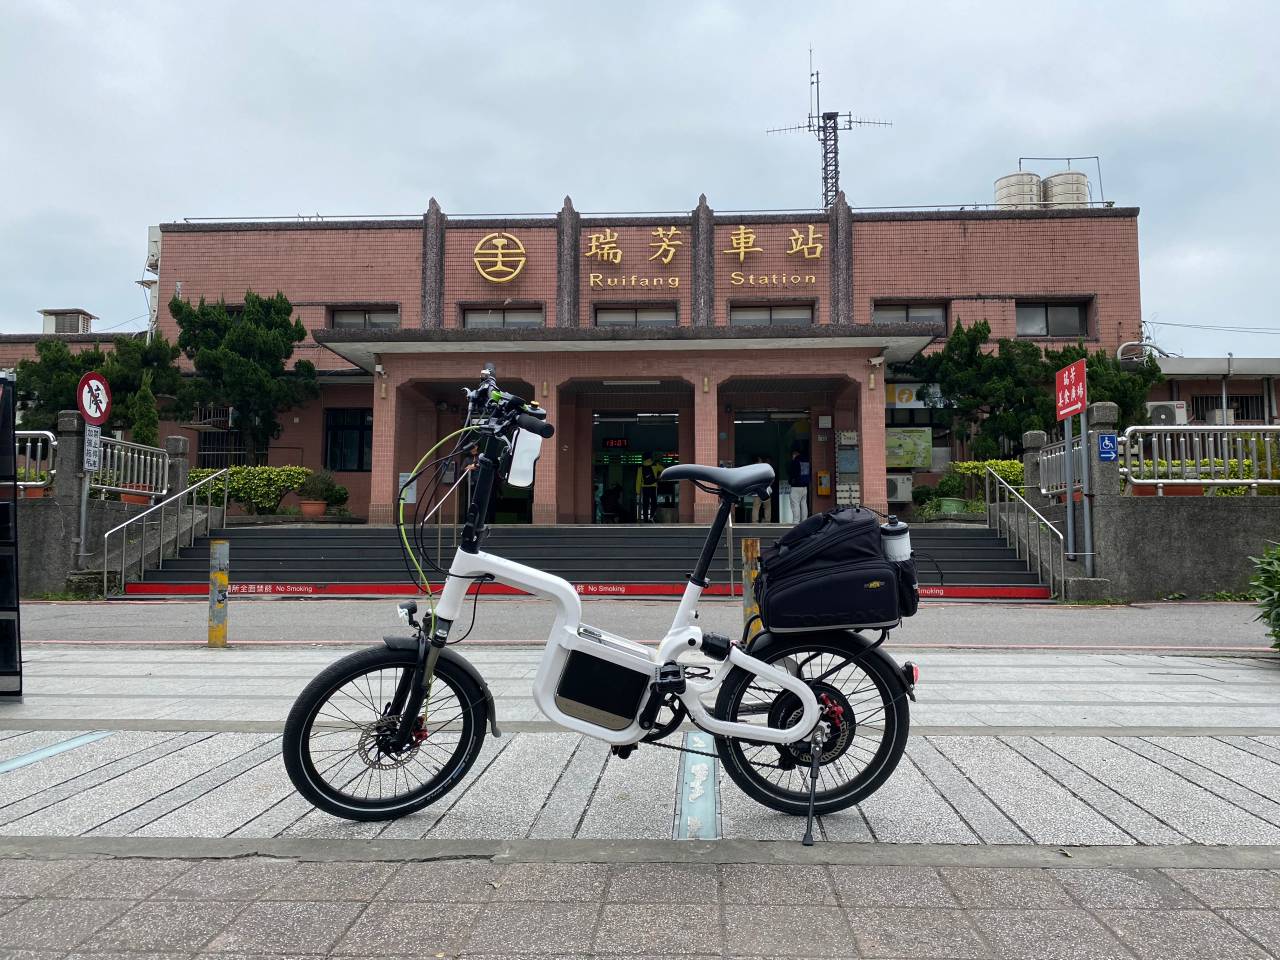
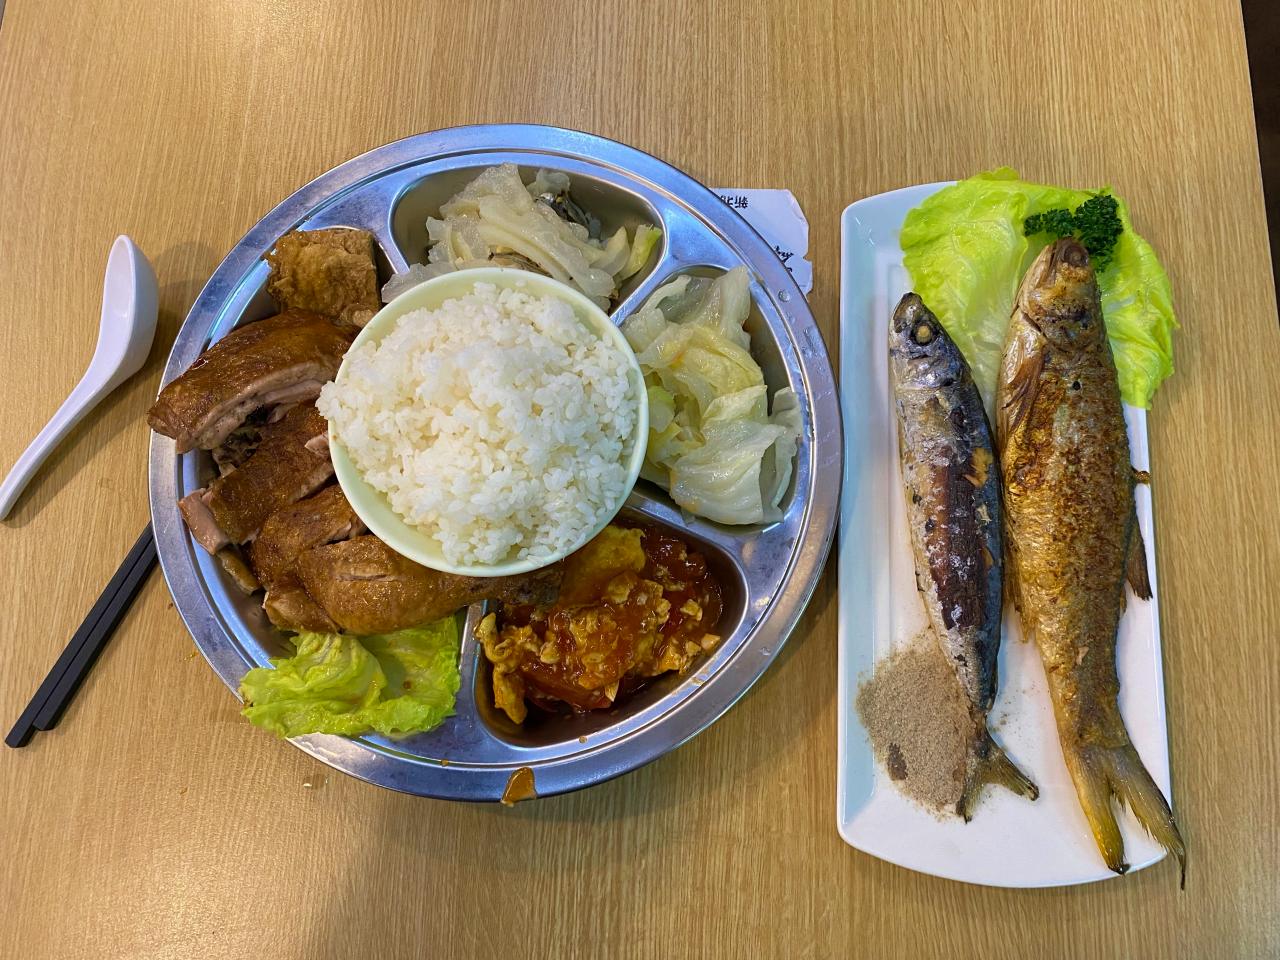
I descended to Ruifang and had my lunch before heading back home. The last bar of energy was blinking by then, signaling the battery was about to run out. But I made it home (about 10km’s ride) without having to swap in a fresh one.
Ruifang StationMy lunch
All in all, the Klever Q Comfort travelled 75km and climbed a cumulative 1341m with just one battery. It was impressive.
When Lois and I are cycling together, there is always a small issue that bothers us. As a rule, it is not safe to ride side by side. Then, as a less experienced and active cyclist, she usually can’t keep up with my speed. That means during our rides together, I am always taking the lead and have to glance back to check on her status from time to time, to make sure she has not fallen too far behind. After a long climb, I also can’t fully enjoy my much-deserved speedy descend in fear that she, who has a natural aversion for speed, will fail to catch up, miss a turn, etc.
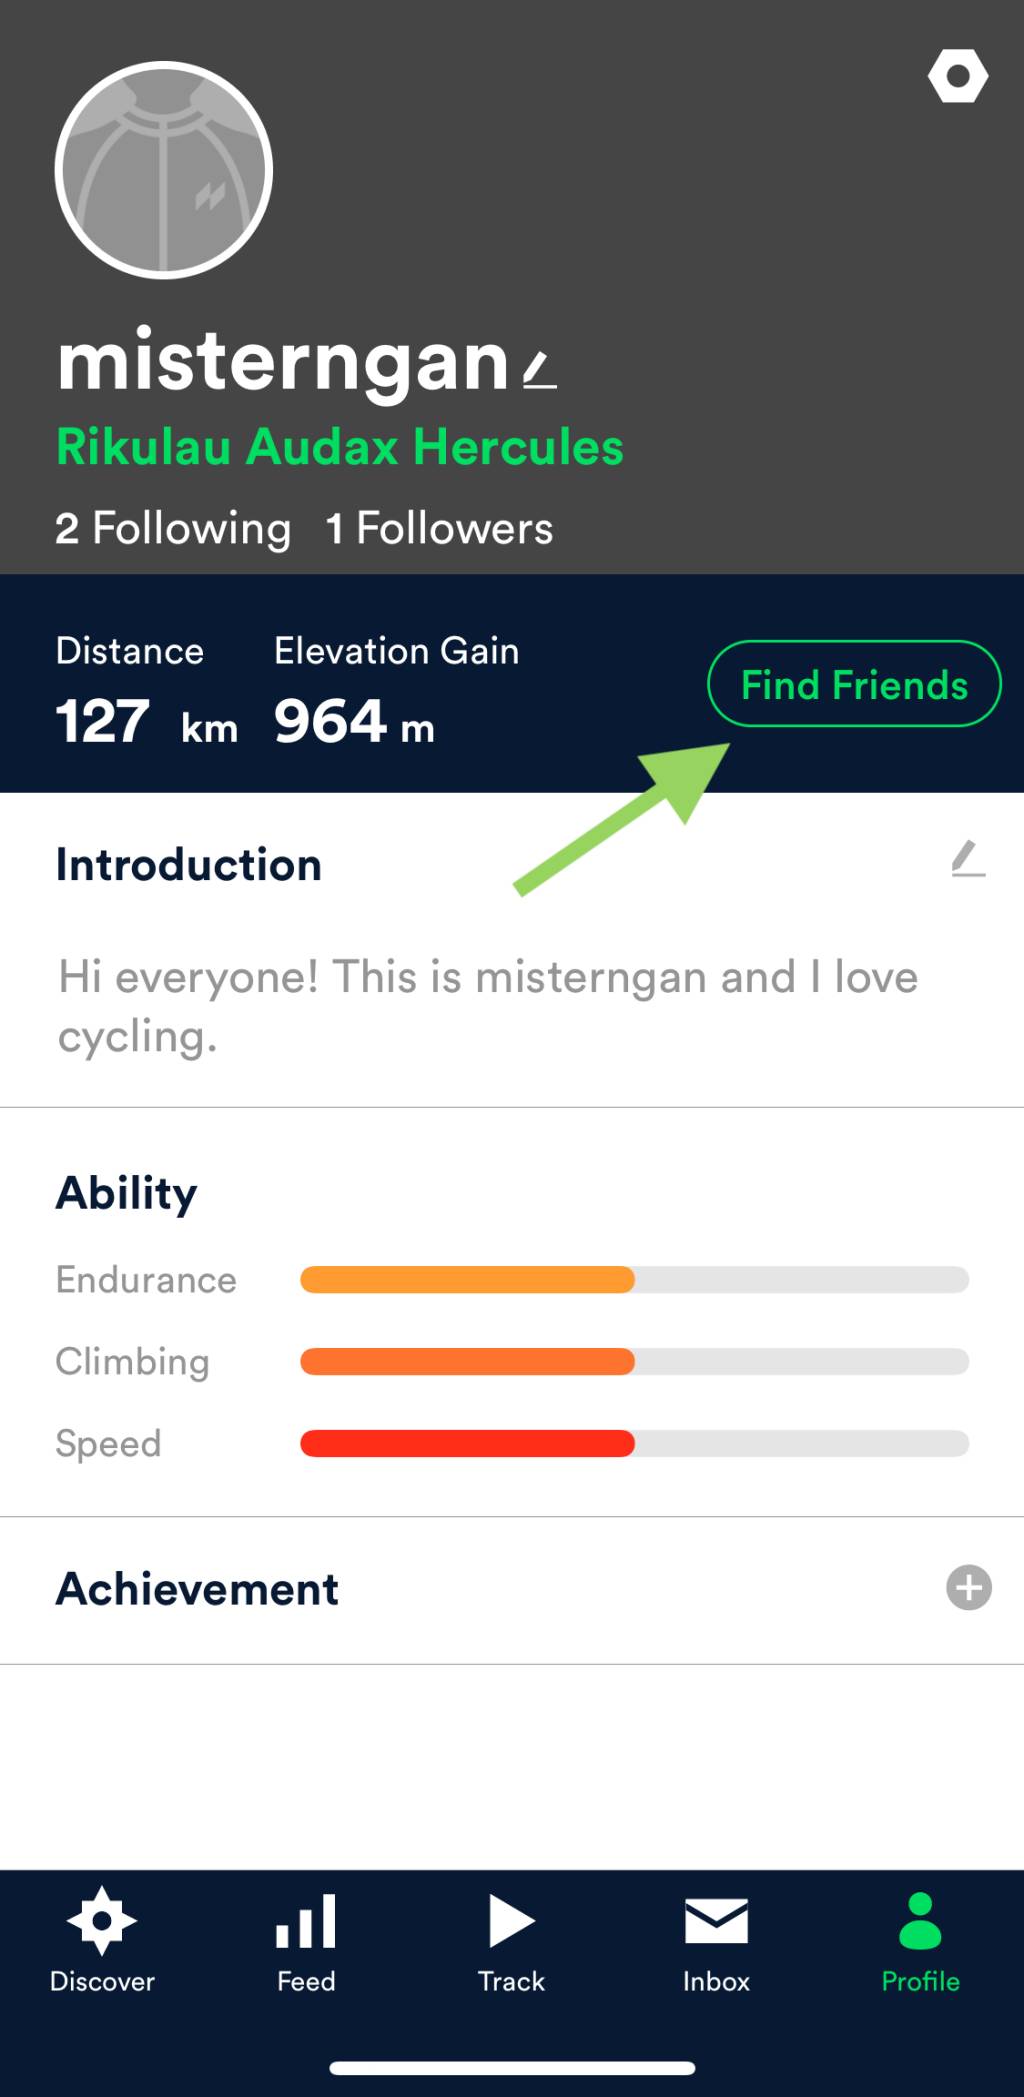
We have tried out the location-sharing features offered by Google Maps, WhatsApp and some other Apps, but yet to find one that suits our needs. That’s when we learned about Velodash, a cycling App specifically designed for group cycling. In addition to the usual route drawing and event planning functions offered by most other cycling/tracking Apps, it also boasts of a real-time location sharing feature that “allows you to see the current location of your friends” – exactly what I need when I go cycling with Lois.
It took us some time to locate this function after installing the App – which is a bit frustrating at first. Turned out this feature is only available for cyclists who have joined the same event created in the App. But once we got this figured out, we love it immediately. I can check on Lois’ location and status anytime just by glancing at the same navigation screen. After the climb, I can leave her behind for a moment and enjoy my speedy descend. She will know where I am heading, follow my trail easily, and know where to meet me when I have stopped to wait for her. Our rides together become so much smoother and more enjoyable, thanks to Velodash.
It seems there is not much information about this wonderful feature of Velodash out there. I am more than happy to share a step-to-step guide here.
How to share real-time location on Velodash when cycling
1. Install your Velodash App and create your account/profile
2. Search for your friend’s profile and follow each other
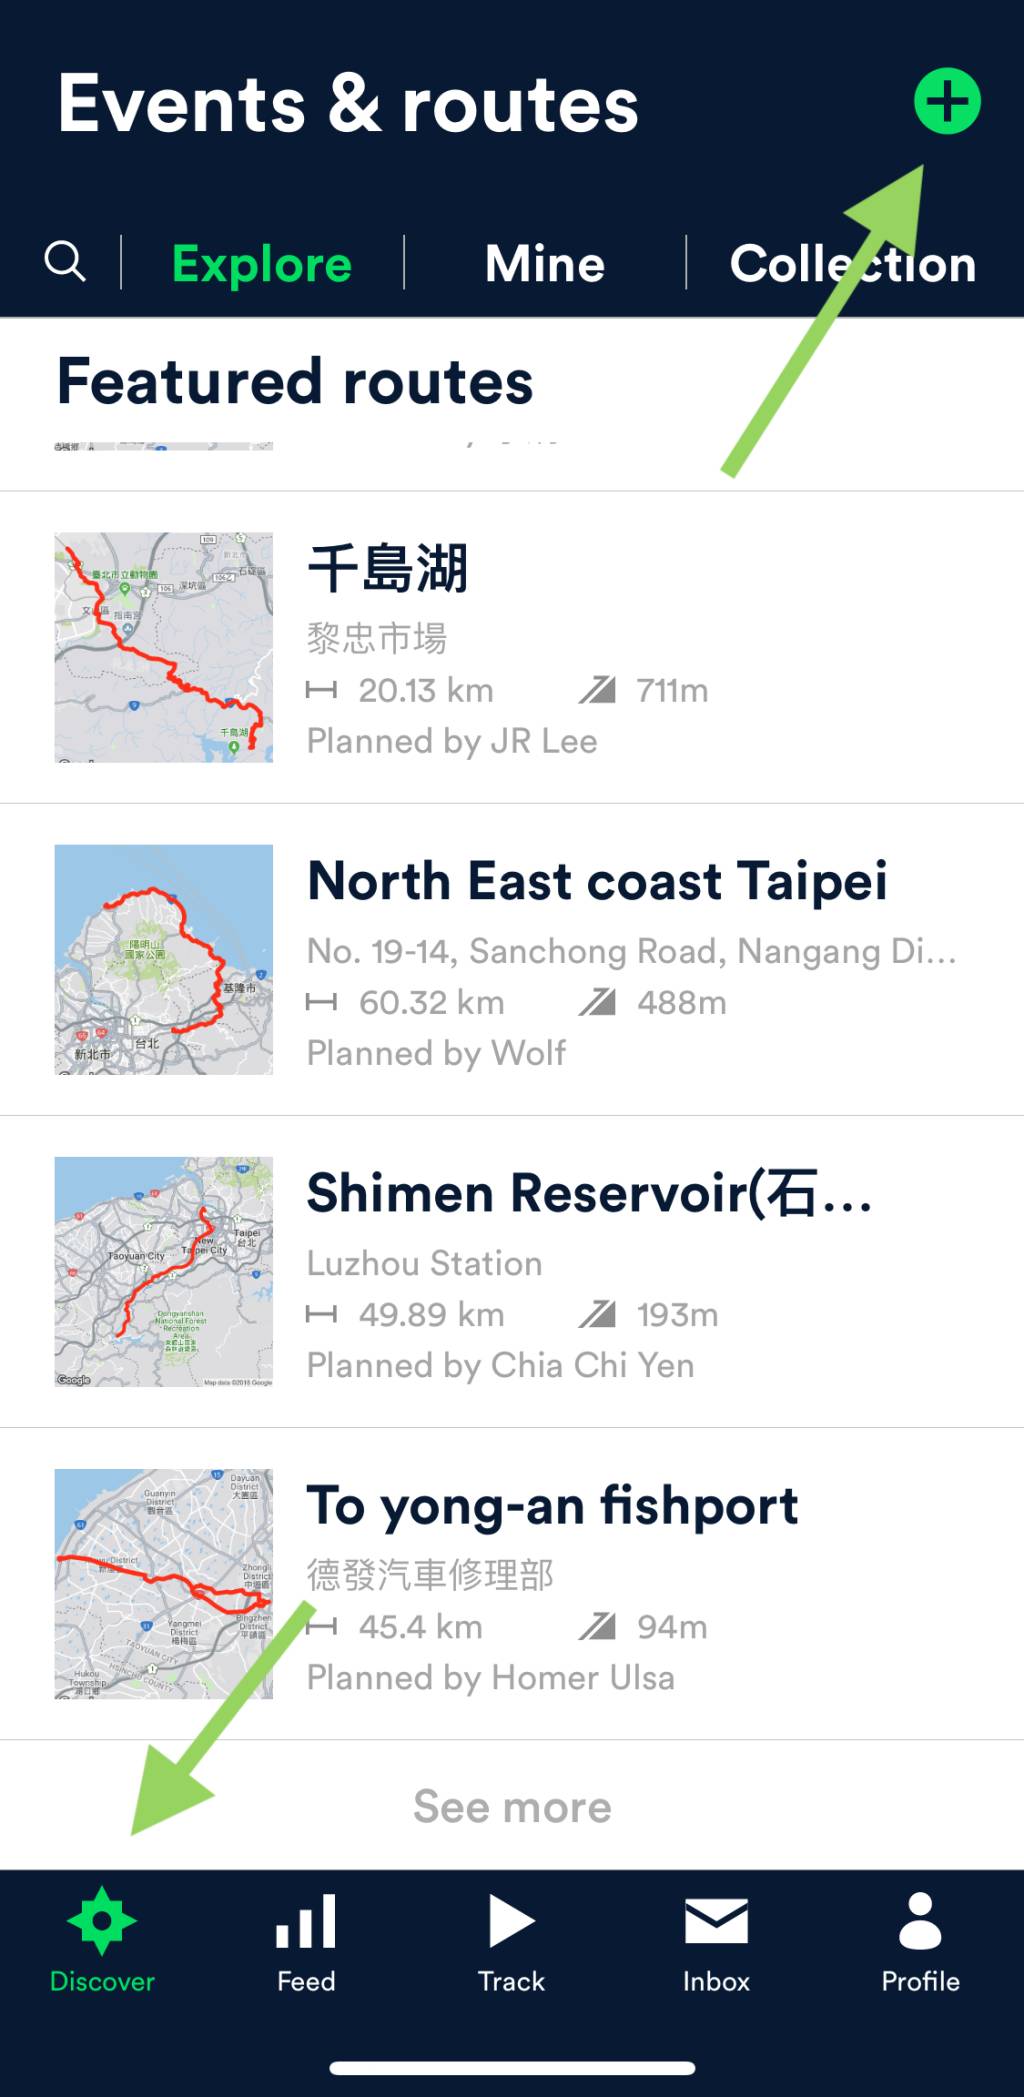
3. Go to the tab of Discover on the left bottom corner
4. Tap on the “+” sign at the top right corner to create an “Event”
Step 1 & 2: Set up your profile and find your friends on VelodashStep 3 & 4: Create an event on Velodash
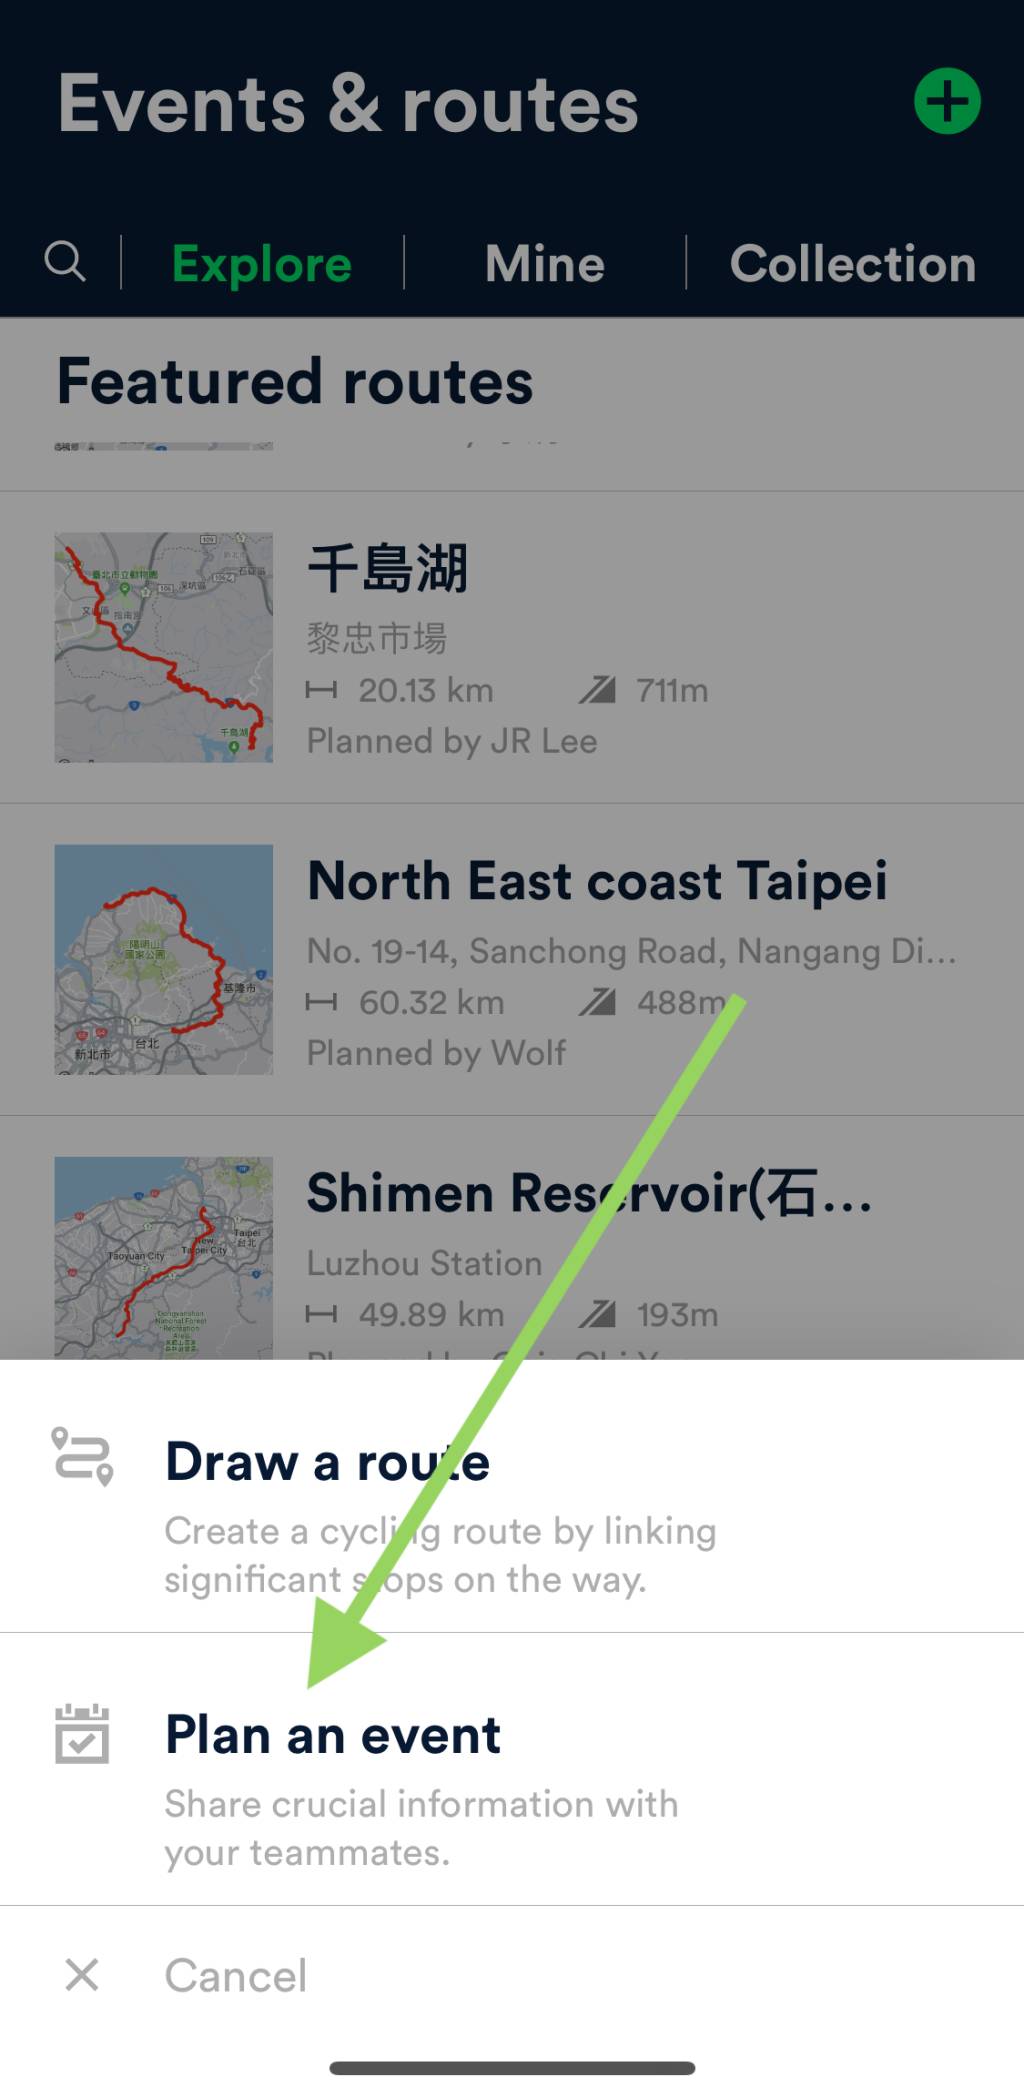
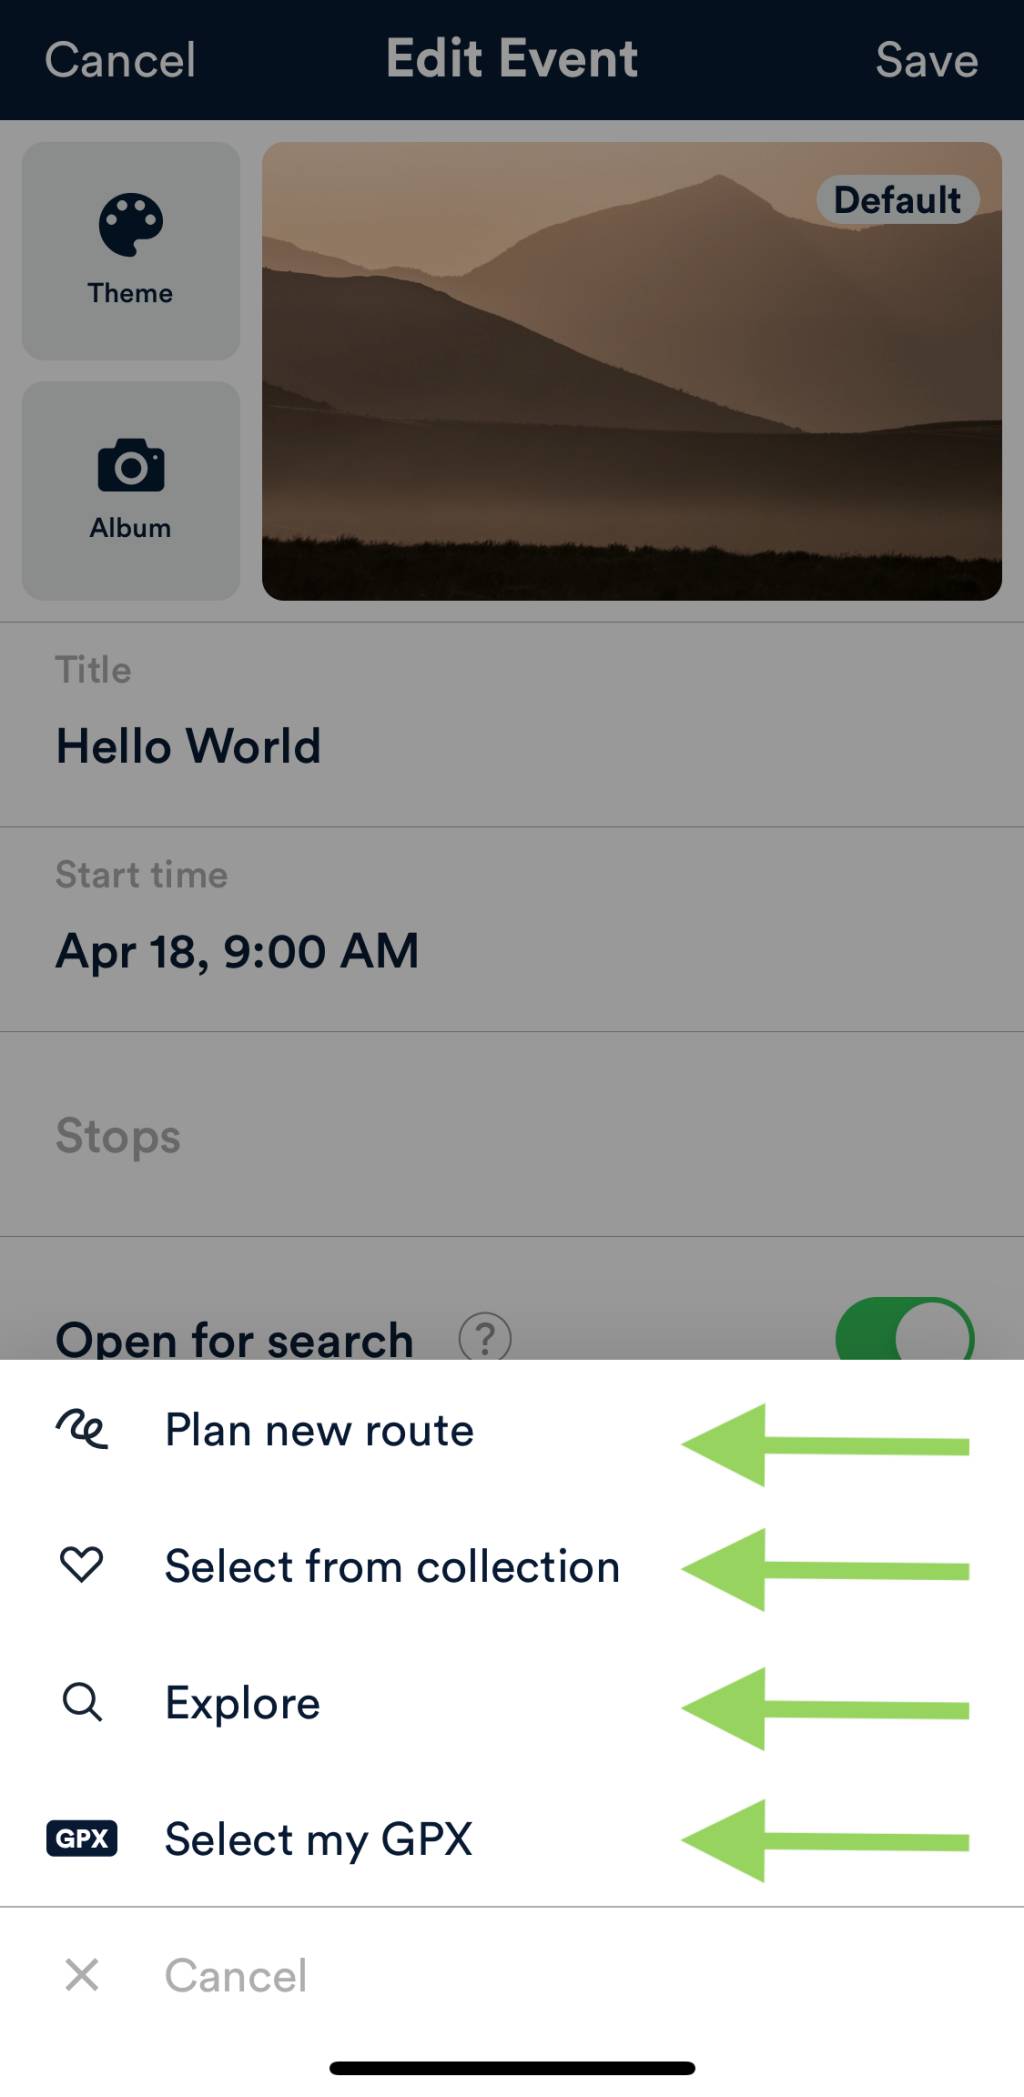
5. At the page bottom, select “Plan an Event”
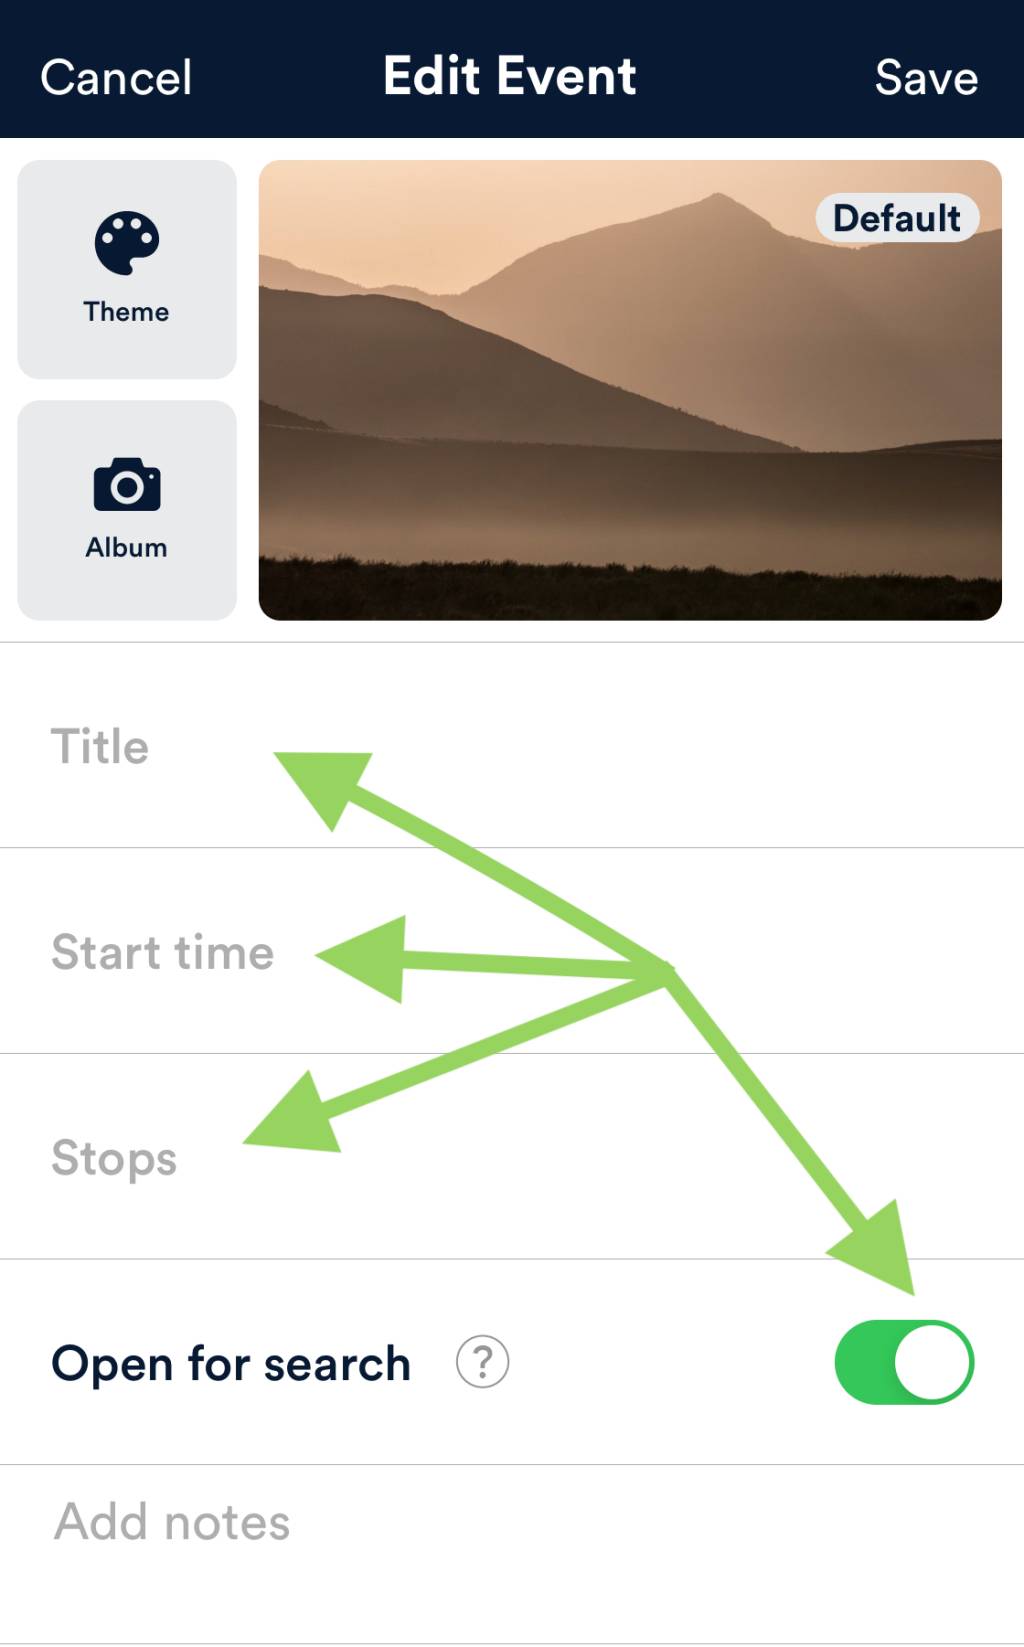
6. On the page of “Edit Event”, fill in info like “Title”, “Start time”, and “Stops”
7. Turn off “Open for search” if this is meant to be a private event
8. “Stops”: This is how you plan a route for the event. There are four ways to do it: plan a new route on the fly; select from the routes you have saved; search for routes created by other Velodash users; and upload a GPX file
Step 8: Plan a route for your event
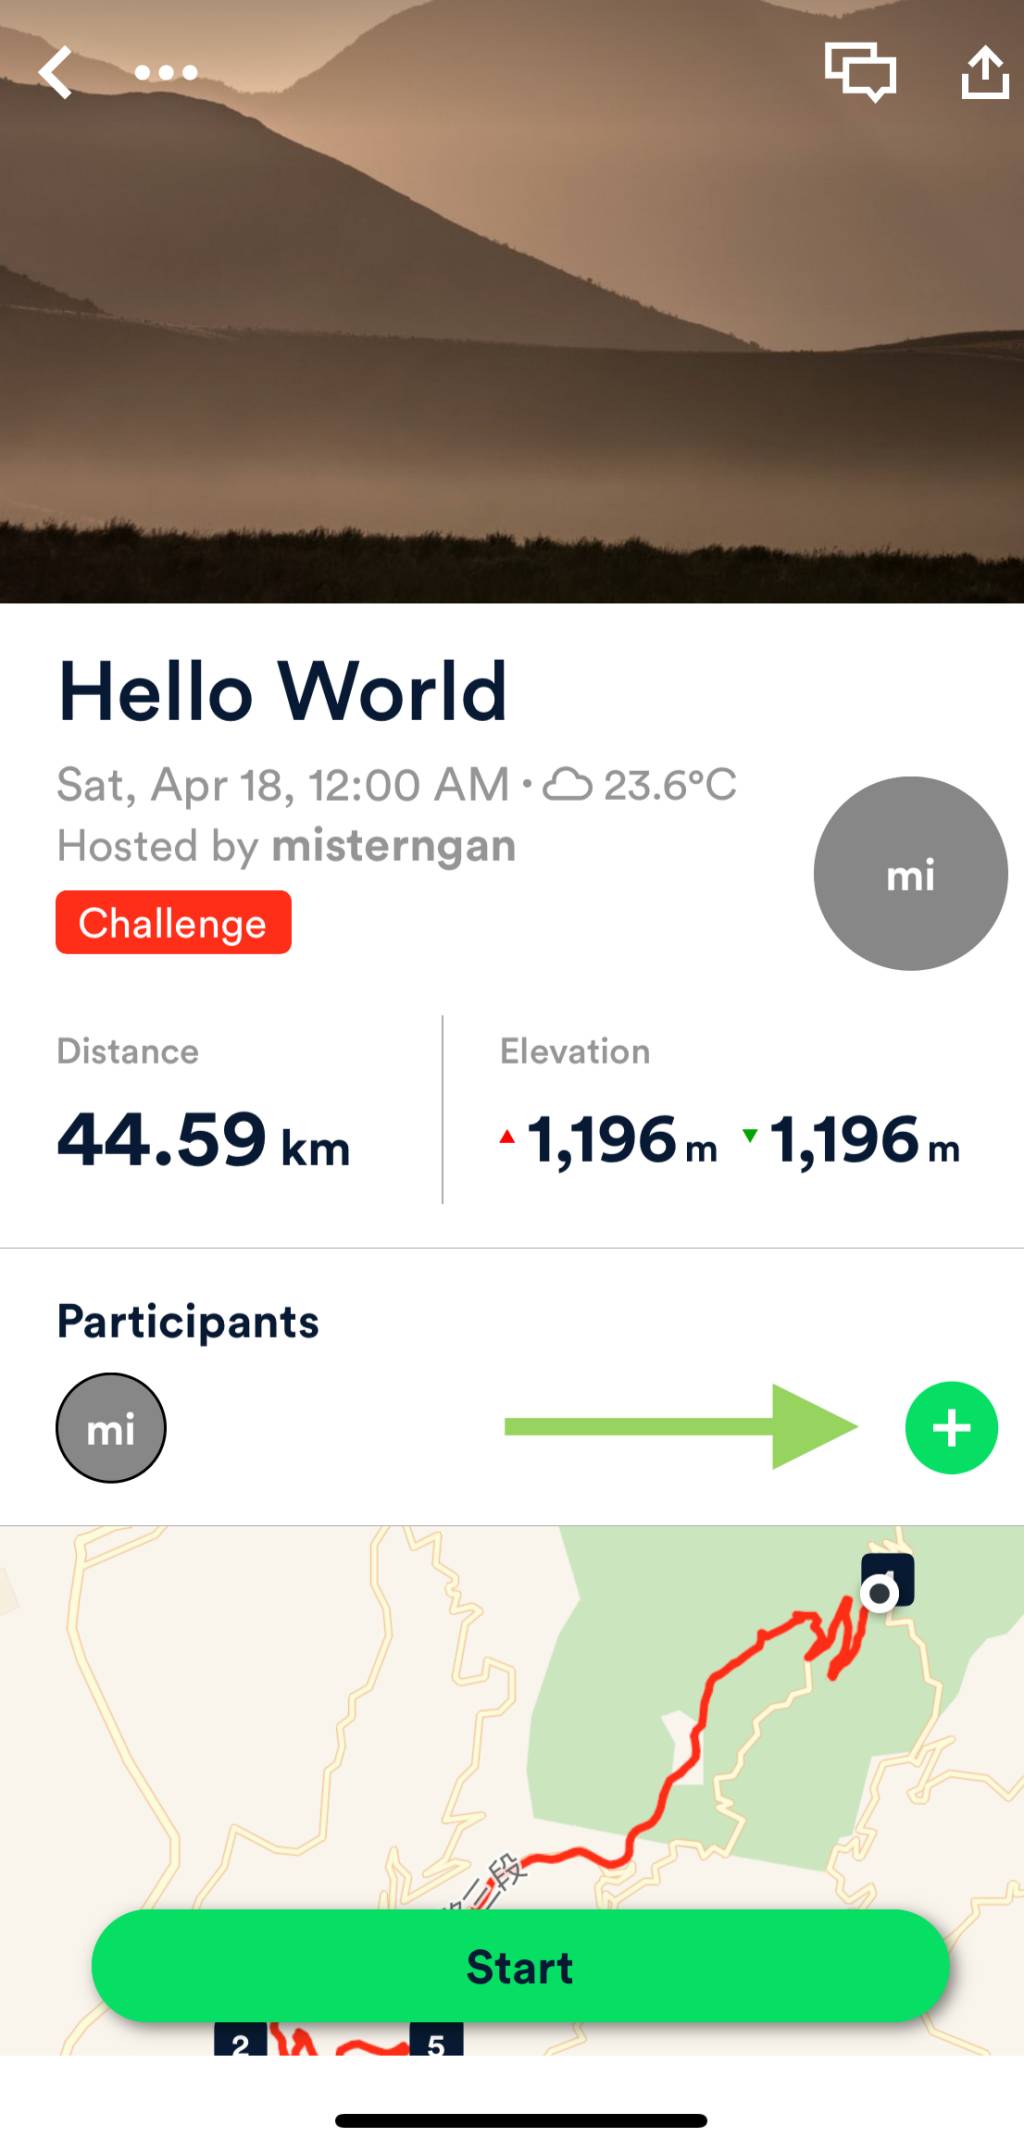
9. Save the “Event” page when you are done
10. On the “Event” page, add your friends to the “Participants”
11. Hit “Start” on the “Event” page
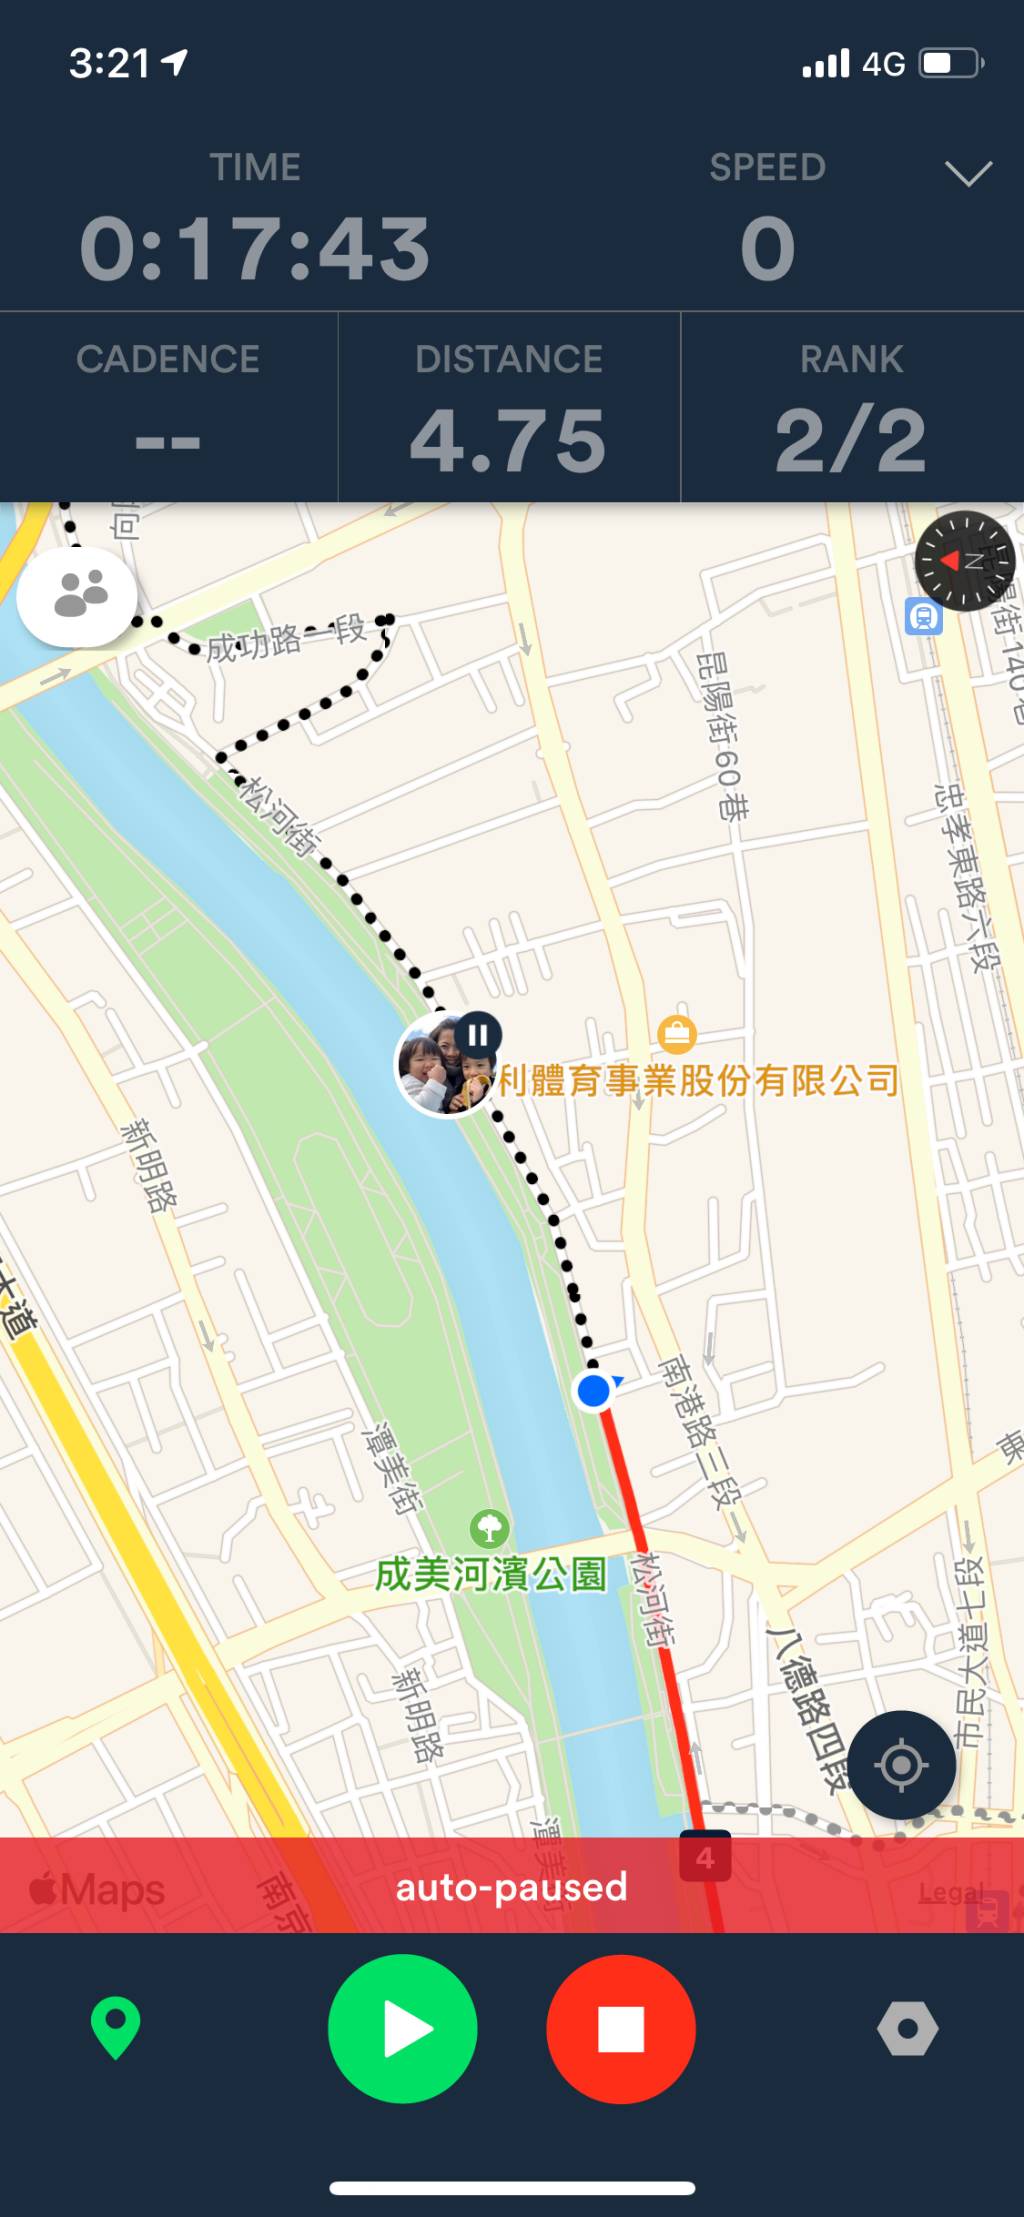
12. Voilà! All the participants will see each other’s status on the map after hitting “Start”. As you can see here, the Blue Dot is me, with Lois being right in front of me on Paused, waiting for me. The solid red line is what I have covered. The dotted route in black is the route planned and yet to travel
Step 9 – 11: Add your friends as participants and hit “Start”Step 12: Real-time location sharing on Velodash
About the route planning function of Velodash
The built-in route planning function is simple and intuitive. You can just specify multiple stops on the map and the App will do the routing for you. However, with the aim to come up with the shortest path, in most cases, the route suggested is not the most ideal one for cycling. The dedicated bikeways are usually ignored. So, if you want to go by a very specific route, it’s better to plot it on a desktop with Strava or Xplova, and then export and upload the GPX file to Velodash.
However, we don’t always have access to our desktops and sometimes we just want to do a spontaneously ride. As mentioned earlier, in order to use the real-time location sharing feature, we must join a Velodash event. That means we have to have a route after all. In this case, I would just give the route planner the starting stop and end stop, and use the route it suggested for the event planner. You don’t really need to follow this suggested route. You are free to deviate from it while still seeing each other’s location and status.
Other Impressive Features of Velodash
There are lots of popular routes created and shared by fellow cyclists; they can be found in the Discover – Explore tab. You can save the ones you’re interested in to your own collection, and retrieve them when you are planning your event.
We can also explore other fellow cyclists’ events and join them if you are interested. I once created an event for testing and received a message from some guy asking if he could join me. Too bad I had to turn him down.
Velodash can also be connected to external sensors to improve accuracy. I have successfully connected a Garmin speed sensor to the App.
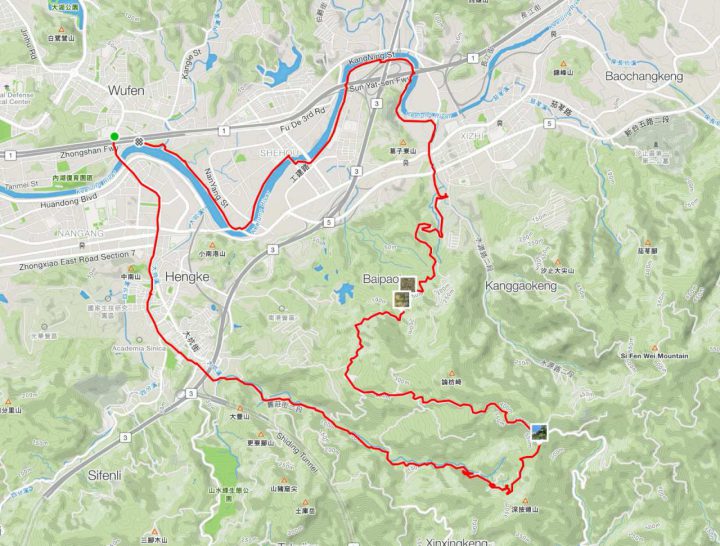
I had been seeing fellow local cyclists posting accounts and photos of their rides along the route named Xizhi Pigeon 汐鴿展翅, which seems to be lots of fun. I wanted to do it, too. I found the route’s gpx on xplova and invited Lois to join me. The downloadable GPX file of this cycling route is at the end of this post.
Xizhi Pigeon 汐鴿展翅 is a 28km cycling route with its starting point at the Nangang Exhibition Center 南港展覽中心 on the east fringe of Taipei City. The maximum elevation of 394.29m at the top makes it a good route for climb training. The route mainly consists of Section 1 and Section 2 of Jiuzhuang Street 舊莊街, Xiding Road 汐碇路 and Xizhi Keelung Riverside Bikeway 汐止基隆自行車道. Upon completion of the route, you will draw a pigeon with spreading wings on the map of your GPS tracking app.
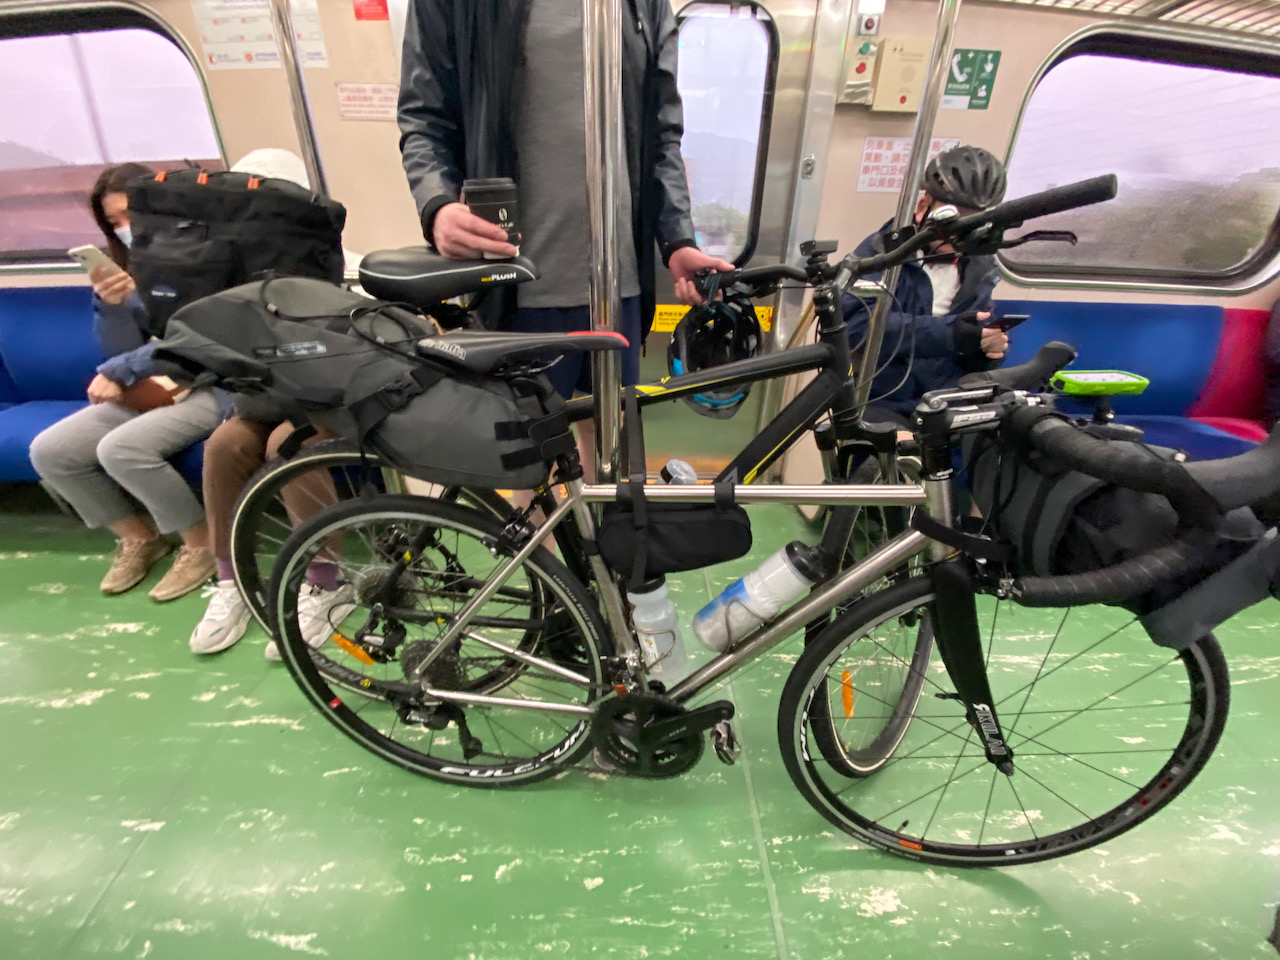
To get to the starting point with your bike, you can either take MRT to the Nangang Exhibition Center Station on the blue line (ref: Taking Bicycles on the Metro) or simply cycle there via the Riverside Bikeways along the Keelung river, setting your destination as the Nanhu bridge. It is along the route, so you may as well just start there. If you live outside Taipei, you can also get there by taking a train / HSR to the Nangang Station, followed by a short ride.
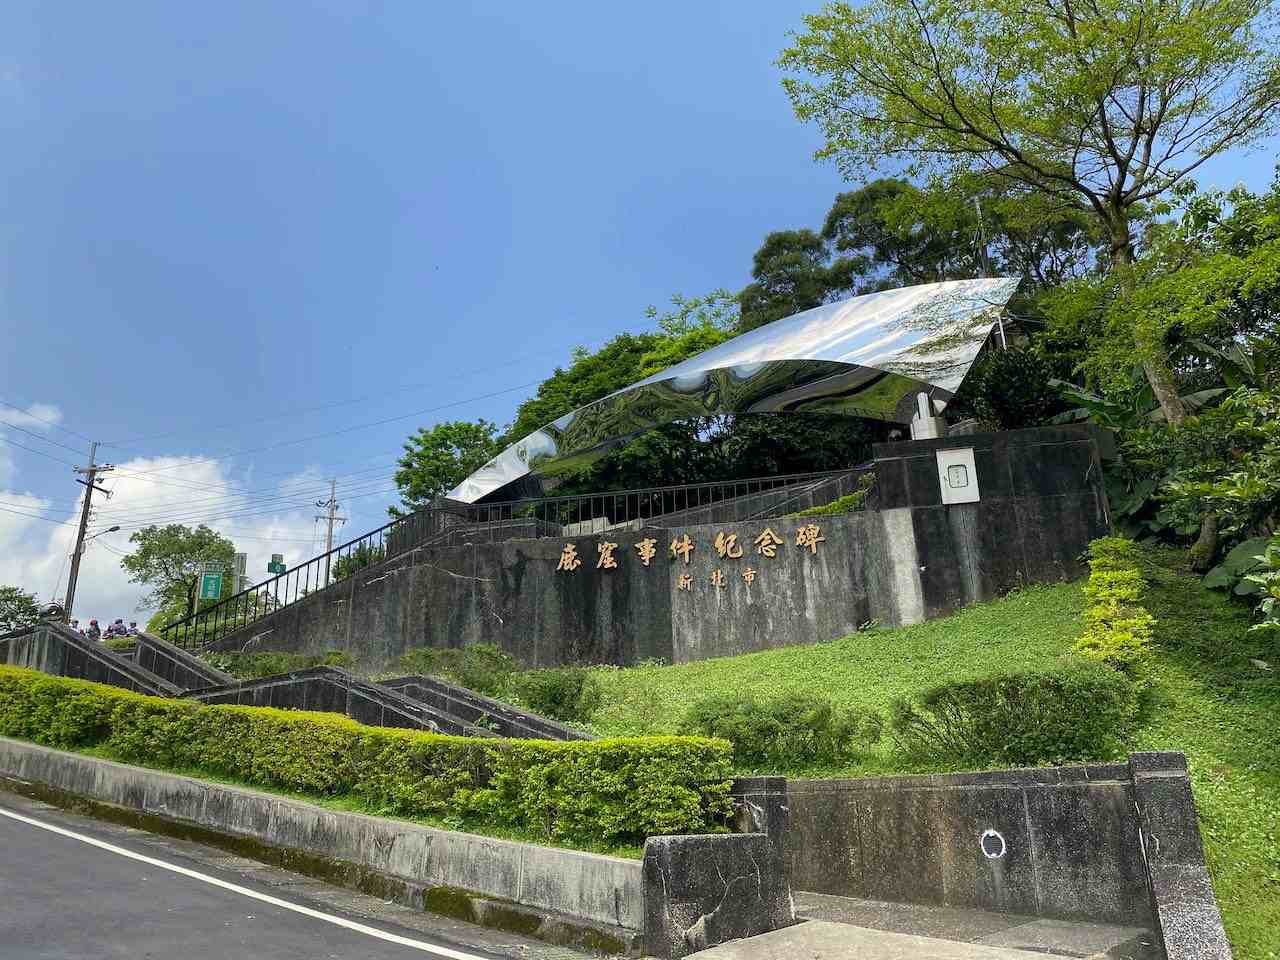
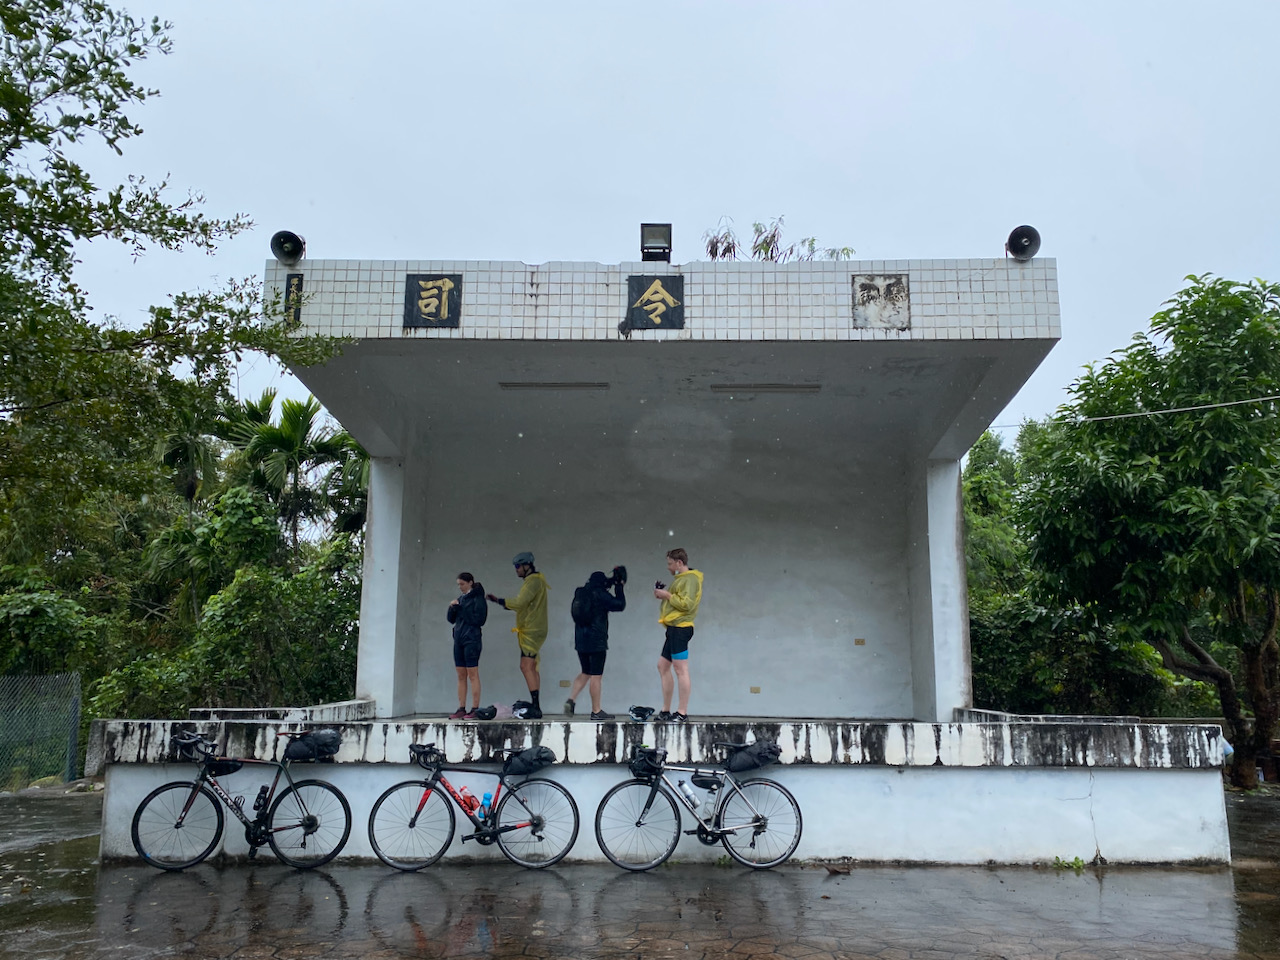
I took the trip on a Friday morning in April, with me on a Rikulau Audax Hercules and Lois on a Klever Q-Comfort. The traffic soon got much quieter after about 5 minutes’ ride from the busy MRT station (Nangang Exhibition Center Station). We could enjoy our ride at our own pace with almost no cars and scooters on Jiuzhuang Street. Some of the slopes were rather steep for me that my heart rate raced up to over 170 bpm. There were tea shops and a tea workshop along the way but I had no mood to stop to explore. It took me about 1.5 hour to reach the top, where a shiny silver sculpture sits. This is the Luku Incident Memorial park and you can find out more about the incident in this blog post.
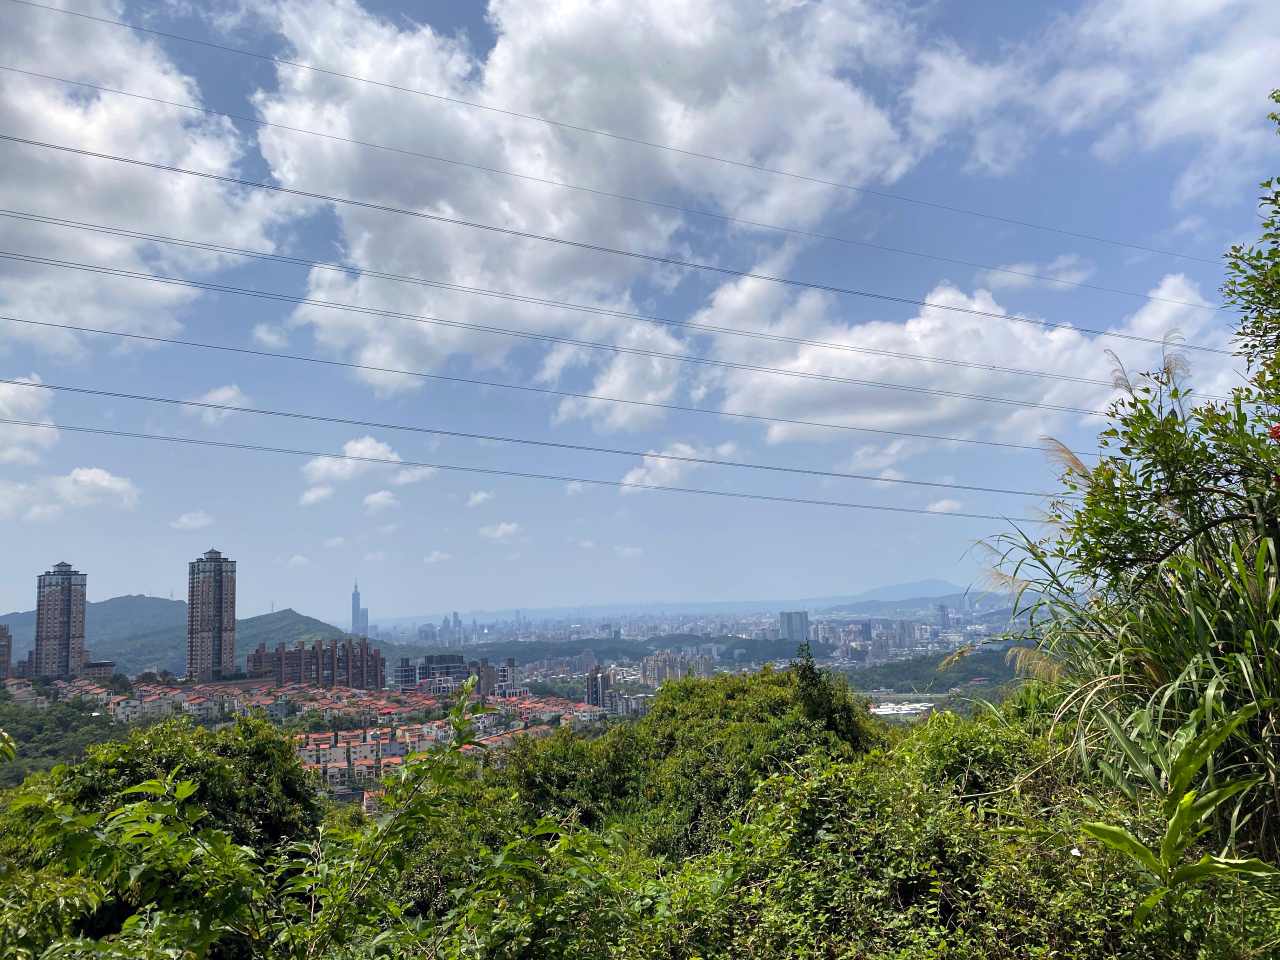
Luku Incident Memorial parkView at the top
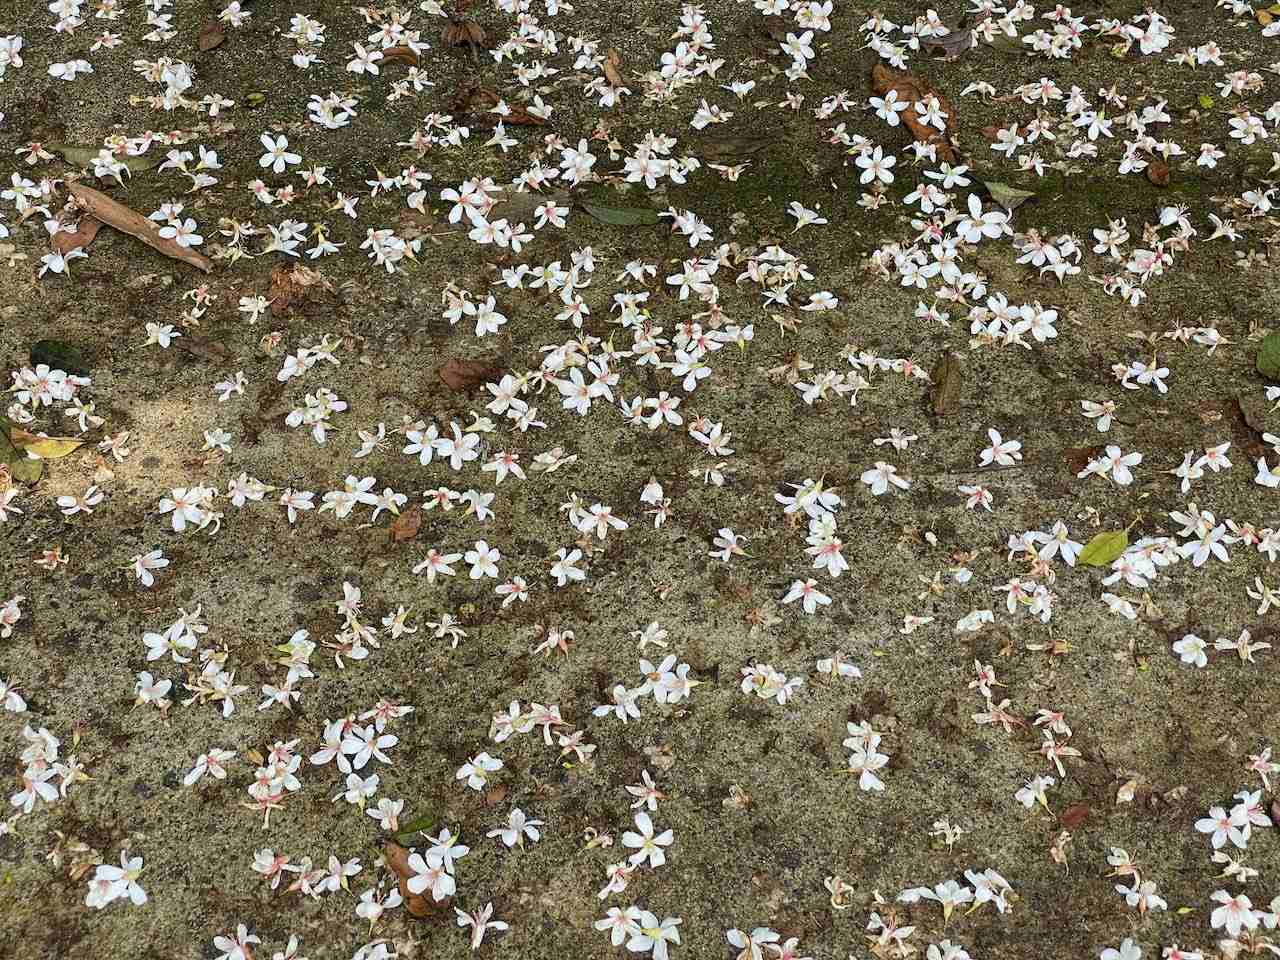
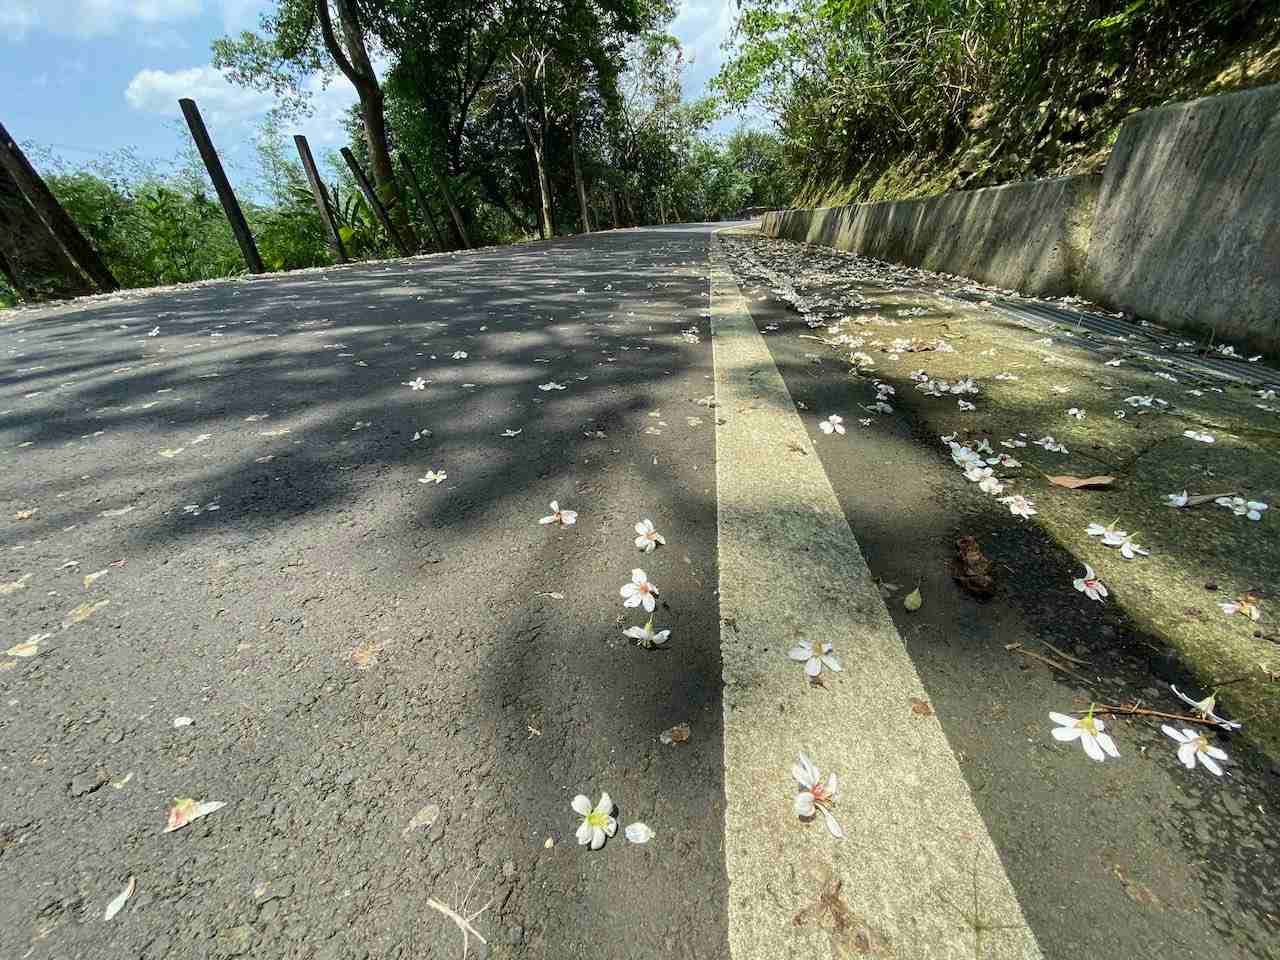
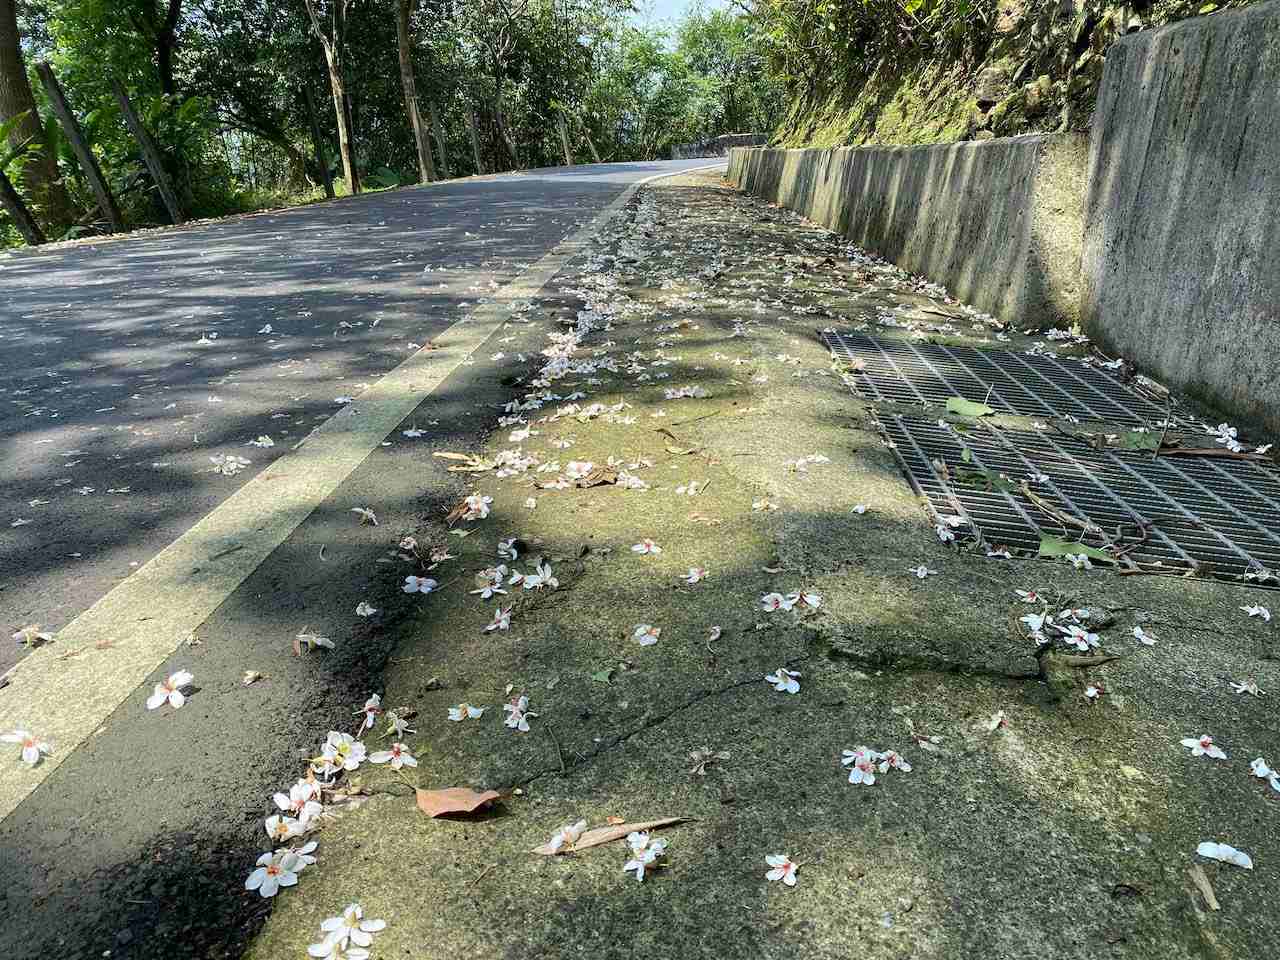
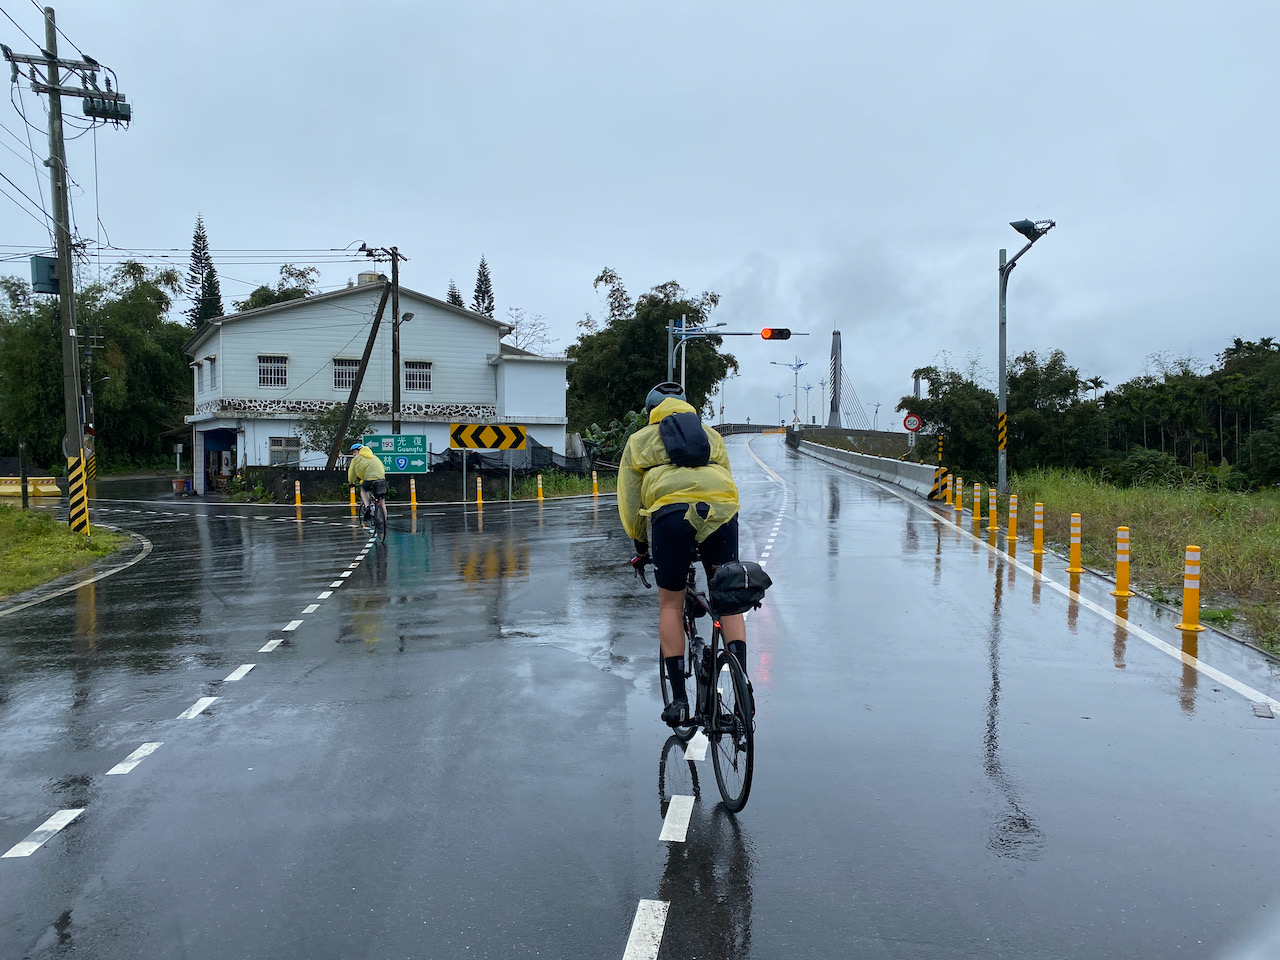
With Velodash turned on to share our locations real time, I left Lois behind briefly to enjoy my speedy descent on Xiding Road. It was less steep and I could enjoy it without having to hit the brake much. I saw carpets of little white flowers spreading along the way. It was so beautiful that I had to stop to take a good look and take some pictures. It occurred to me later that those are the flowers of Tung Trees, which were introduced to the island during the Japanese rule (1895 -1945) for their economical values. The oil from their seeds makes good waterproofing material and paints. The trunks were used for furniture, clogs, toothpicks and matches. They were popular and planted extensively by poor families to supplement their income. Nowadays, local people love the trees for their dense blossoms during April and May. It’s dubbed as the May Snow. As beautiful as they are, you’d better not touch them as the whole plant is poisonous.
Tung flowers on the road
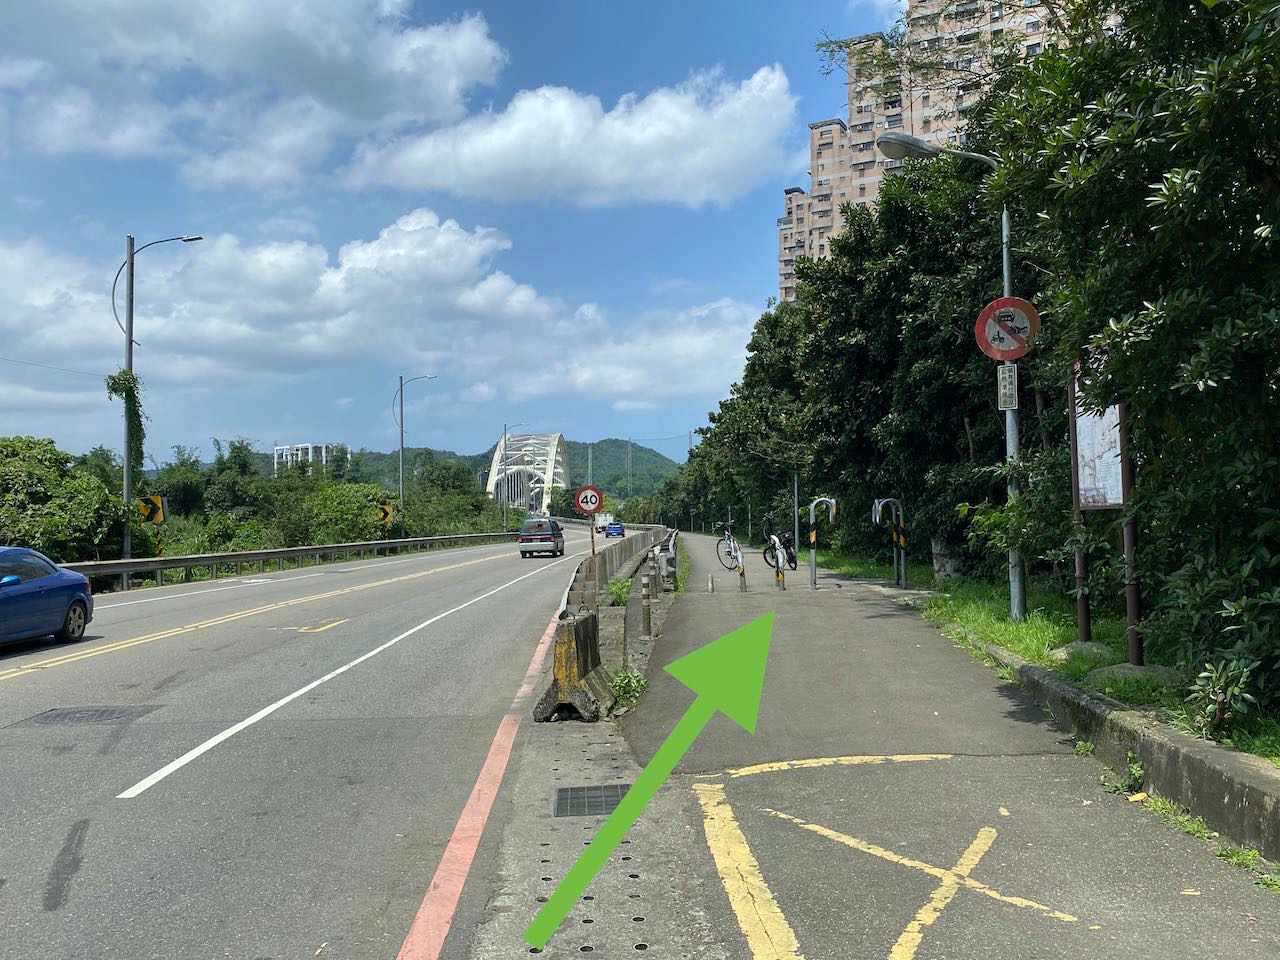
At the bottom end of Xiding Road, we passed a busy juncture and entered the quiet Riverside Bikeways of Xizhi. It’s easy to miss the entrance, which is shown on the picture below. Then you will complete the route after riding for around 15 more minutes.
Entrance of the Xizhi Riverside Bikeway
I love this route because its elevation gives me enough training and it offers the reward of a mild downward slope which is perfect for speedy yet unthreatening descent. Traffic on the route is really low and therefore makes it very bike friendly. No wonder we ran into several groups of cyclists even on a weekday.
If you want more climbing after doing Xizhi Pigeon, Fengguizui lookout is just about 13km away via Dahu Street, which offers a 636m climb. GPS route available at the end of this post.
If you want a low-carb meal, an authentic American smokehouse serving juicy brisket, Bogart’s Smokehouse, is about 1km away.
For me and Lois, our pick is this local hotpot restaurant that offers all-you-can-eat duck-blood curds 鴨血, braised pork rice 魯肉飯, and free drinks and ice cream along with a very generous portion of meat and veggies in a standard lunch set. That’s a very satisfying conclusion for a great ride.
NOTE: To use the routes, please install the App on your smartphone. The App will launch and load the route automatically after you tap the above links on your smartphone’s browser. For Garmin Connect, you can then use the APP to send the route to your garmin device. If your Garmin device is not purchased in Taiwan, you will also need make sure you have the Taiwan map on your device. Here is our blog post on this topic.
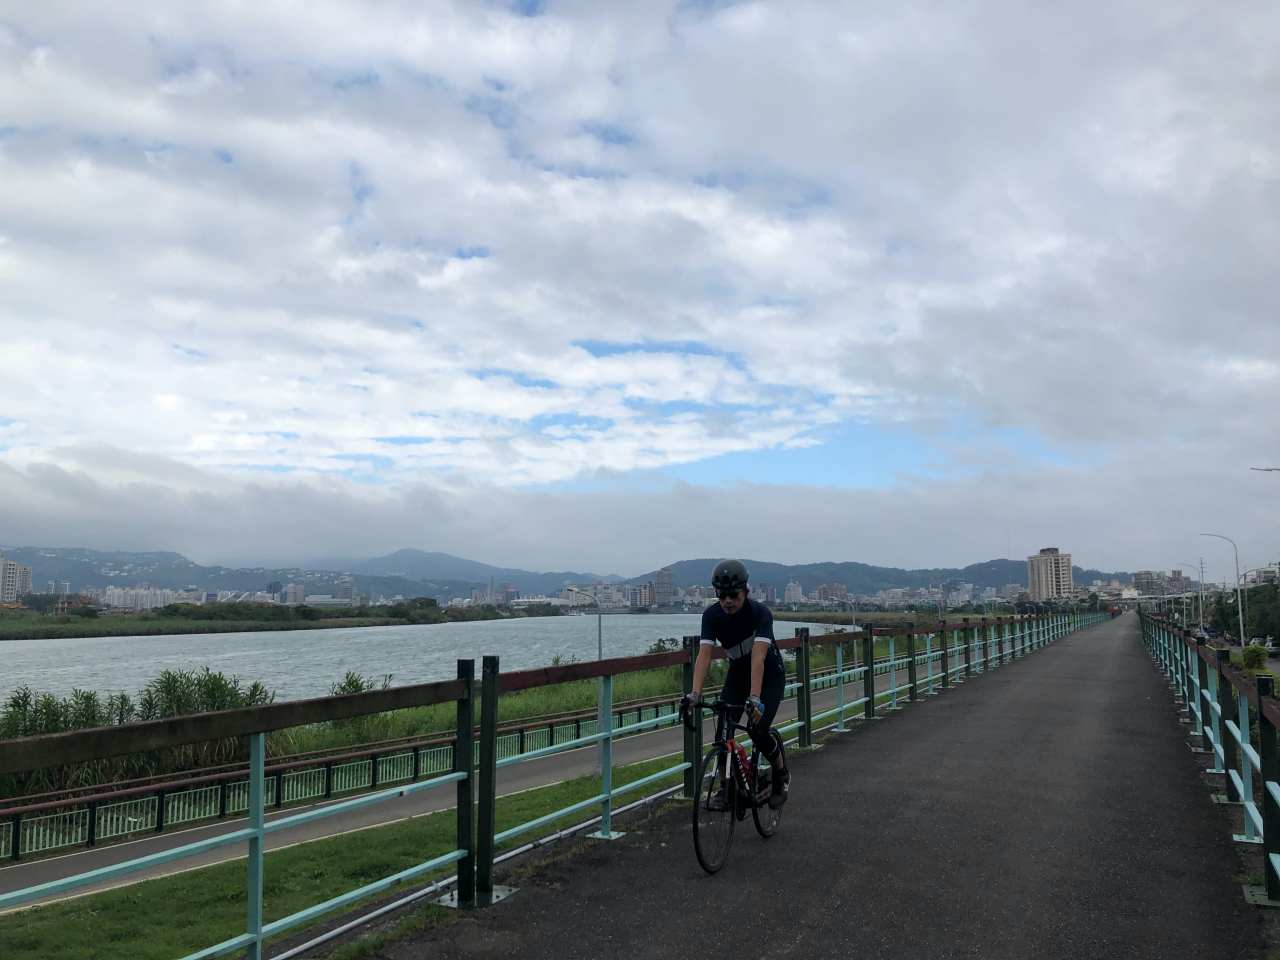
The riverside bikeways 河濱單車徑, built along the rivers winding through Taipei City and New Taipei City, form a vast network of bike paths. A significant part of it embraces Taipei City in the shape of a distorted “C”, with its flourishes extending towards Xizhi 汐止, Xindian 新店, Sanxia 三峽, Taoyuan 桃園, and Tamsui 淡水. Since only bicycles, e-bikes, and pedestrians are allowed on these designated bike paths (except one or two occasional service vehicles with special permit), cyclists don’t need to negotiate road rights with other motorized vehicles or inhale the polluted air coming from their exhaust pipes. With the absence of traffic lights, these well-paved and seemingly endless bikeways make a cyclists’ paradise whether you are a seasoned athlete in training, a newbie trying to get familiar with your bike, or a parent cycling with an over-excited new rider. Meanwhile, because of its vast coverage, commuting cyclists can also make use of it like the freeways for bikes to get to the closest exit points, so as to stay away from the busy city traffic as much as possible.
Riverside bikeways in Taipei City and New Taipei CityRiverside bikeways in Taipei City and New Taipei City
Regrettably, these amazing cycling infrastructures are mostly hidden behind the two-storey-high flood walls erected between the rivers and the city area to protect the cities from flooding during monsoon seasons, which causes the riverside bikeways remain unknown, or at least neglected, for many of the cities’ residents, let alone tourists and visitors. Cyclists who come for a cycling trip in Taiwan for the first time, including myself back in 2009, are most likely inclined to leave Taipei City in a rush for the much craved countryside. Back then I was led by my GPS navigation device onto the busy roads within the city towards the next town. That wasn’t bad at all, but the beautiful, tranquil riverside bikeways were totally ignored because those devices and apps were all programmed to come up with the shortest route to your destination. They still are.
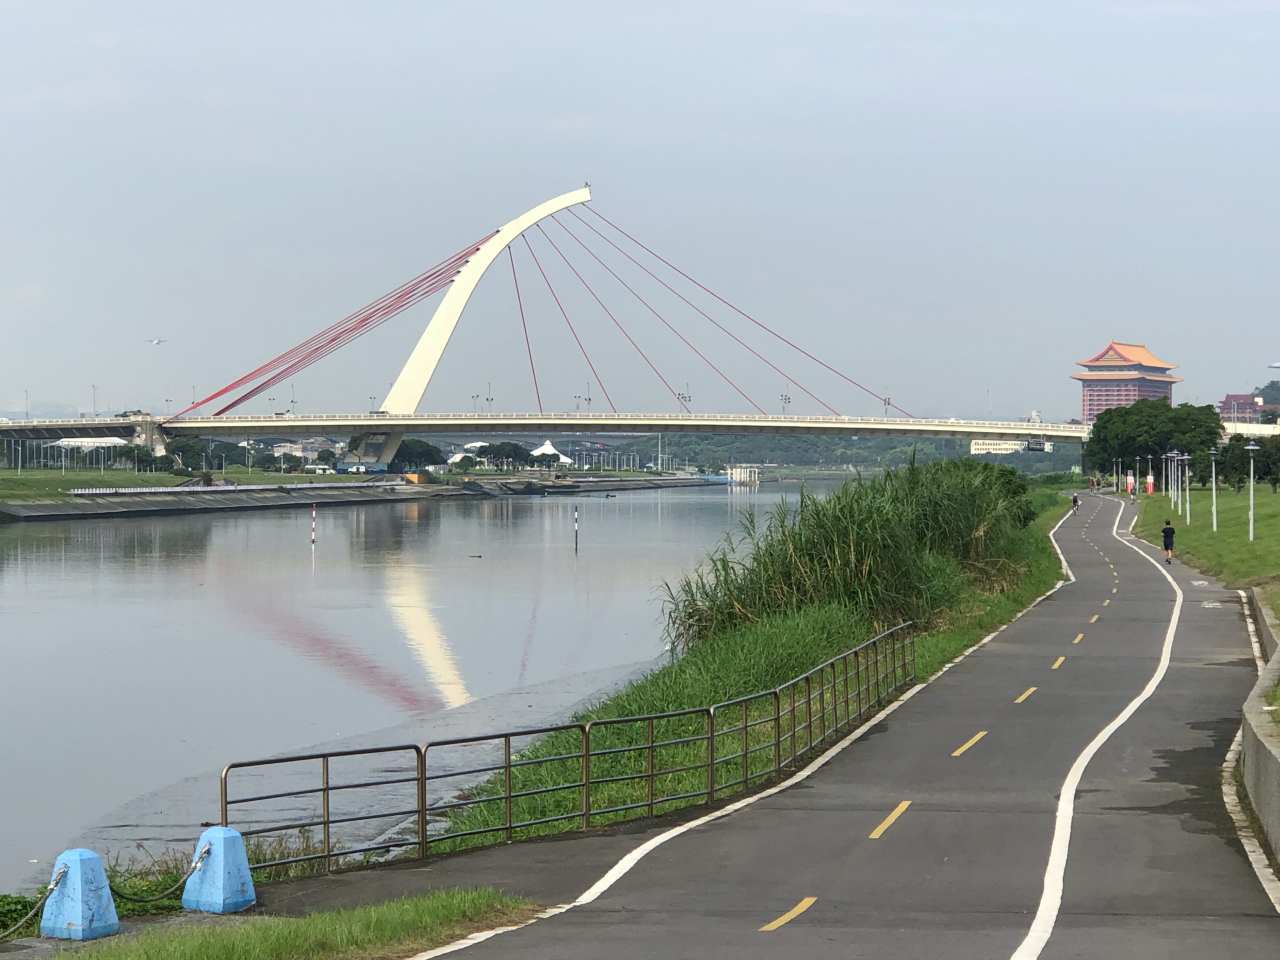
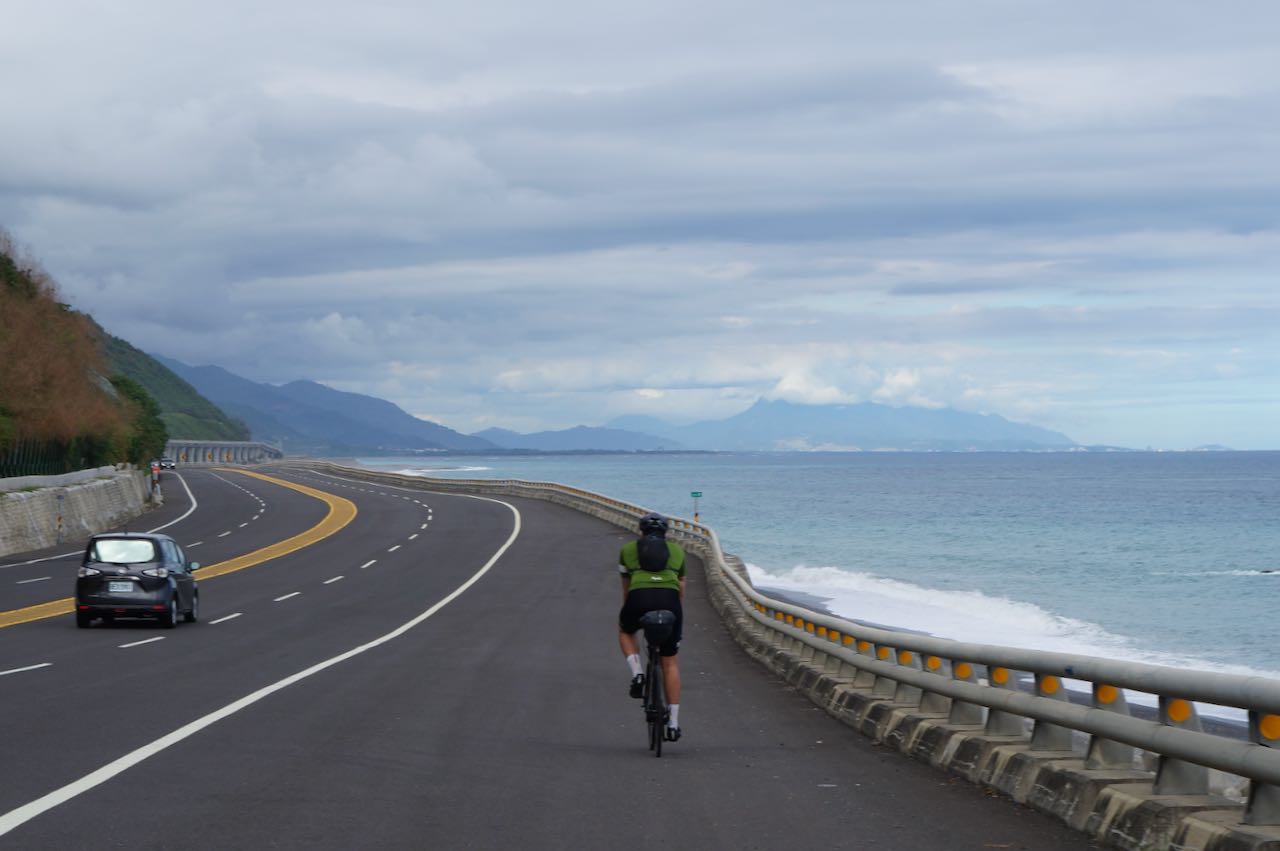
It’s not until my second cycling trip years later that I discovered the riverside bikeways, a more desirable offer by the city to cyclists. Once we got to the riverbank, we found ourselves cycling blissfully on the dedicated bike paths for more than 20km until we reached Tamsui, where the coastal road unrolled before us. It was like getting through a magic tunnel devoid of all the unpleasant aspects of city traffic.
Riverside bikeway near Bali.
The riverside bikeways in Taipei and New Taipei city are too good to be missed as a part of your cycling trip in Taiwan. I have consolidated a list of those access points in this map. You can tap on the square at the top right corner of the following map to launch GoogleMaps with the access points. And then tap on the access point closest to you to have GoogleMaps guide you there. You can then cycle on the riverside bikeway to get out of the city.
These access points can be in the form of:
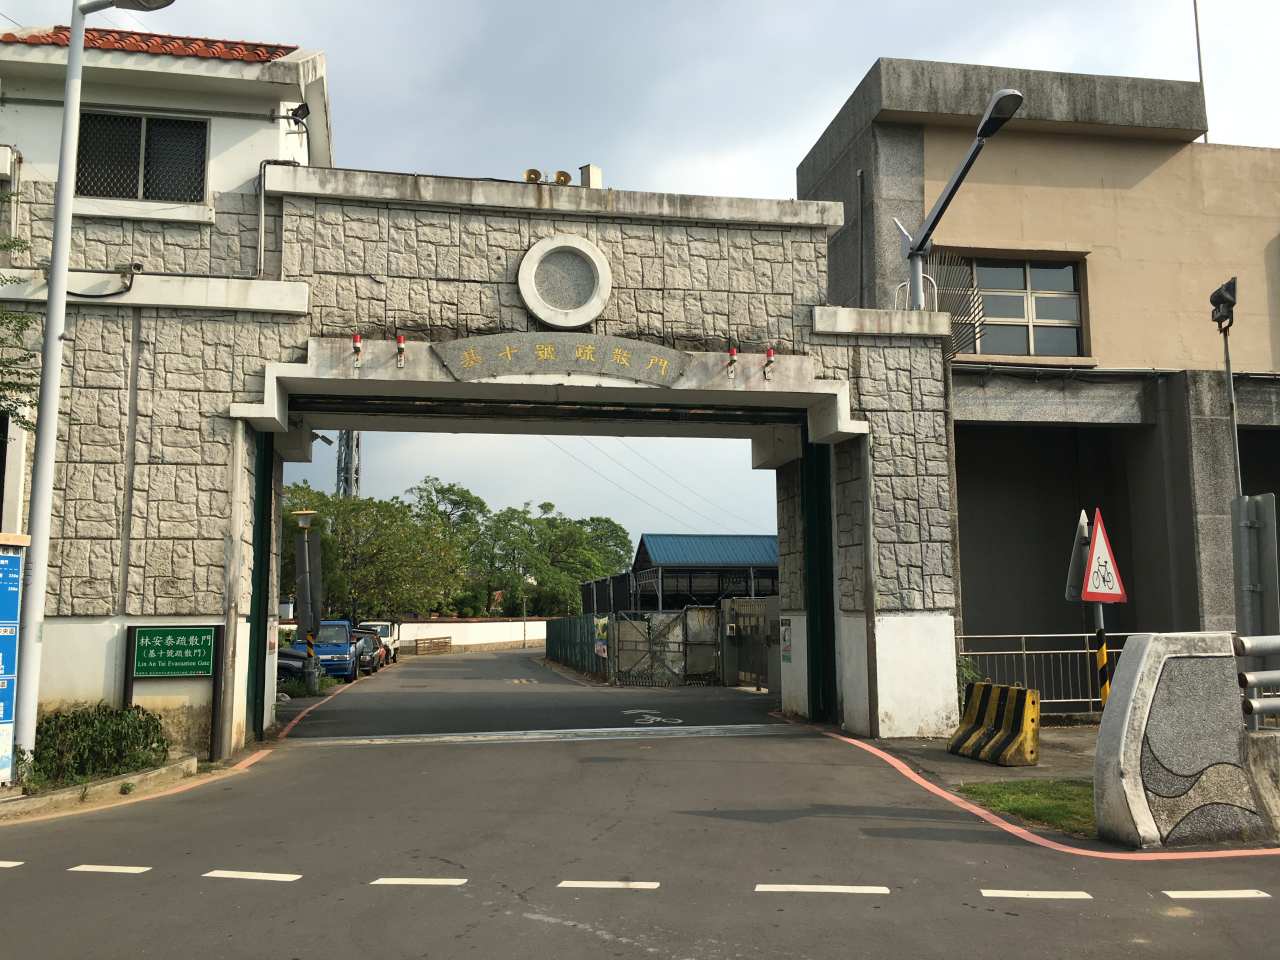
Evacuation gates
A typical evacuation gate
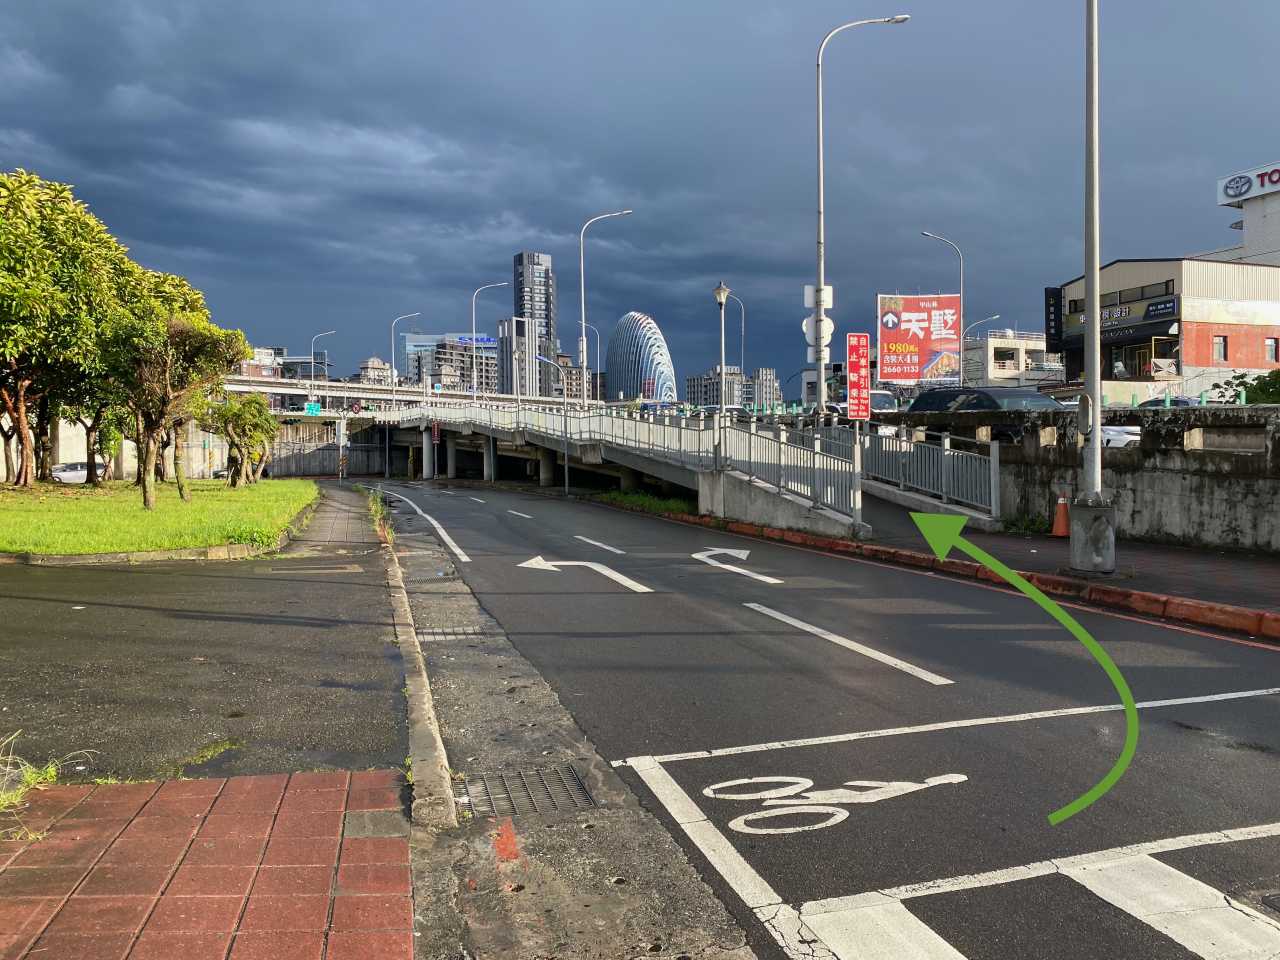
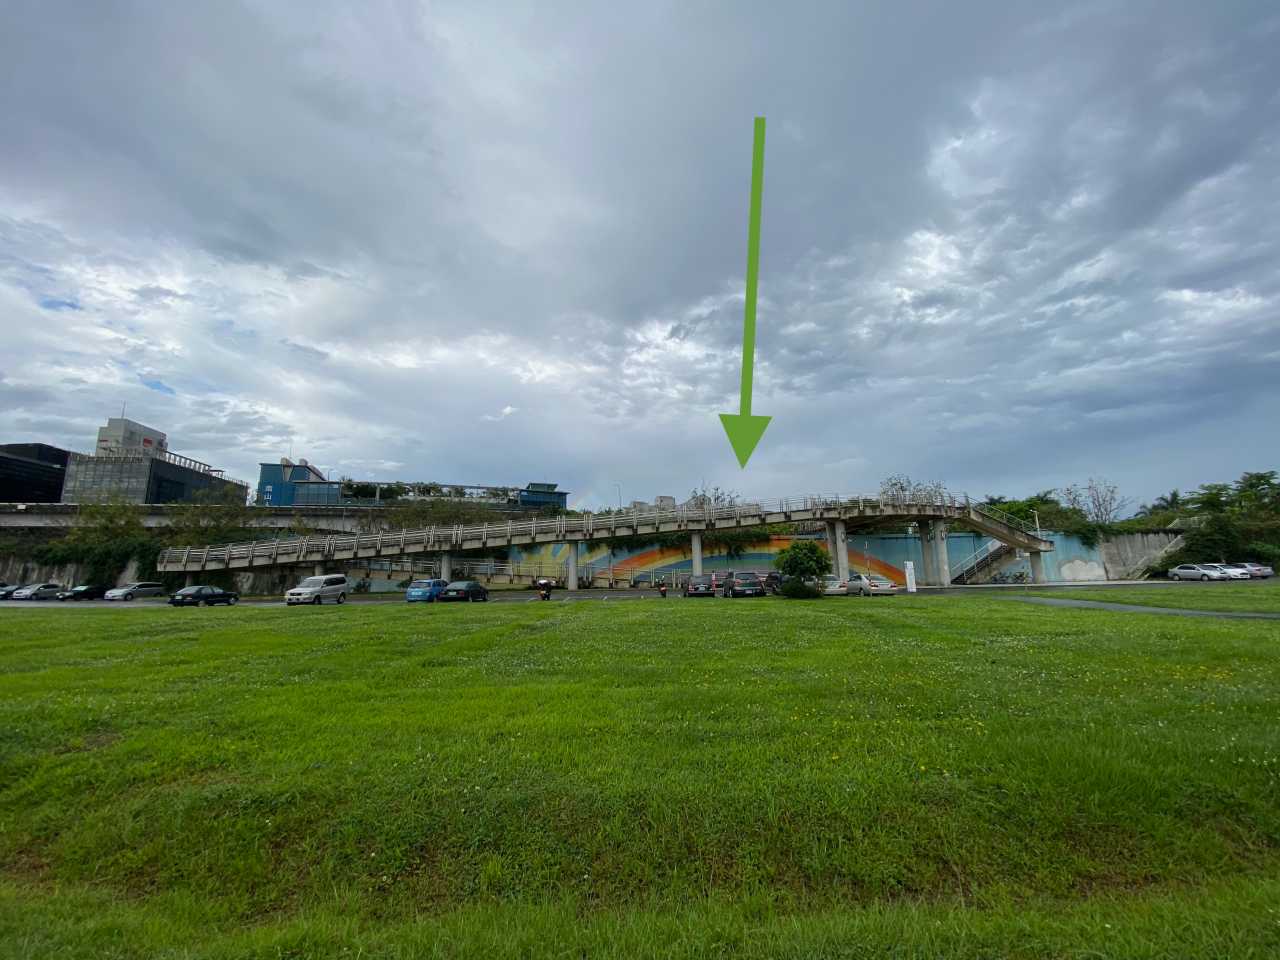
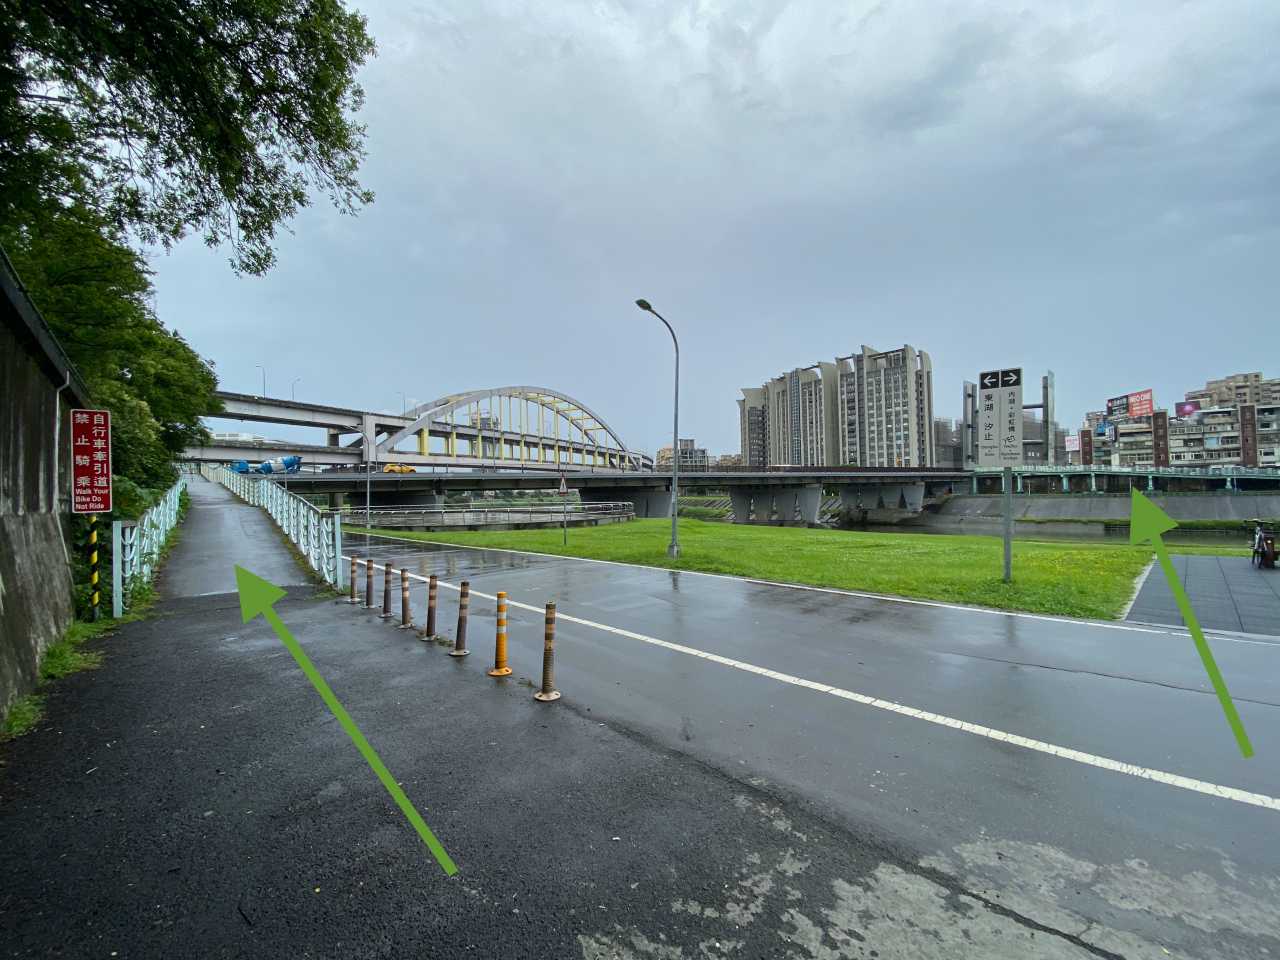
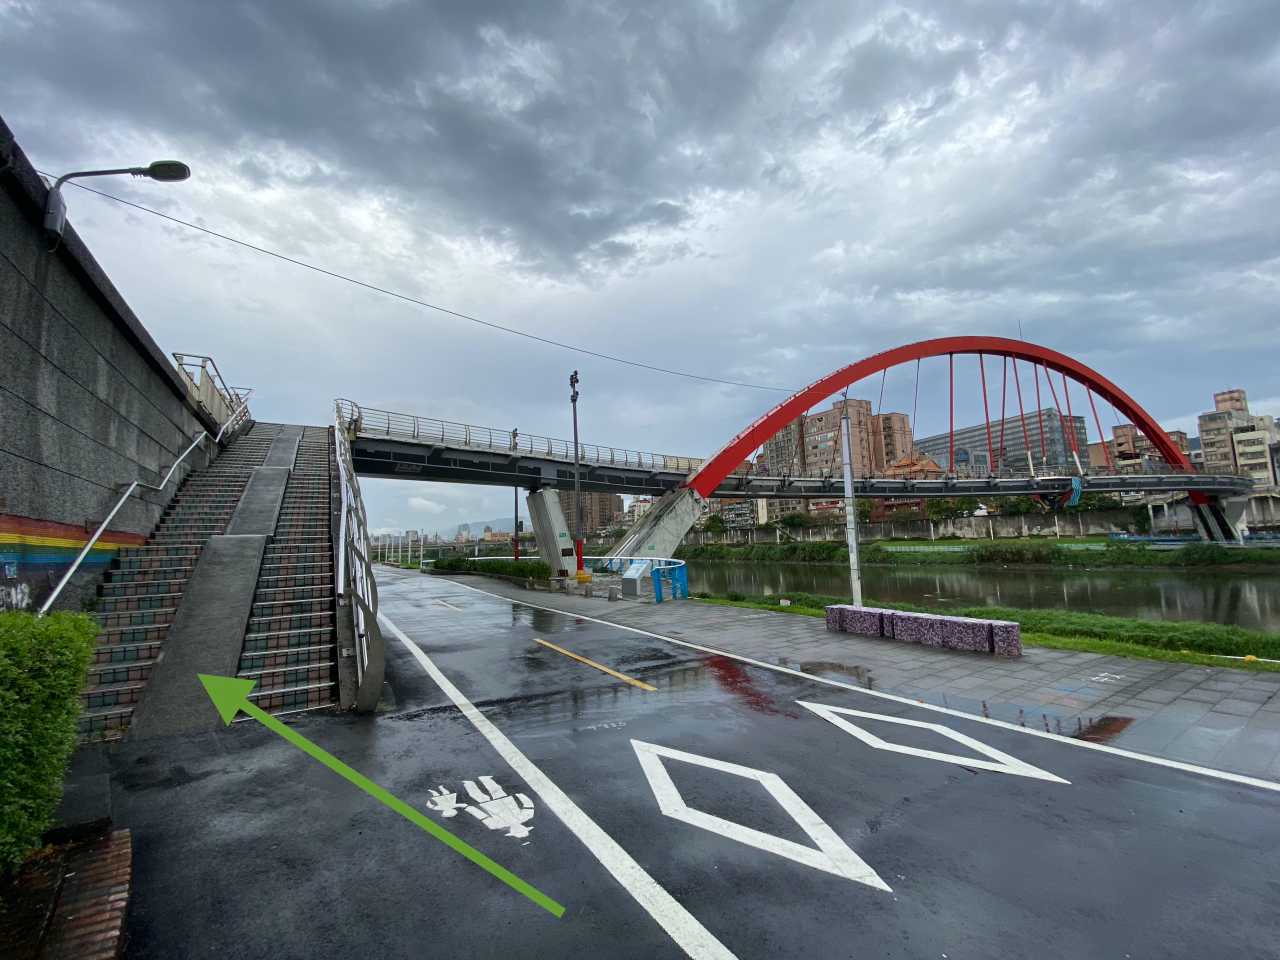
Flyovers to cross over the flood walls
A flyover to cross over the flood wallA Zig-zag ramp/flyover to surpass the flood wallA pair of gentle ramps within the bikeways network connecting the bridge to cross the riverAnother style of ramp for bikes to pass the wall and access the riverside bikewaysA ramp on the middle of a stairway
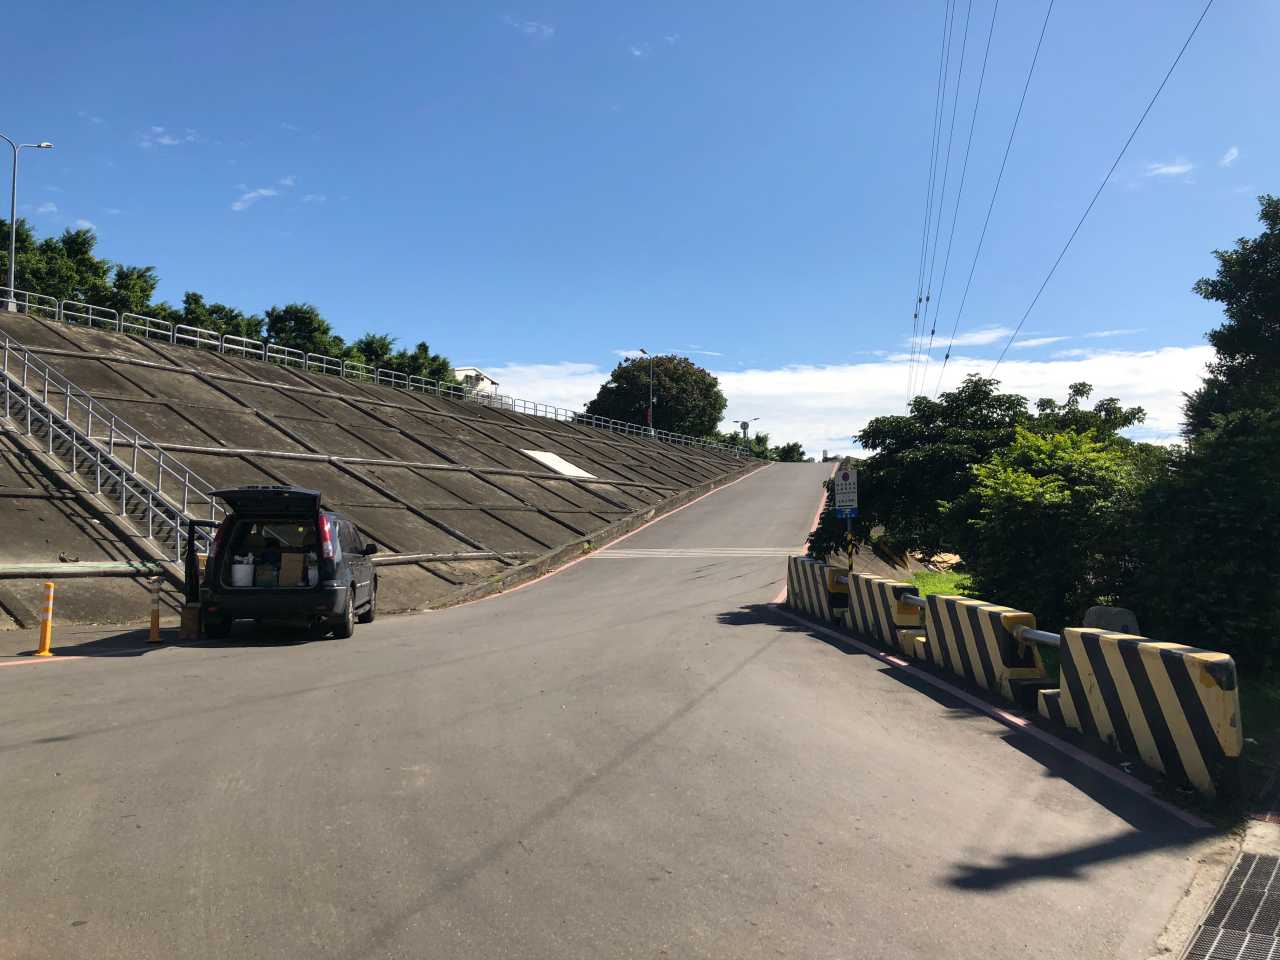
Ramps for cars
A ramp meant for cars to enter the carpak on riverbanks, another type of access point for bikes
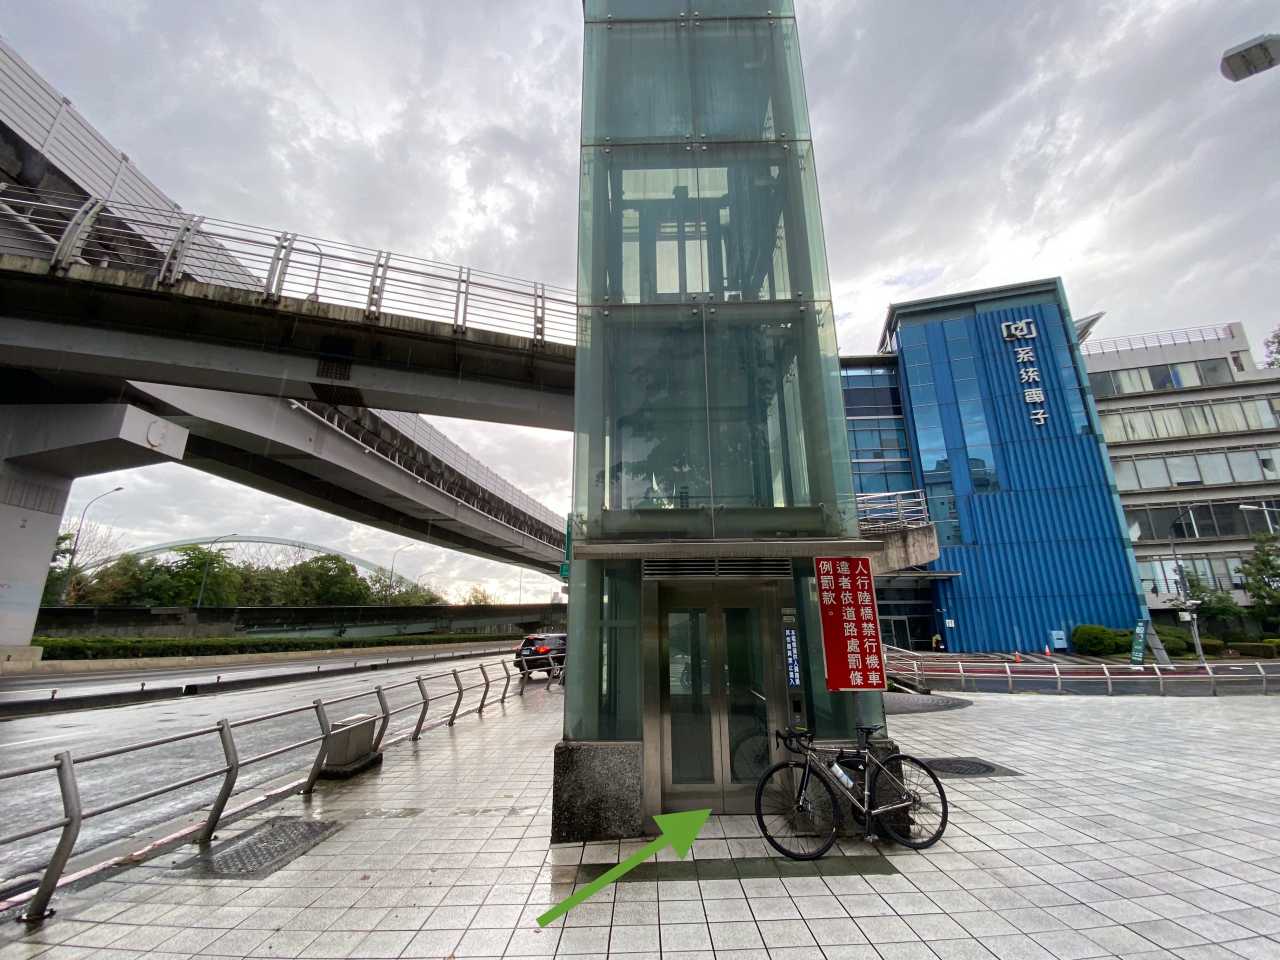
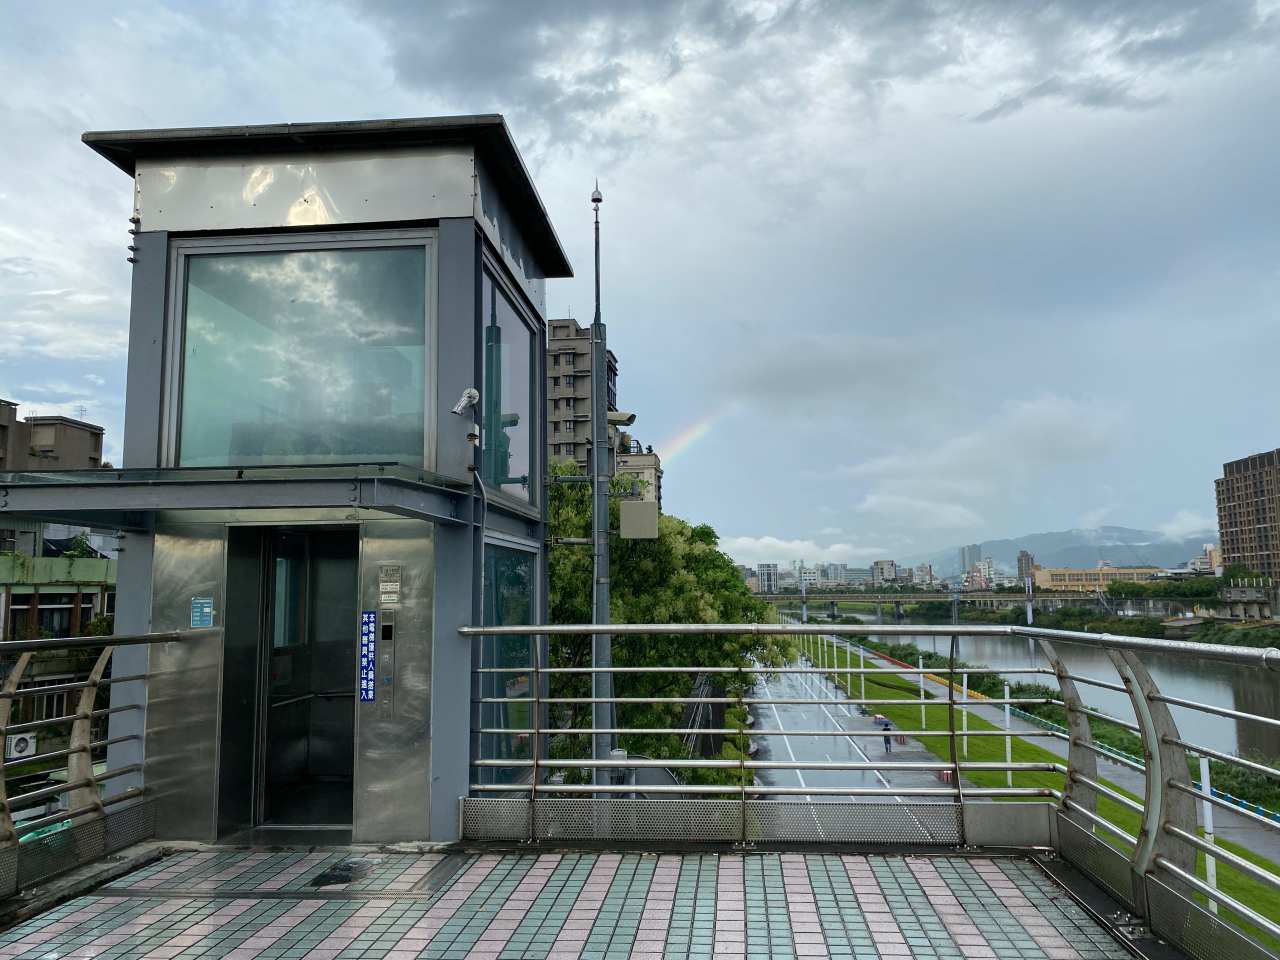
Elevators that operate at specific hours
An elevator to bring you to the footbridge found on the end of Xingshan Road, operating from 05:00 to 22:00Two elevators like this are found at the two ends of the Rainbow Bridge in Songshan District.
There are many other access points for pedestrians, but these are the points where cyclists have no need to carry their bikes on their shoulders and climb the stairways.
A small number of these access points are unmarked on Google Maps so I have marked somewhere nearby like I did with the Yanping Evacuation Gate. Once you reach the marked places, you should be able to spot the access points easily. I have also submitted the unmarked access points as missing places to Google. Hopefully they will show up on the Maps soon.
I have also included in the list those bridges that connect the bikeways to the other side of the rivers and offer designated bike paths to cyclists. Although bikes are allowed on most of the bridges in Taipei, I don’t regard them all as part of the bikeway network. Like Mingquan Bridge, you need to leave the bikeway and join the other vehicles on Minquan East Road to use the bridge. Bridges like this are not on my list.
I have also found some GPX files of the bikeways from the two government websites. I have imported to this map for you easy reference.
https://taiwanbike.taiwan.net.tw (site removed/down as in 2024-01-24)
The list and the routes are not yet completed and I will keep updating it whenever I come across a new access point or a new gpx file. If you happen to know one that is not yet listed here, or you spot any error in our list, please send us an email. We, and I believe all our fellow cyclists, will appreciate your help. Thank you.
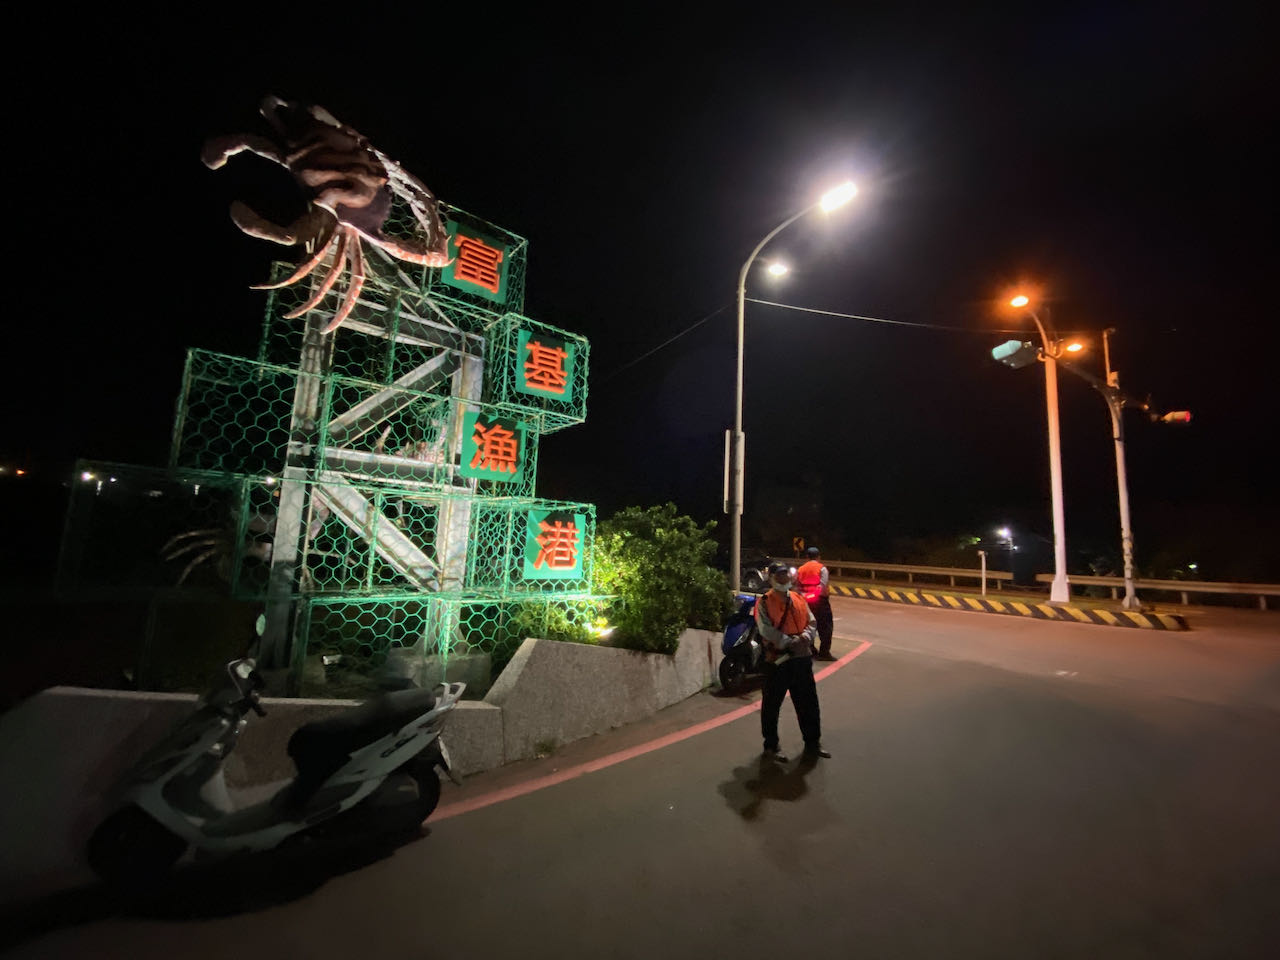
Bad news: weather forecast said there wouldn’t be tailwinds for us. It’s very uncommon for this season and it happened to fall on the event day. It turned out that at some point, there would even be a 7km/h wind blowing against us and I had to join some groups for drafting. But on the bright side, the lack of north wind means that it would be dry and there would be no slippery, dirty road surfaces.
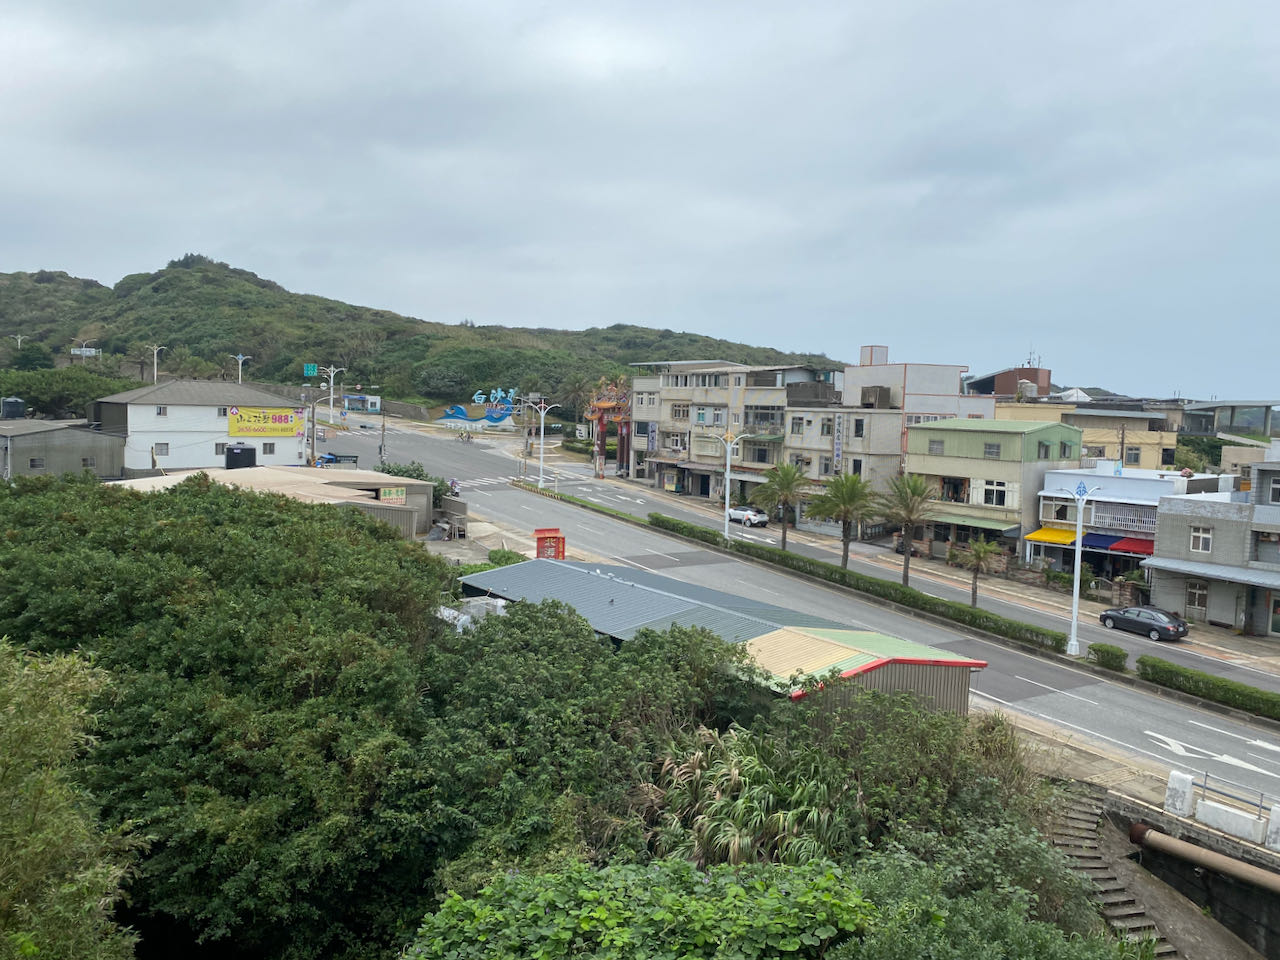
On Friday morning, I took the MRT to Hongshulin Station and cycled 20 km to Baishawan where only three businesses were open: a pub, a grocery store and a food stall selling sticky rice dumplings and escargots. They only exist because of those visitors to the beach during summer. The atmosphere is completely different in November. I felt so lonely and regretted that I had only a simple meal from 7-eleven in Hongshulin. I should have treated myself to a decent one before getting to this small settlement.
Poor Choice of Hotel
I checked into a small hotel I booked a couple weeks ago. It was clean with a good view. But the mattress was too soft for me. There was no support at all and it left my body in a strange posture. I missed my own bed already. I took a shower and had a beer with some escargots and two sticky rice dumplings for “dinner”. Around 4:00 pm, I was ready to go to bed. I estimated that I would have had 6 hours of sleep before my alarm went off at 10:00 pm. But I was woken up by the arrival of a group of cyclists who checked in around 6:00 pm. Soundproofing of that building was so poor that whenever the elevator moved, there was a squeal followed by a knocking sound when it stopped, which made it impossible for me to fall back to sleep. Though being frustrated and angry, I forced myself to lay flat and keep my eyes shut and wait for the time to pass. It’s going to be a long day. Gotta conserve every drop of energy. I learnt, afterwards, that some would even take sleeping pills but I wouldn’t go that far.
9:50 pm, I could not do it any more. I jumped out of bed and ate 2 pieces of bread to top up the fuel in my body, also hoping to trigger some bowel movement soon enough so that it would save me the trouble of looking for toilets during the event.
Takeaways: I could have booked a better hotel where I had stayed years ago. But somehow that hotel had a lower priority on GoogleMaps so that it didn’t show up when I was searching for accommodation in the area. The map even showed that the hotel was closed after I explicitly searched for it. That’s why I ended up experimenting with a new one. But I saw other cyclists heading into it that day so it was probably still in business. Maybe the hotel did not own or update their Google Business Profile actively. So, it’s always a good practice to make a phone call to make sure.
Small homestays/hotels with less rooms should be better choices as there won’t be large groups of travellers making lots of noises. More homestays/hotels are available in Sanzhi District 三芝區 which is around 6 km to 8 km away from the starting point.
Starting
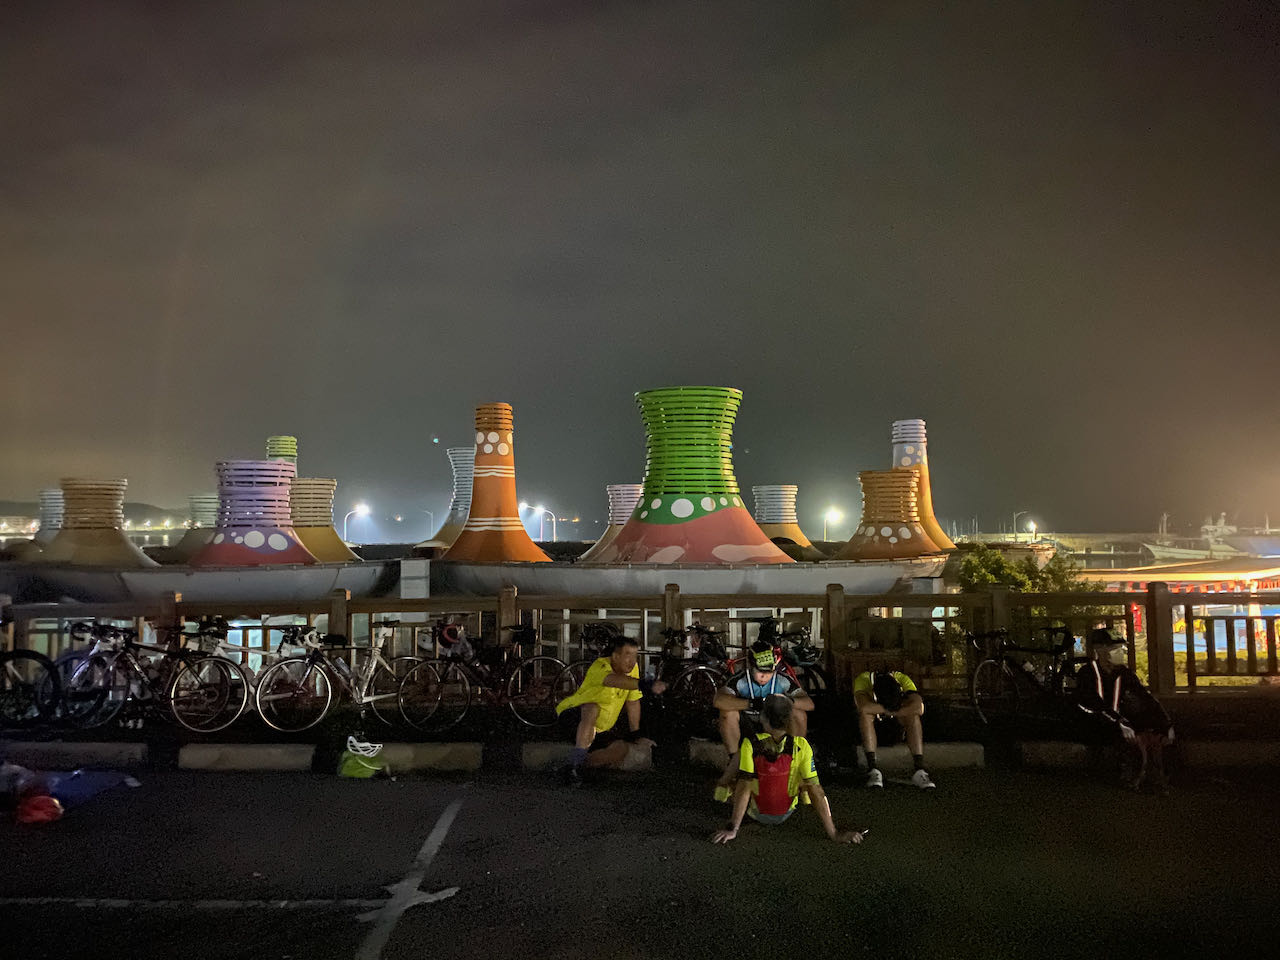
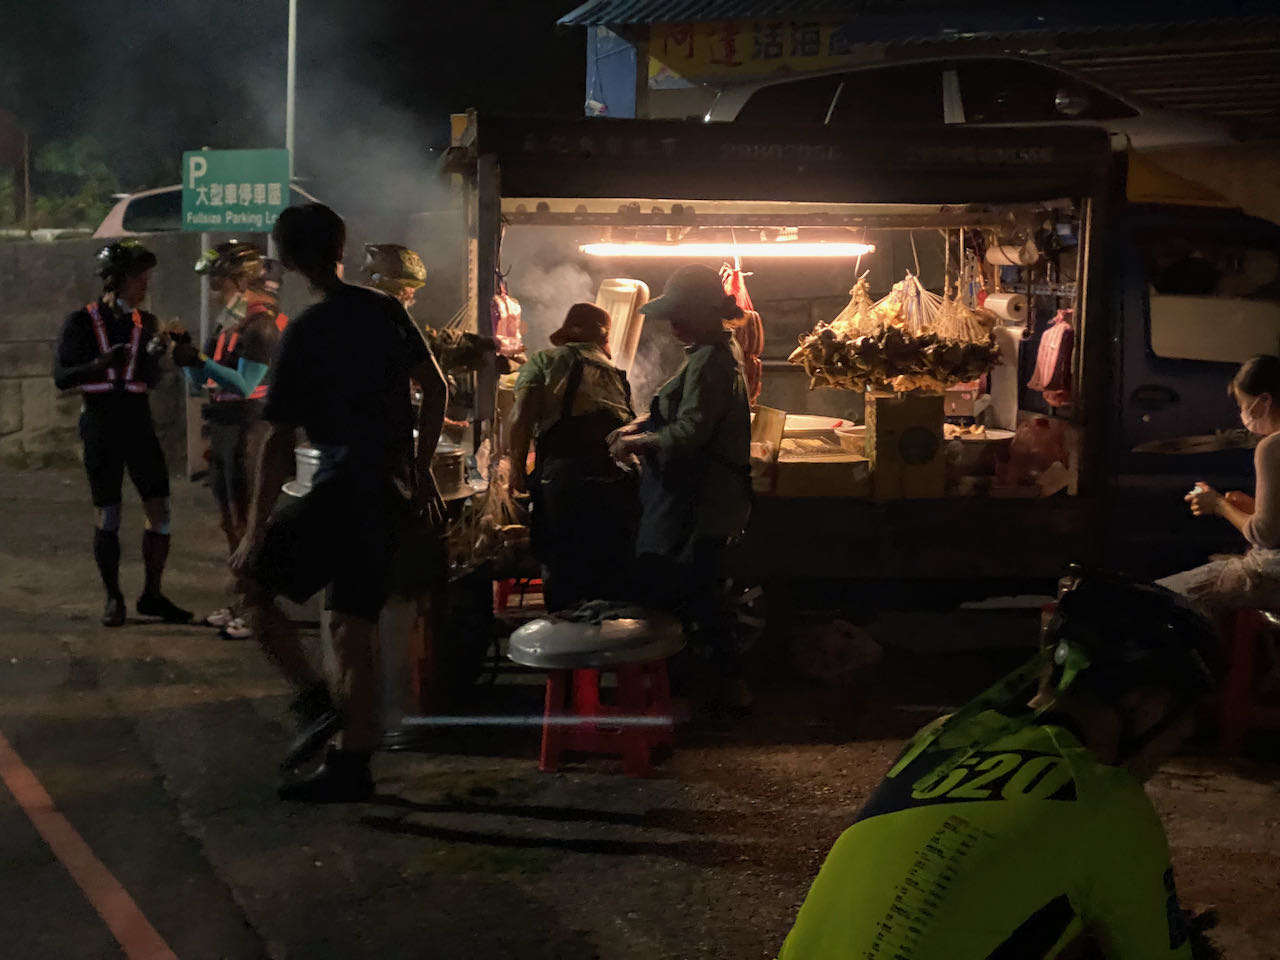
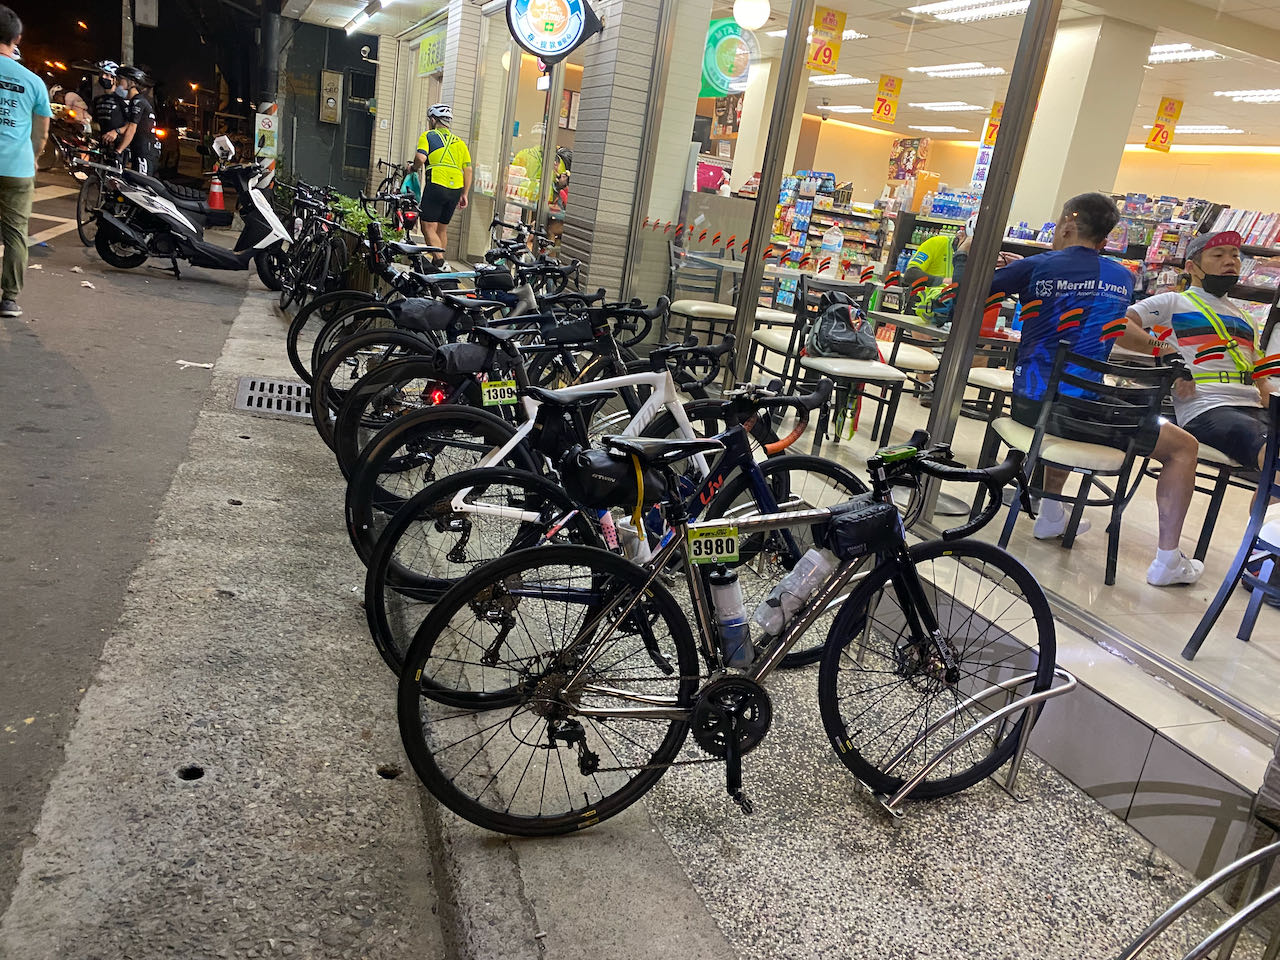
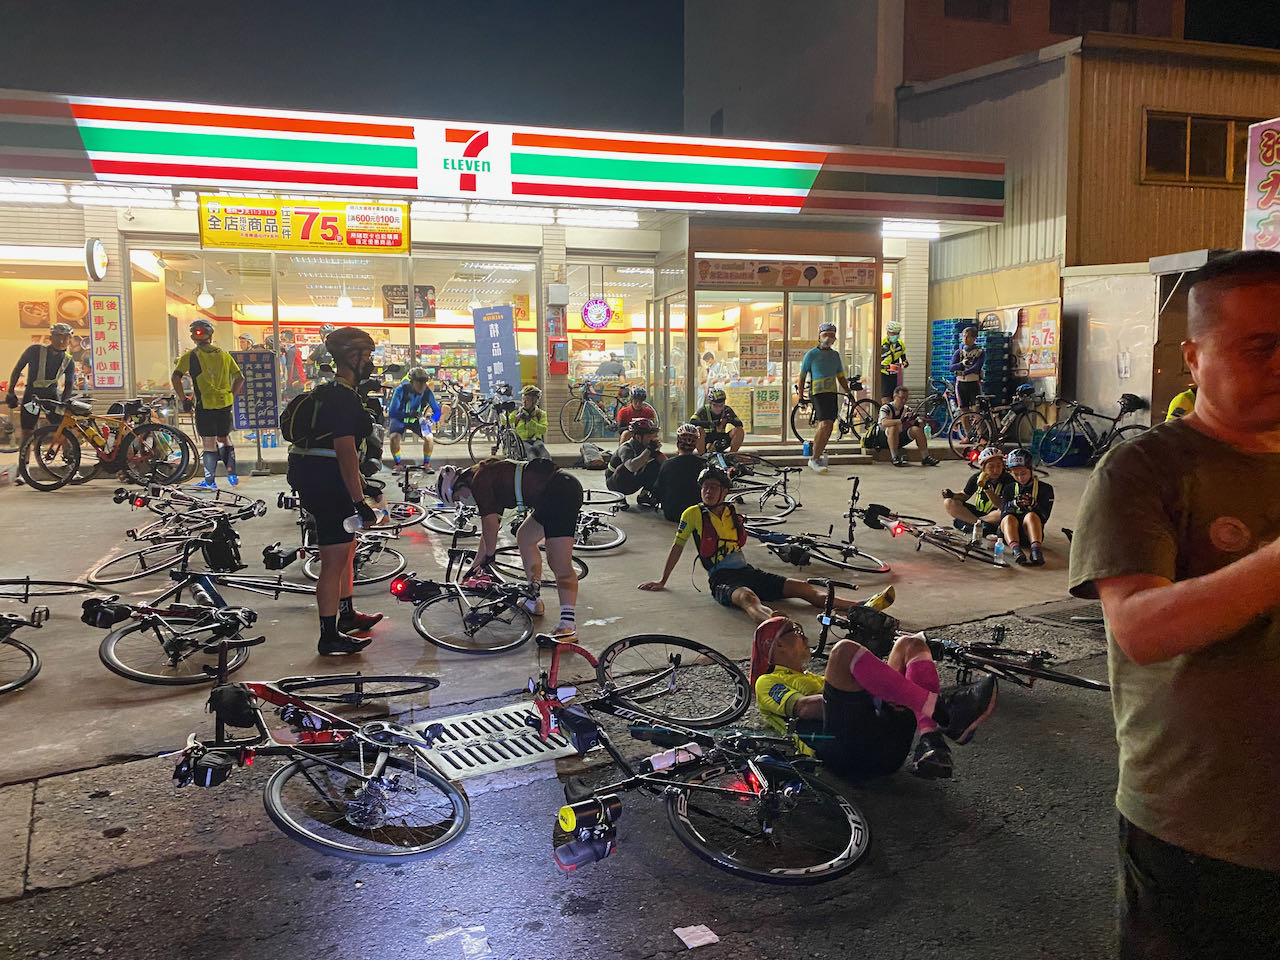
It only took less than 5 minutes to cycle to Fuguijiao. There was a food truck selling sausages and sticky rice dumplings, one more chance to load up more fuel. At 22:30, there were already lots of participants waiting, most of them sitting in the big car park with their bikes. The big public toilet in the seafood market was open to the participants. No more administrative work required. We only needed to sign in by cycling through the starting gate with our number stickers on our helmets. It took a minute to deposit my backpack.
There were more than 1500 participants queueing up behind the starting gate. Getting bored waiting, I chatted up a guy in his fifties who was also doing the challenge alone. Turned out it was his first time, too. Not even had he done the Taipei to Kaohsiung in One Day Challenge before. He finished work that day, asked his daughter to drive and send him to Fuguijiao, took a brief rest and had dinner, then here he was.
The event started at 0:00 sharp. I saw the peloton unzipping itself and feeding through the starting gate. When it was my turn, it was more than a minute later. It was rather packed and we occupied a whole lane of the road.
We were supposed to follow the traffic lights. But there was really no good reason to stop for the light at those small junctions at a time like this. So, everyone just proceeded after making sure it was safe to go. At some important junctions, there were traffic controllers to guide the participants.
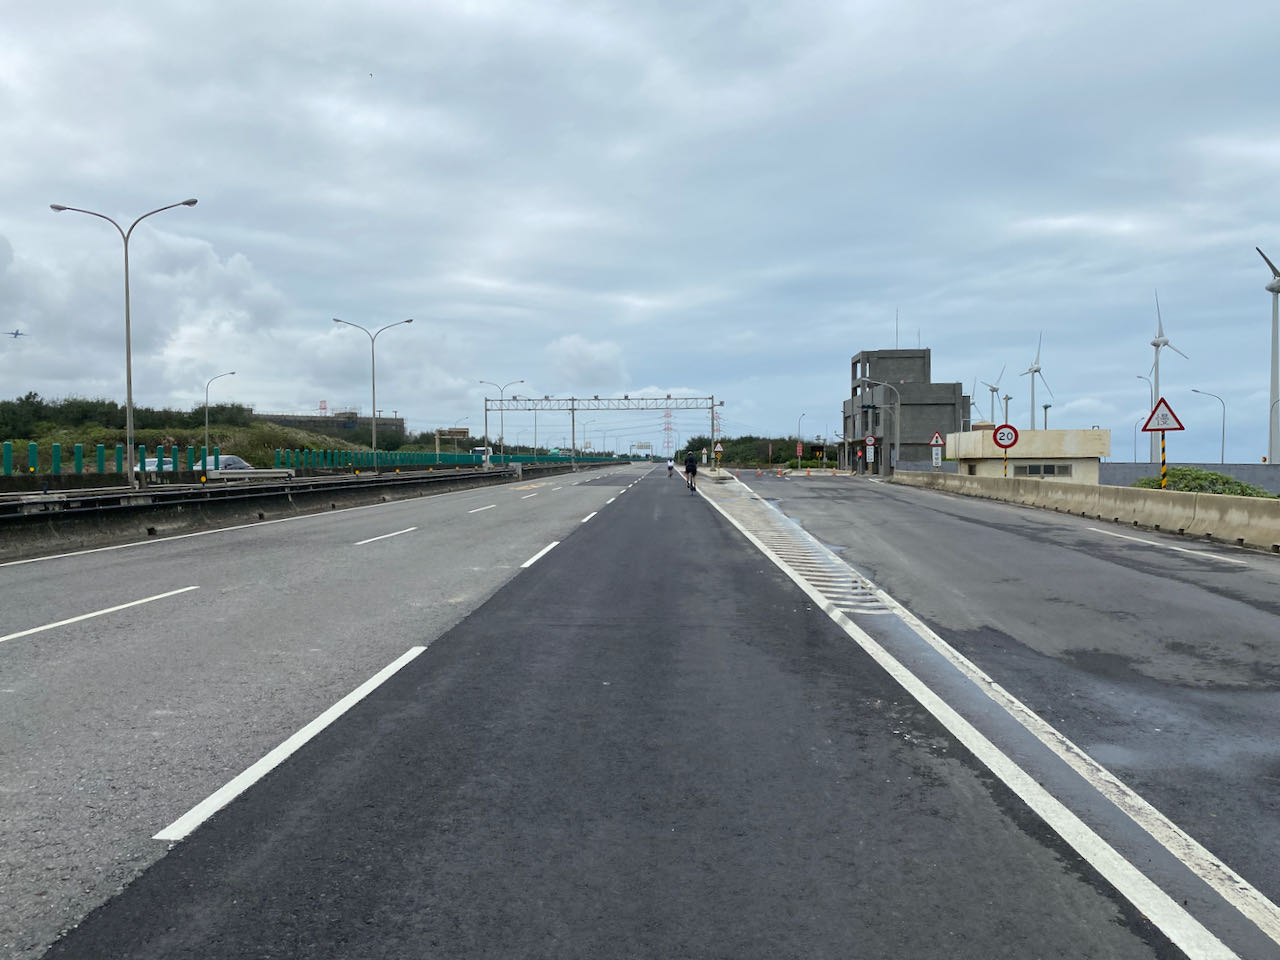
After passing Guandu bridge (27km), the peloton stretched much thinner and I was able to cycle at my own pace. I stopped to buy a bottle of water at the first convenience store after Guandu bridge. A couple passing by were surprised to see so many bikes in the small hours and asked me where we were going. I proudly said “Eluanbi Lighthouse” and then moved on, probably leaving them even more surprised/confused.
The wind was not particularly favourable to us but it was a nice ride on the west coast. In less than 3 hours, I had covered 85km and reached my first supply stop at Yongan Fishing Harbour. There were big boxes of energy gels stacked up in the convenience store. I ate two onigiris and one pack of energy gels, maybe a bit too much and too quickly. My stomach gave me a warning nudge with a reflex, almost creating a reflux. OK ok. Next time, I would be gentler.
After taking a break and refueled, I was feeling refreshed and energized. I found myself overtaking a fleet slowly. But I soon realized the leader was cycling at a very steady pace, so I decided to tag along for drafting. Their pace was just right for me! For courtesy, I did not follow them too closely, leaving more than one bike’s length in front of me. But it was such a wonderful 20km ride. At the first official checkpoint in Hsinchu (107km), they stopped and I carried on. Then I saw them in front of me again as they had overtaken me when I was looking for a toilet. How lucky I was! I tagged along with the group again.
I made it to my 3rd supply stop (148km) in Baishatun at 5:20 a.m., more than 1.5 hours earlier than planned. The group carried on and I stopped for a break. To be honest, I had almost worn myself out trying to keep up with them. I checked my iPhone and found that the battery was still 70% full. I had put it into Low Power Mode and only used it to play some music. The energy level of my first light also looked good. The sun would be rising soon. I was glad that I had decided not to bring two power banks with me.
I set a timer for 15 minutes and sat on the ground for a break with my eyes closed. Then, I was ready to go again.
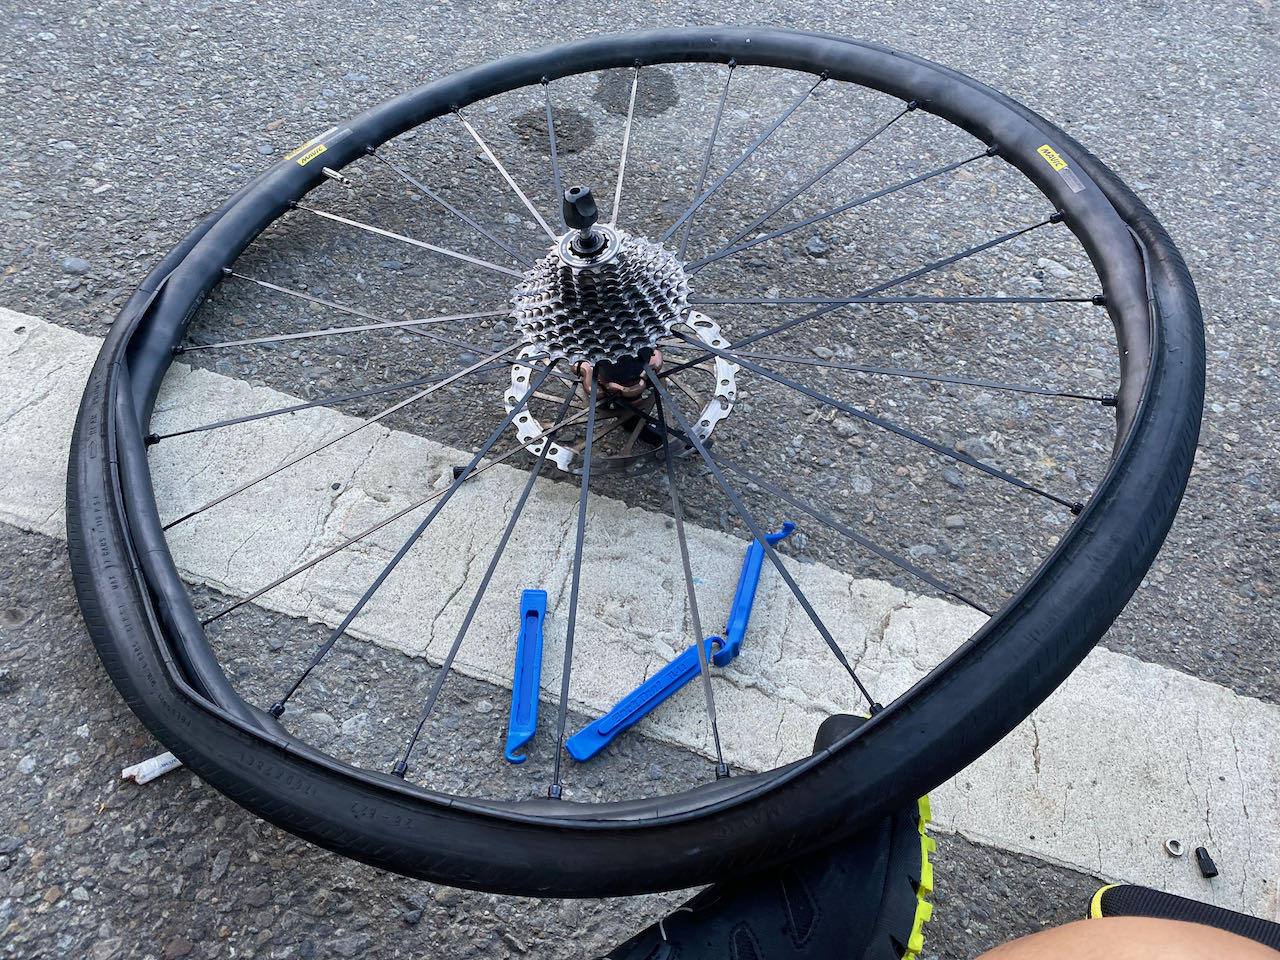
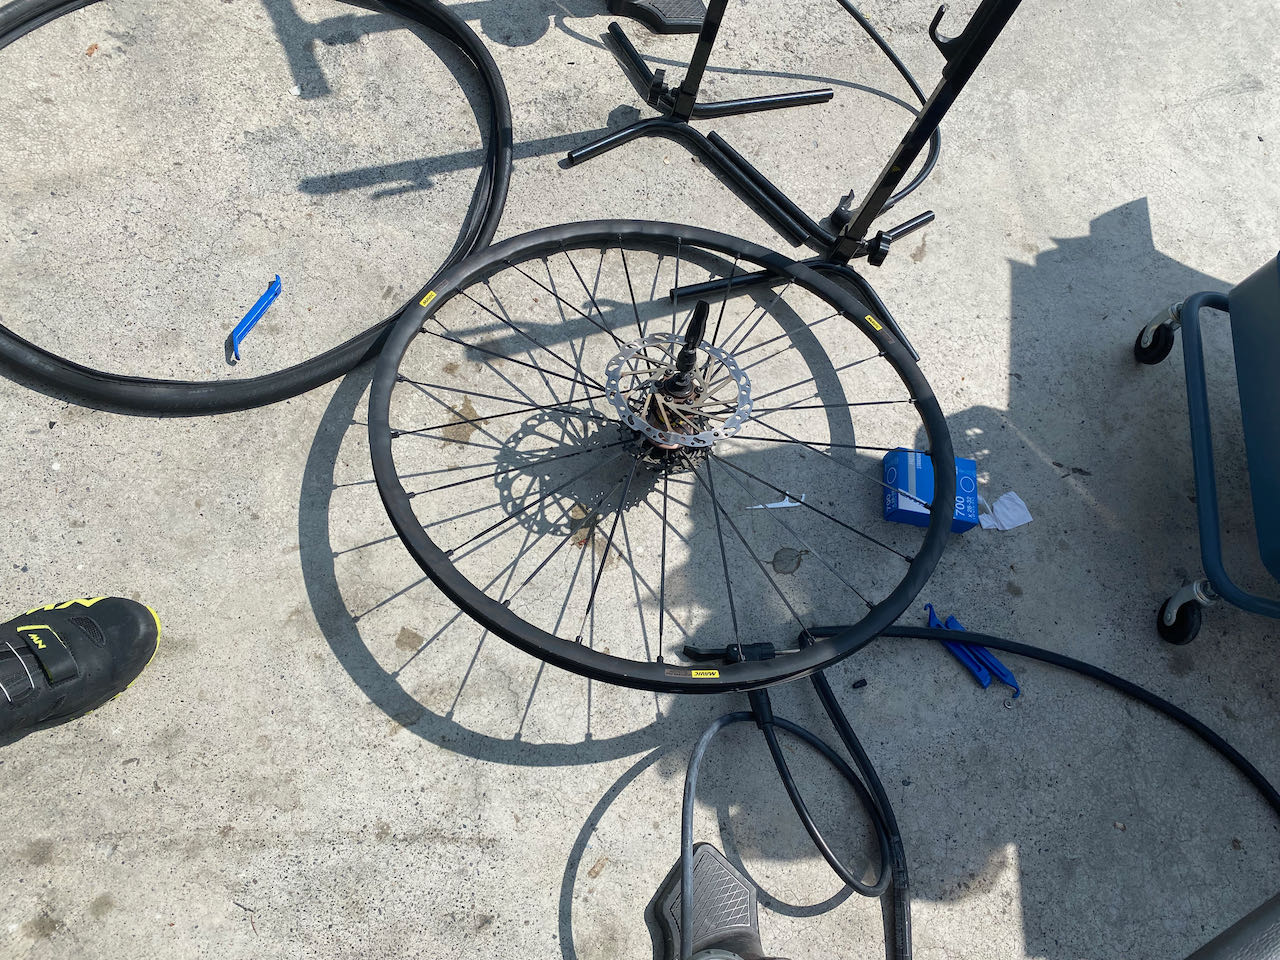
A punctured tyre, and more
At 6:15 a.m. I bumped into a pothole with very sharp edges. My rear wheel was flat. It must be a pinch cut. But no worries. I made good progress so far and I had a spare tire and a hand pump for occasions like this. Staying cool, I took a bite of some snacks and used 14 minutes to replace the tyre (I took pictures to keep time record). I did not want to spend too much time and effort on pumping. So, I started cycling after putting a decent amount of air into the tire. My average speed was well above the required 22 km/h for finishing the challenge in 24 hours and I wanted to keep it that way.
So, I borrowed a floor pump from a supporting car to make sure the tyre pressure was high enough. It was only 60 PSI. In order to make sure the pinch flat wouldn’t happen again, I pumped it up to 100 PSI, 20 higher than what I usually use.
As I entered the west fringe of Taichung city, there were lots of traffic lights with very long countdowns. My average speed was dropping to a low 23km/h. Then, the rear tire went flat again at 8:15 a.m. Shit! Did I do anything wrong when I fixed the tyre? I still had inner tube patches and I could fix a puncture. But if it was a pinch cut again, those wouldn’t work. Besides, it would add 15 minutes or more to patch the tyre. So I tried my luck by calling up a friend who was providing support to a participating team. He had told me he could help if needed as long as it did not interfere with his operation. He happened to be only 2km away from me and he would give me two more spare tyres.
We agreed to meet midway while he cycled towards me and I walked my bike towards him. Some truck driver saw me and offered to bring me to a nearby support station but I politely declined, believing I would be seeing my friend soon. But then we realized we were both heading in the wrong direction and away from each other! My rear tyre started to come off from the rim as it was rolling on the surface full of dirt. It got more and more difficult to push my bike forward. That’s when a man on a scooter with all kinds of bicycle supplies and tools saw me and stopped to ask about my problem. He was there to provide support to his friends. He gave me two inner tubes and ended up staying with me to fix the tyre. He refused to take any money from me.
It was a puncture that caused the flat. We found the sharp object and removed it from the tyre. It was pure bad luck, not that I had done it wrongly the previous time.
Try to catch up, but…
I had lost count of how much time it took us to fix this problem. I realised that my average speed had dropped to around 21km/h. I tried to make up for the time lost but my lower back got so stiff just like flying with economy class on a long haul flight. I needed to stop to take more breaks. It seldom happened to me when I was on this bike.
I also found that my favourite energy gels were sold out in convenience stores. Only chocolates, cakes and breads were available. I stopped at a busy one for supplies. There were so many bikes that I had to lay mine down on the roadside. Just when I was ready to pick it up and continue my ride, I heard gas leaking. No way! It’s my bike again! The rear went leaking again after 45km.
Well well well, no worries. The situation was far better than the previous time. I had two spare inner tubes (one from the man on scooter and one from my friend). Also there was a pop-up stall selling bike supplies and tools right beside the convenience store, from which I bought another inner tube because it was sold in a box. It gave me a bit more faith. The staff of that stall also let me use their floor pumps. Should it be necessary, I could even get new tyres from them. At this point, mine looked suspicious.
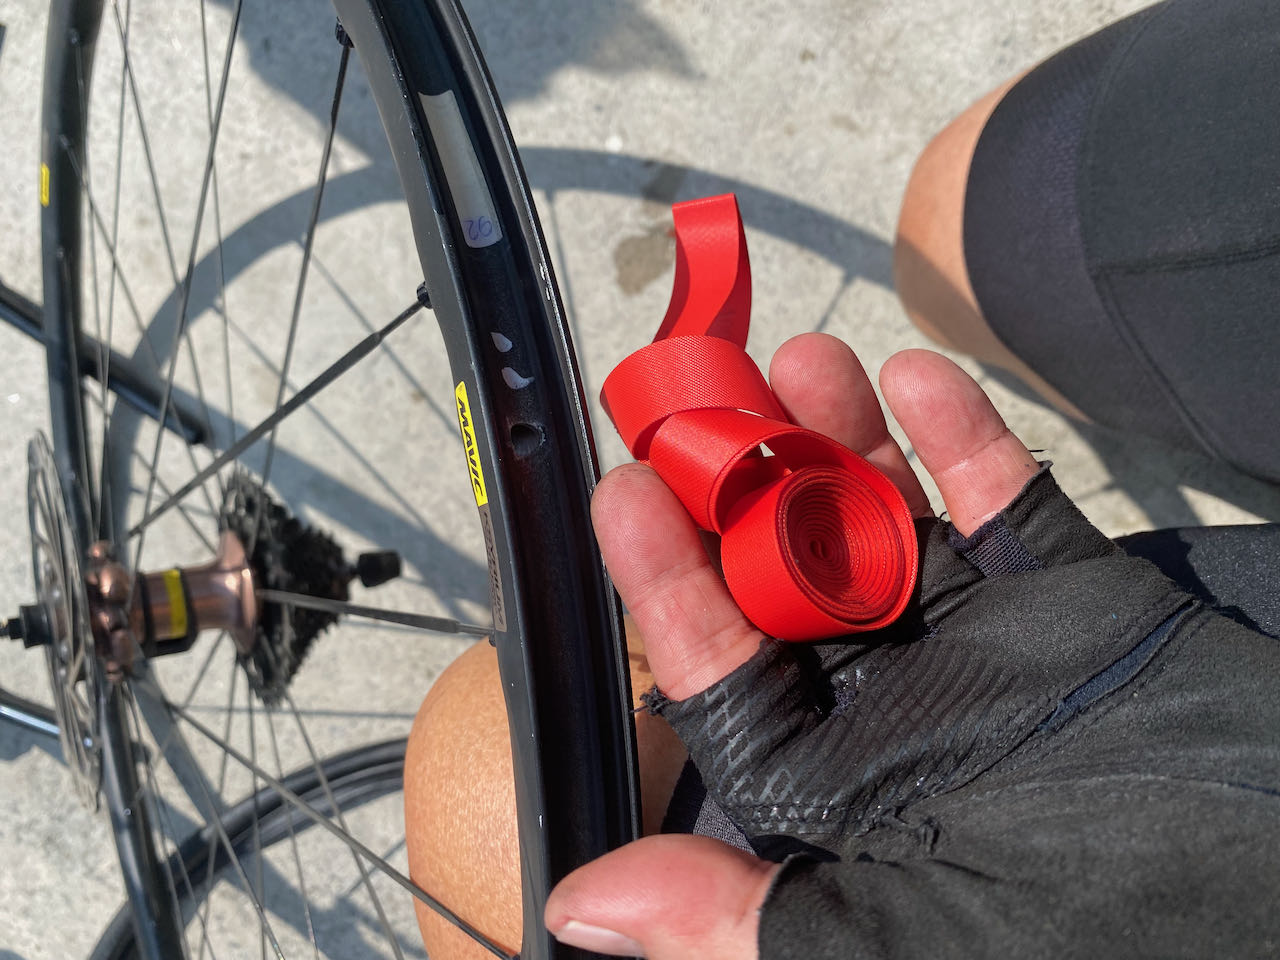
I removed the inner tube and inspected it. The wheel was warm under the sun. The inner tube had a small hole facing the rim. It was neither a puncture nor a pinch. I concluded that it’s not my tyre that had caused the leaking. I decided to keep using it, partly as a proof of my reasoning capability and my sanity under this woeful situation. I was not defeated yet.
From my past experience, when we have a hole like this, it means the rim tape is getting too old. But there was no rim stripe nor spoke hole on this wheel. I thought there must be something wrong with the rim surface and I had a rim stripe with me. So, I put it on the rim and installed the inner-tube-sold-in-box. I pumped it to slightly over 100psi. Worked just fine.
(When I told Chengnon about this afterwards, he said it was the tube that was defective.)
When I was ready to go again, I checked my Garmin and found my average speed dropped to 19km/h, well below my target speed of 21.25km/h in order to reach Eluanbi Lighthouse by 0:00. My legs were still working fine although they felt weaker. My feet had swelled up but they were okay after I released the buckle to the extent that my feet could slip out from the shoes easily. I was glad I had bought a pair of oversized shoes.
Then, I realized I could ride at a speed of 30km/h more easily. There were dry leaves rolling alongside me on the road. Yes! The wind had changed. Now it was in my favour. My average speed climbed slowly to 19.4km/h. But the stiffness on my lower back had evolved into unbearable pain. I found myself putting more weight on my hands and my shoulders were tense. I had to stop more frequently to stretch. Ah… the tyre pressure was probably too high as it’s 25% higher than usual. It might have absorbed less shaking and rattling, which had been putting pressure on my spine since the first puncture. But I was hesitant to release some air because I did not have a gauge and I did not want any more flat tire.
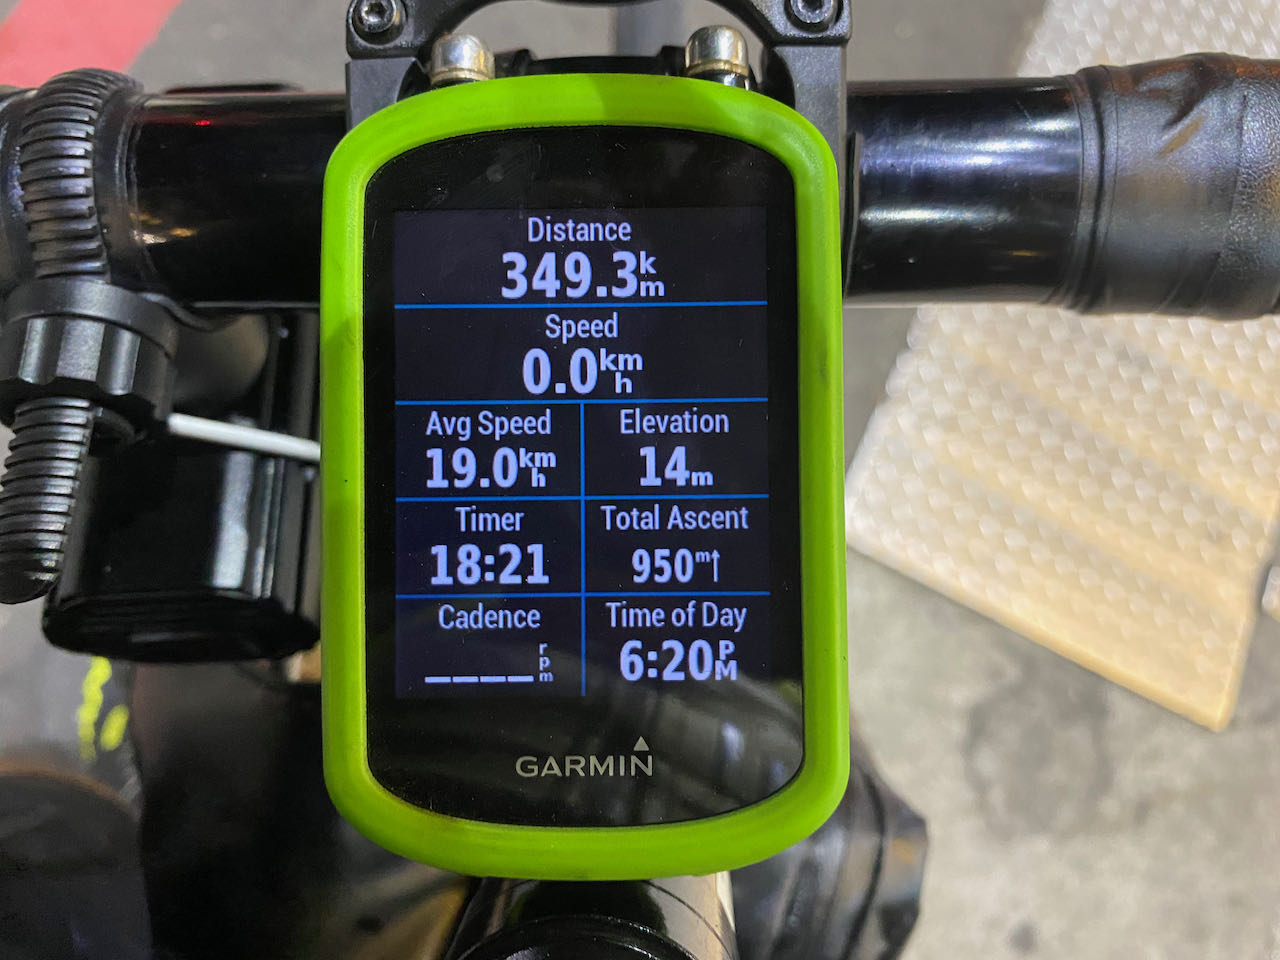
I had covered 300km. It was clear that I wouldn’t be able to finish within 24 hours. A part of me missed my comfortable bed back home while the other part was trying to convince myself to keep going. The game was still on. I was making progress despite all those setbacks. It would soon be 400km and I would be counting down from the last 100km to reach the finish line. I took some painkillers for my lower back pain, though not quite helpful. I decided to treat myself to a longer break with some real food when I reached Tainan city.
Time to decide
The route was flat, the road surface was nice and the wind was in my direction. I managed to overtake some other participants. My cadence sensor went offline and the music from my earphones stopped. When I reached Tainan city centre, it was totally dark and the effect of lack of sleep kicked in. Or perhaps the effect of the painkillers too. My mind started to go blank from time to time. I bought instant noodles and coffee at the first 7-Eleven I saw. And then I found my iPhone was off. The battery had drained much sooner than I expected. This was the last draw. Technically I did not need my iPhone to keep cycling. I had my Garmin for navigation. My first light was still showing no sign of low battery and the second light was untouched. There was still some juice in the powerbank. But my will power was hit hard by yet another unexpected situation.
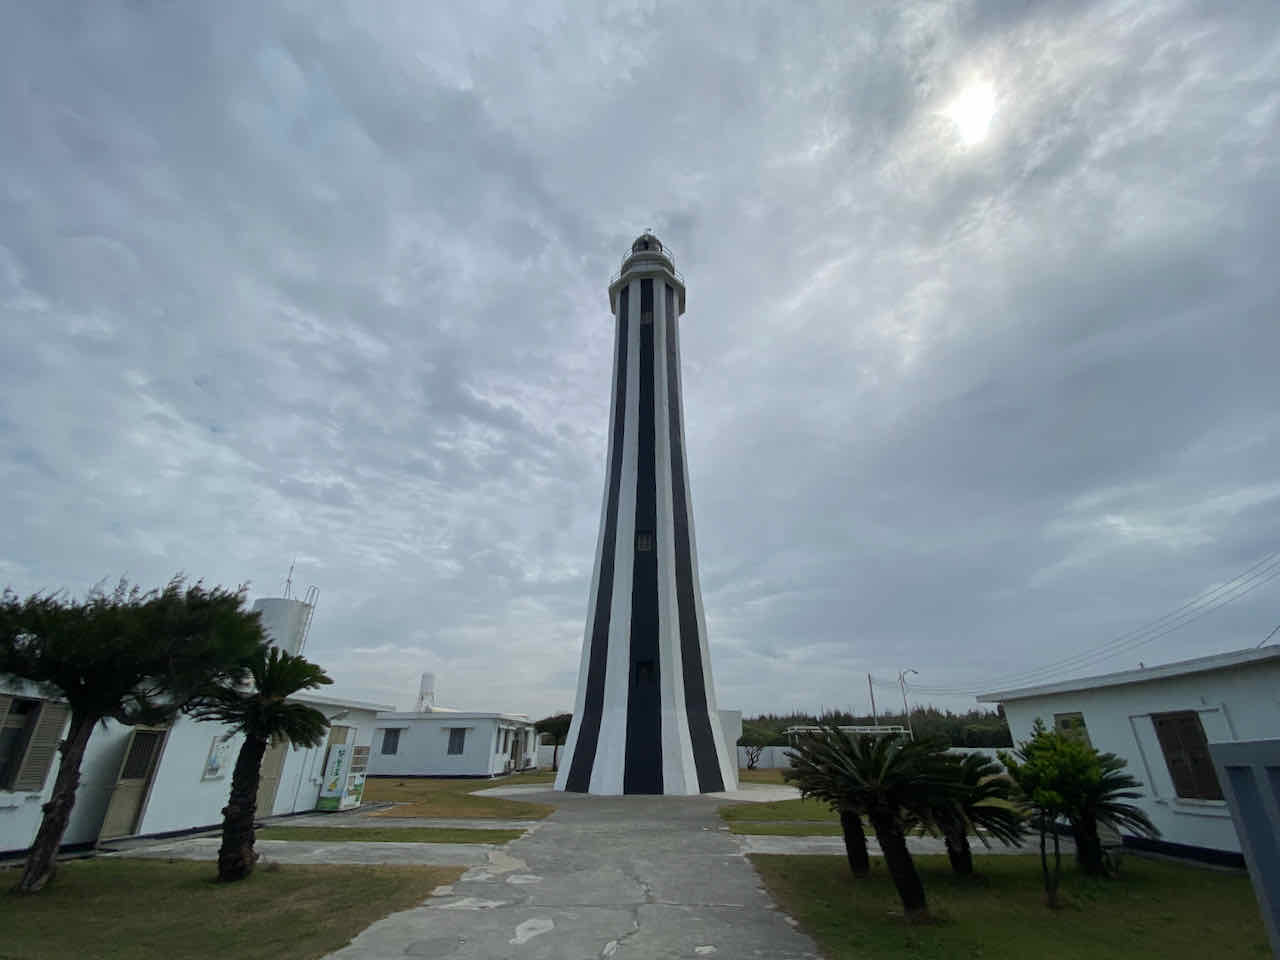
I could still push myself forward. If I arrived at Eluanbi Lighthouse by 6:00 a.m. the next day, there would be a nice hotel room waiting for me.
But then the pain on my lower back was getting excruciating. I would have to stop more frequently and rest longer. The time I stayed on the bike would get shorter. It would be harder and harder to estimate my arrival time. In case I arrived late, I was not quite sure where to collect the hotel room key. My backpack and bike bag would be shipped back to my home the next day. Without a bike bag, I would not be able to board the bus with my bike… More importantly, beyond Kaohsiung, there would be no escape route and I would have to keep going until I reached Eluanbi Lighthouse or turned around. I was feeling a little bit dizzy and sleepy already. The risk of falling off the bike was not nonexistent. If only I had subscribed to my friend’s supporting team! I could have supporting vehicles waiting for me and bringing me to the hotel in case I exhausted myself before reaching the finishing line.
The Tainan Train station was 15km from me. It was still open. I could cycle there, drop my bike at the luggage room for shipping back to Taipei, then board the next train to Tainan HSR station for a 2 hour ride home. The next exit option would be Kaohsiung. But I wasn’t sure if I could make it there before 8:00 pm when the luggage room closed for the day. So, I decided to retire from the challenge in Tainan City. By 10:00 pm, I was home for a good shower and hugs with my wife and kids.
As to the guy I chatted up at the starting line, I happened to have his sticker number in one of my photos. The record showed that he finished in 22 hours 26 minutes. Bravo!
Self Evaluation:
The main reason why I could not continue with the challenge is my lower back pain. Here are some factors I think may have contributed to the problem.
Wrong mattress. My lower back, shoulders and neck would get stiff after sleeping on a soft mattress. This is what I found in that small hotel I had stayed. It may not be a major issue in other circumstances, but for a day with more than 20 hours’ ride on a bike, the issue is bound to be magnified.
Tyre pressure. I had increased my tyre pressure quite significantly since the first pinch flat. A tyre with high pressure will transfer more rattle and shaking from the road surface to my body, my spine particularly in the case of a rear tire. In fact, right before big events, one should not experiment with new settings, including positions of the cleats or saddle.
Lack of long distance training. I finished the Taipei to Kaohsiung Challenge in 2020 without any issues like this time. But I was using an Audax Hercules back then, which was made for long distance cycling. This year I was doing it on a bike with more aggressive geometry. I should have done at least one long distance training and observed the reaction of my body. All those pains and discomfort can be avoided with proper posture. You can refer to this post from Sheldonbrown.com for more details.
Ineffective painkillers. And I suspected that they had also contributed to my dizziness when I was reaching Tainan..
Unfamiliar route. I had not prepared for the last 100km from Kaohsiung to Kenting. I thought it was just another 100km along the route. But it turned out that this had undermined my confidence and willpower quite significantly especially during stress events.
Lack of food varieties. I was planning to sustain myself by drinking energy gels because it’s easy to swallow and digest, so that I could spend less time on eating and more time on cycling. But this proved to be harder and less fun than I thought. I regarded the breaks more like an obligation than a chance to relax, both for my mind and muscles. This had backfired. It’s a long challenge. We should reward our mind and body from time to time. The taste of real food would definitely boost morale, even if it’s just a bowl of instant noodle.
Lack of support. Being an introvert, I did enjoy cycling alone. But for an event like this, the importance of mutual support from teammates and the aids from supporting cars could not be overlooked. I believe my unfortunate experience in the Execution Section has made this clear.
So, that’s it. I hope you are going to enjoy the “One Day Two Towers” Challenge and finish it in time.